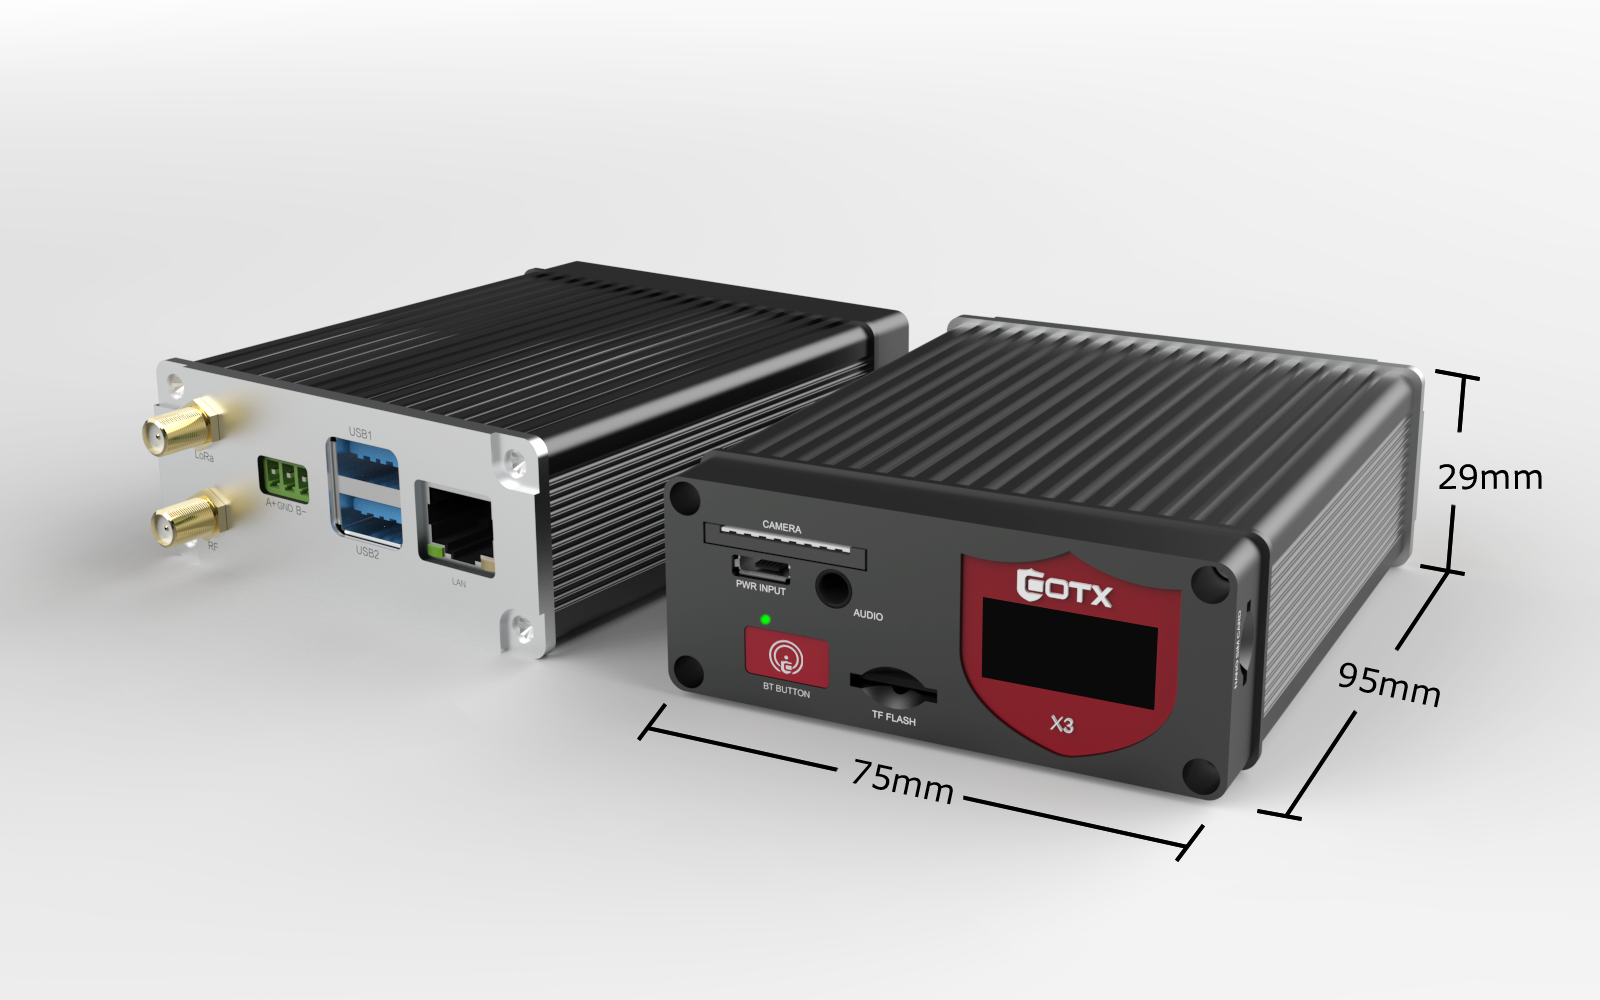
COTX X3 gateway has similar characteristics to previously described X1 gateway, only with additional features like:
- Outdoor support
- BLE support
- Small screen for easy monitoring, etc.
Gateway Setup
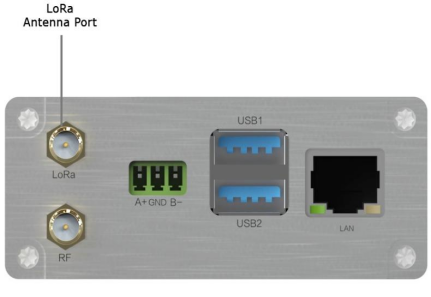
Install the LoRa antenna on the LoRa Antenna Port.
Place the gateway in a proper location (e.g. near a window) to have the optimum coverage and signal reception.
For Ethernet access to WAN/Internet scenario, please connect the LAN port on the gateway to an existing router with an Ethernet cable.

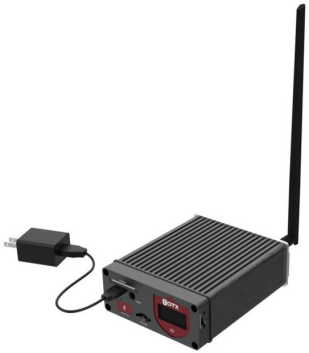
Plug the power adapter to a 110~220V AC power source (socket) and connect the micro USB connector to the PWR INPUT port on the gateway.
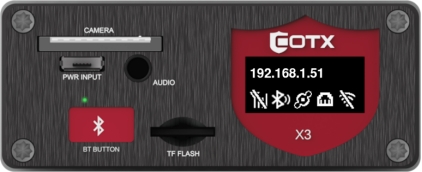
After powering up the gateway, the LED indication should light up and turn green when the gateway is ready for further configuration. Click the BT button and the Ethernet interface’s IP address and device status will show up on the screen. The gateway should now be able to connect to The Things Stack.
Connecting COTX X3 to The Things Stack
Register the COTX gateway by following instructions for Adding Gateways.
For Gateway ID and Gateway EUI, enter the 8 byte ID available on the label at the bottom of the gateway.