akenza is an IoT platform designed to help you develop your own smart solutions. It connects your sensors, manages the connectivity layer, processes your data and makes it accessible to your cloud application.
This guide will help you set up an integration between The Things Stack and akenza.
Prerequisites
- A user account on akenza, with an organizationa and a workspace set up.
akenza integration setup
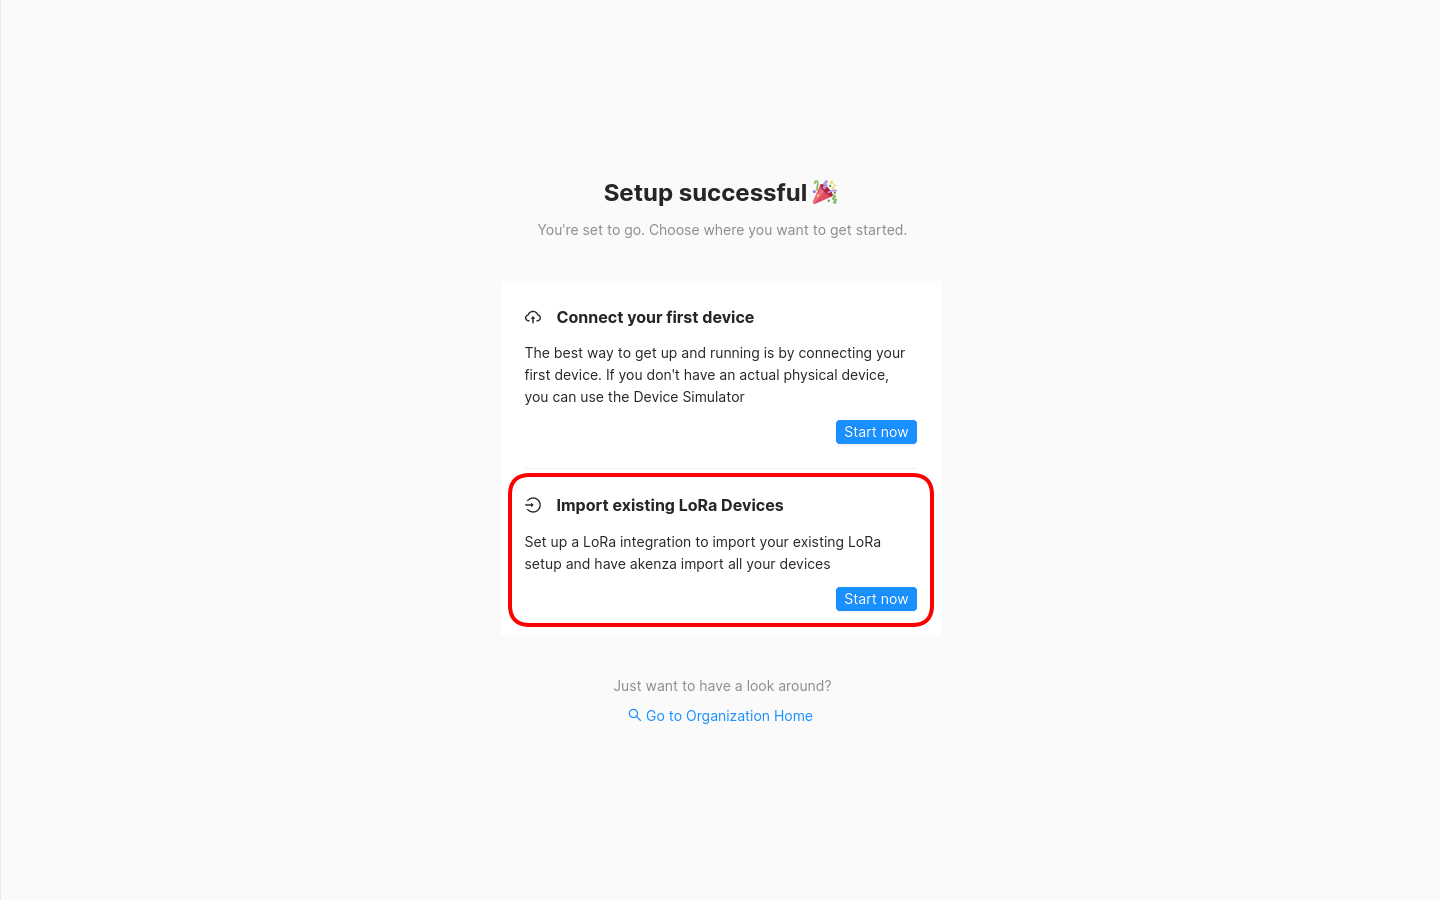
If you are a new akenza user, and you just set up your organization and your workspace, you will be presented with two options to continue, as shown on the image below. Choose the Import existing LoRa Devices option.
If you had an akenza organization and workspace set up before, then navigate to the Integrations tab on the left hand menu in your akenza workspace.
Next step is to create the integration, so hit the + Create Integration button.
In the Connectivity provider menu, choose The Things Stack.
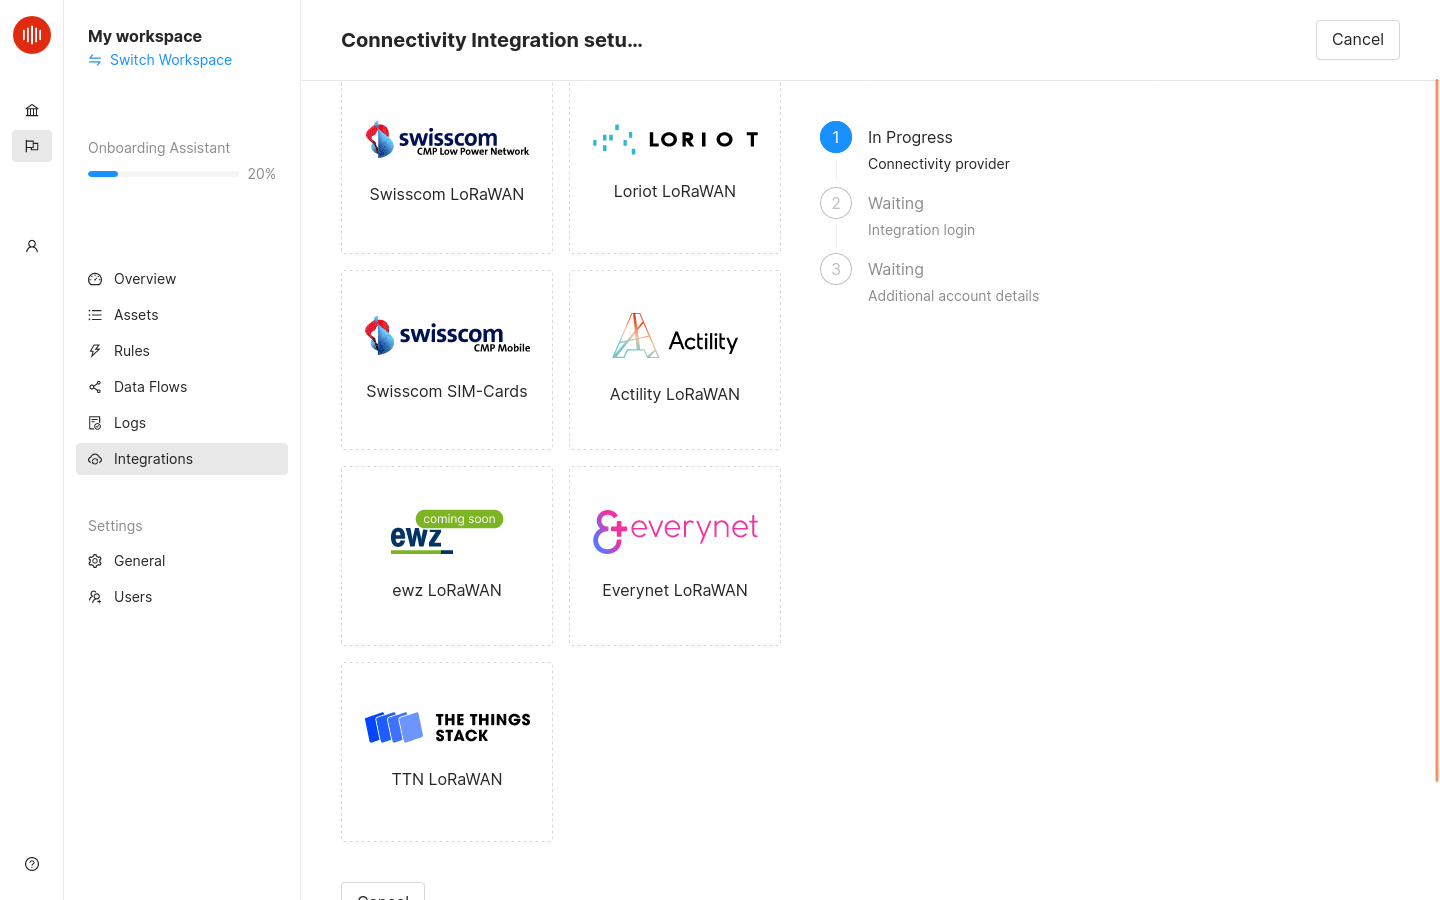
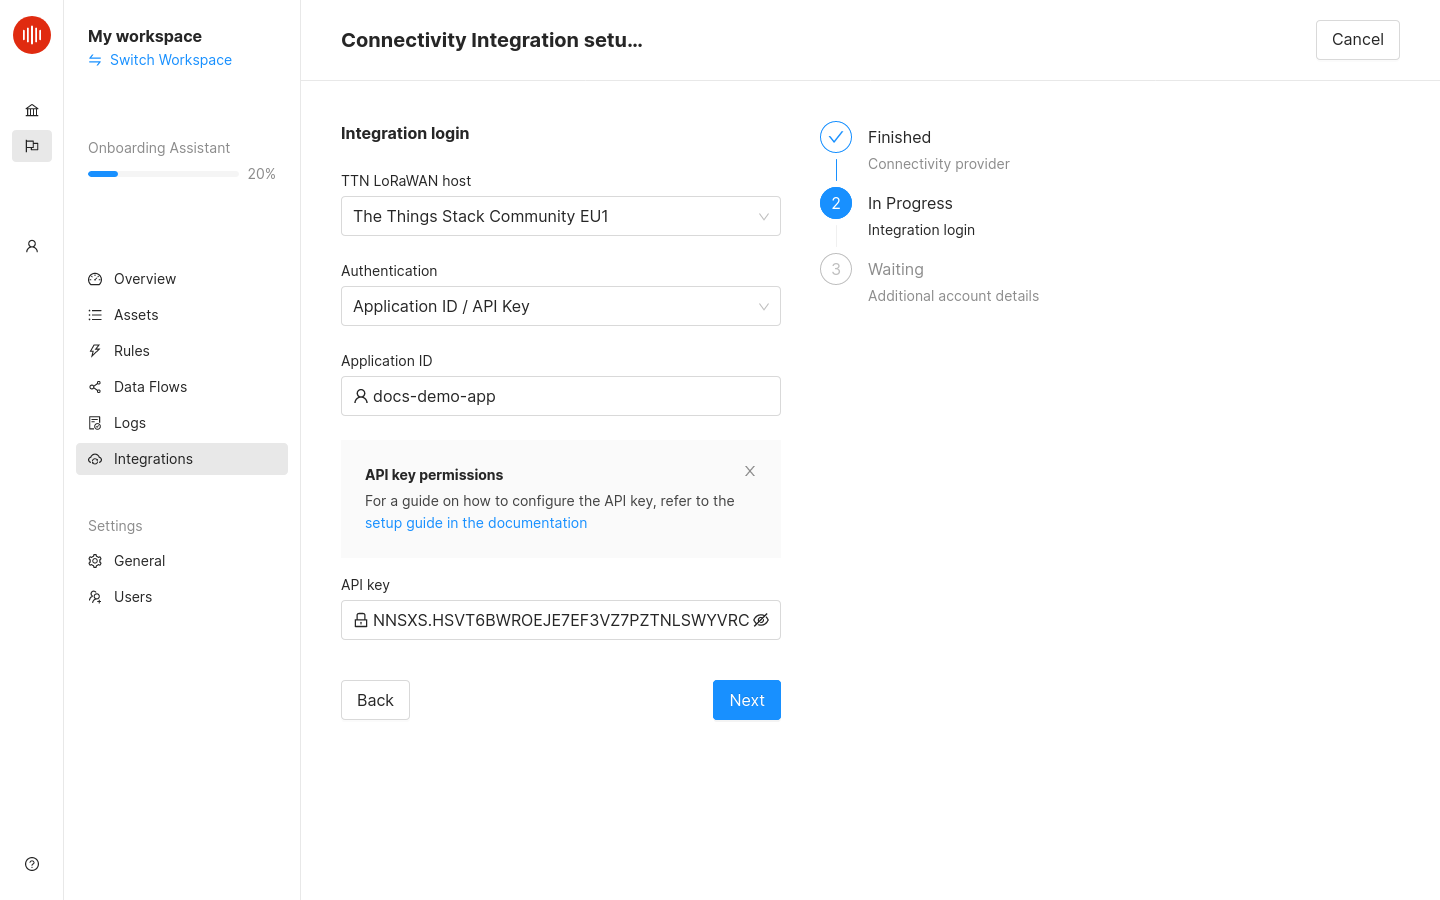
To configure The Things Stack integration, you first have to choose the host, i.e. The Things Stack cluster, depending on your region.
Then, choose the desired Authentication method. If you choose the Application ID / API Key authentication for example, you will need to provide your The Things Stack application ID in the Application ID field. You will also need to provide an API key from The Things Stack that you have previously created in your The Things Stack application.
Finally, just fill in the Integration name, click Next and finish with Done button. In this example, the integration name is tts-integration-demo.
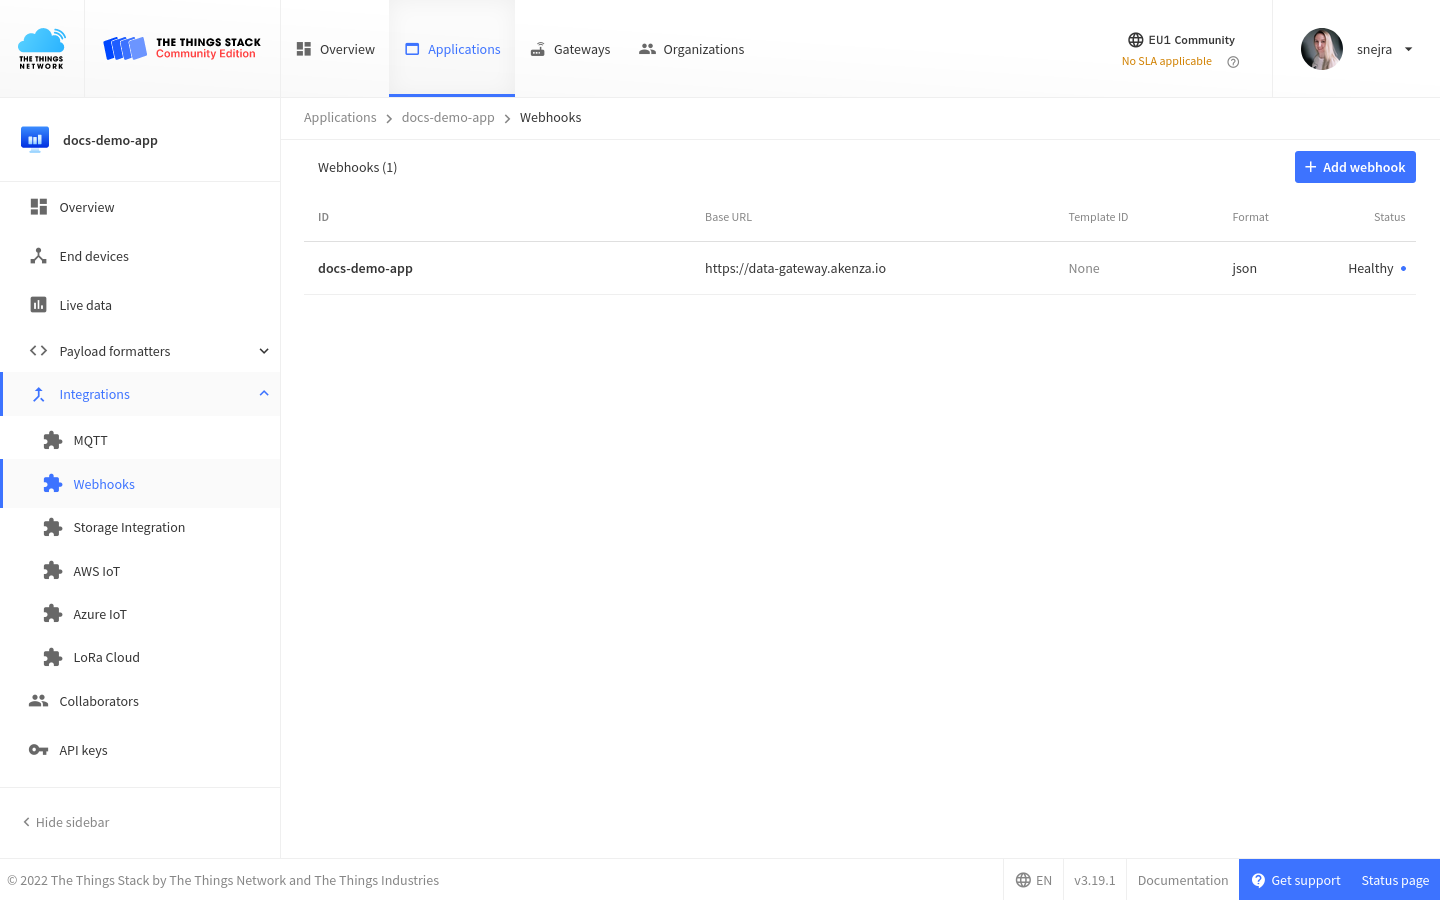
After this process is completed, the initial synchronization will start, and after a few minutes (depending on how many devices your The Things Stack application contains), the devices will automatically become available on akenza. If you look under Integrations → Webhooks in your The Things Stack application, you will see that an akenza Webhook was automatically created.
If you navigate to the Assets tab on the left hand menu in akenza, you will a list of devices, which are now available in akenza. However, a few more steps are needed for the integration to function properly.
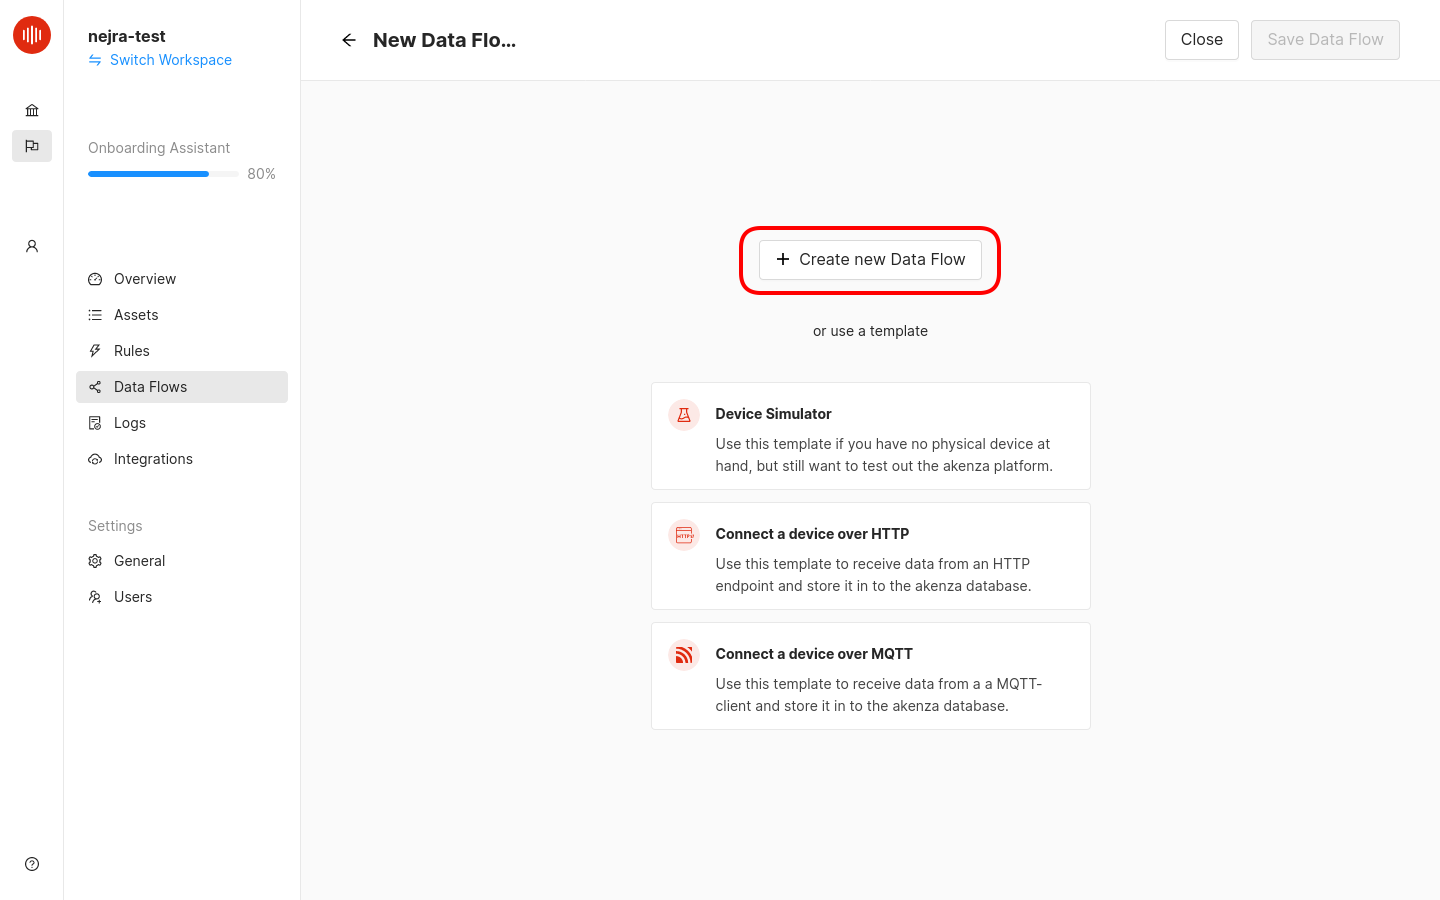
Navigate to the Data Flows tab on the left hand menu and click the + Create Data Flow button. You will be presented with a few data flow templates, but make sure you click the + Create new Data Flow button, as shown on the image below.
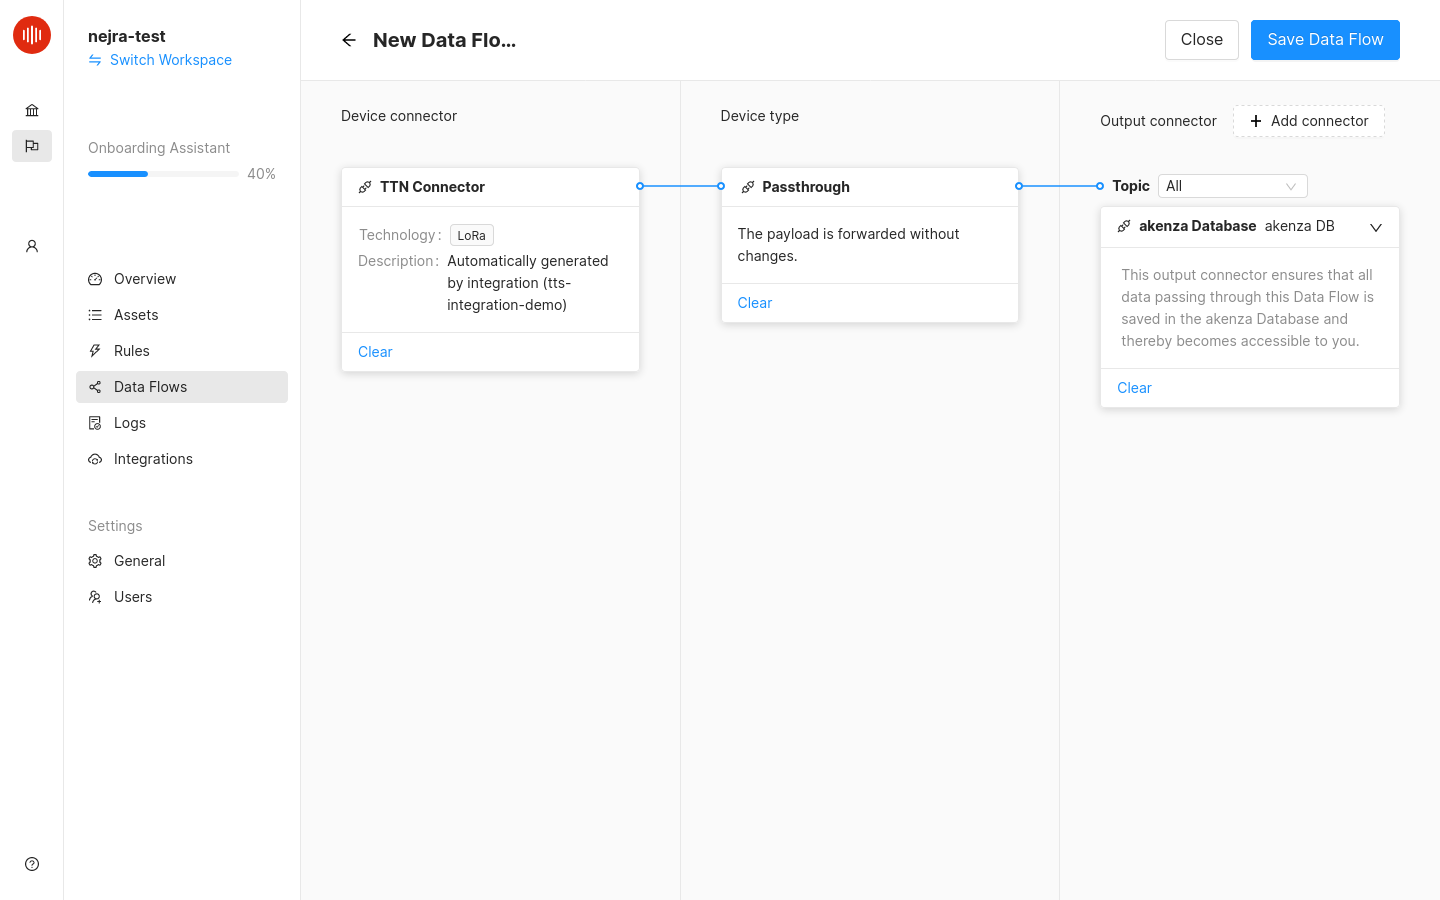
In the Device connector section, choose LoRa → The Things Stack → TTN Connector and then choose the connector named after the akenza integration you created above. In this example, the connector is named TTN Connector - tts-integration-demo.
Finally, choose an Output connector. In this example, we use the akenza DB data sink.
Finish with the Save Data Flow button. Now you will need to associate this data flow with your device.
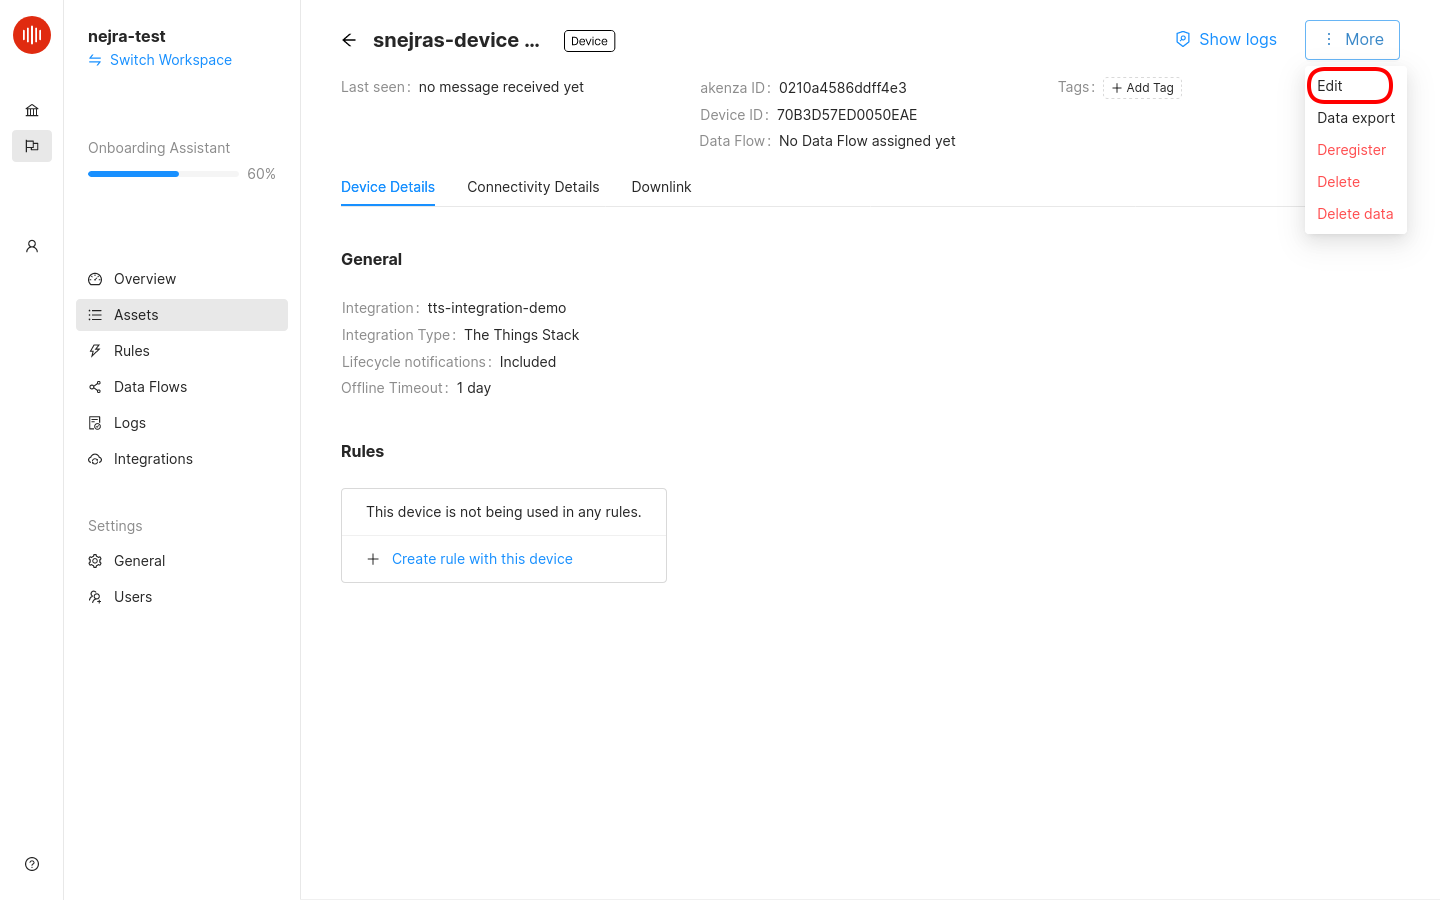
Navigate to the Assets tab on the left hand menu and select your device. To edit your device, click on More → Edit in the top right corner.
In your device’s settings, scroll down to the Data Processing section, click on Data Flow and make sure you choose the data flow you created in previous step.
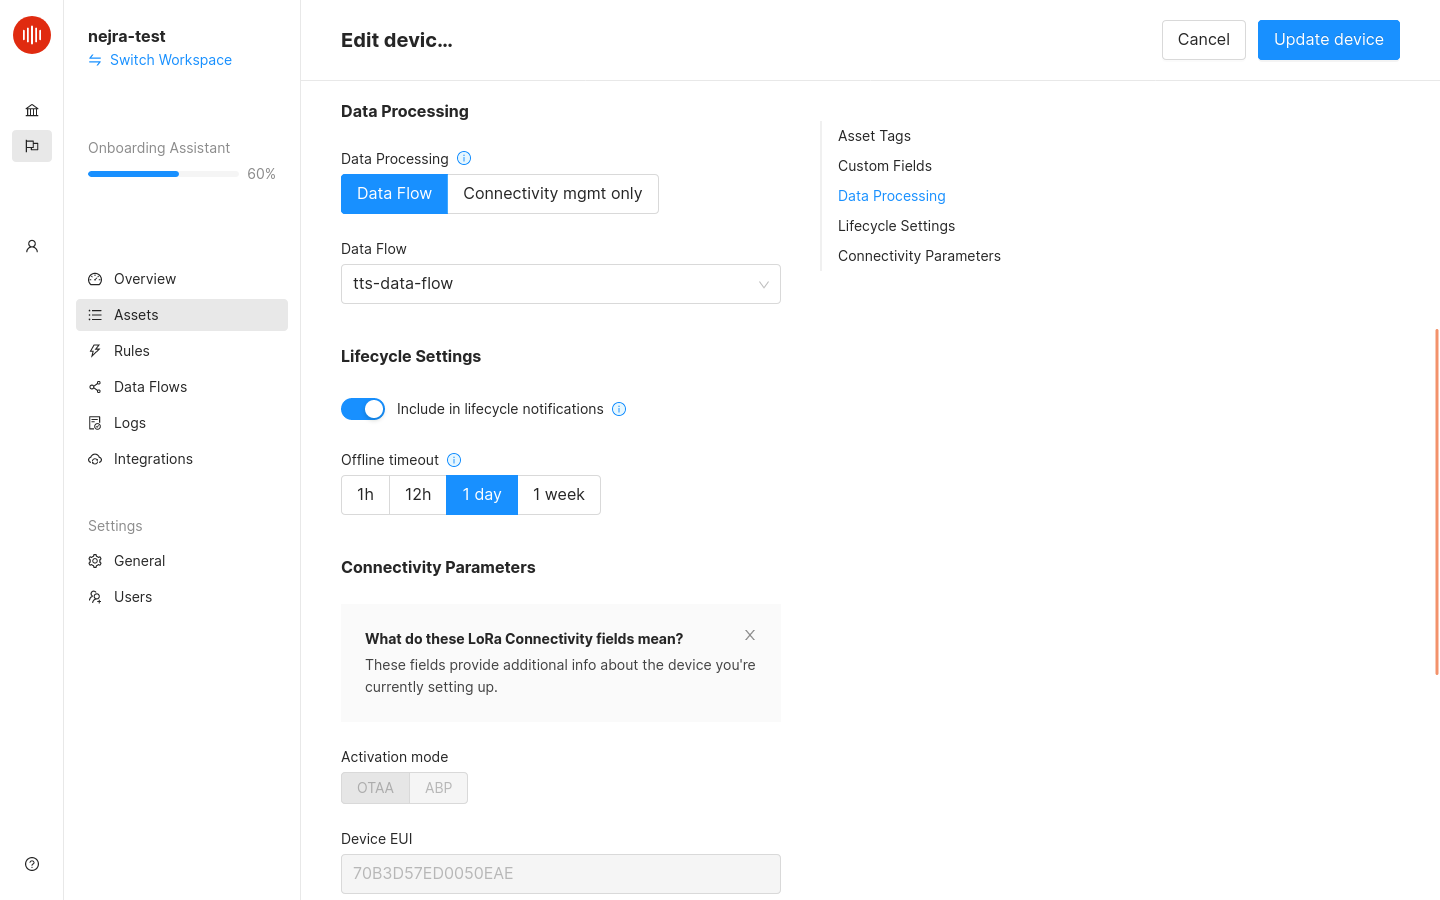
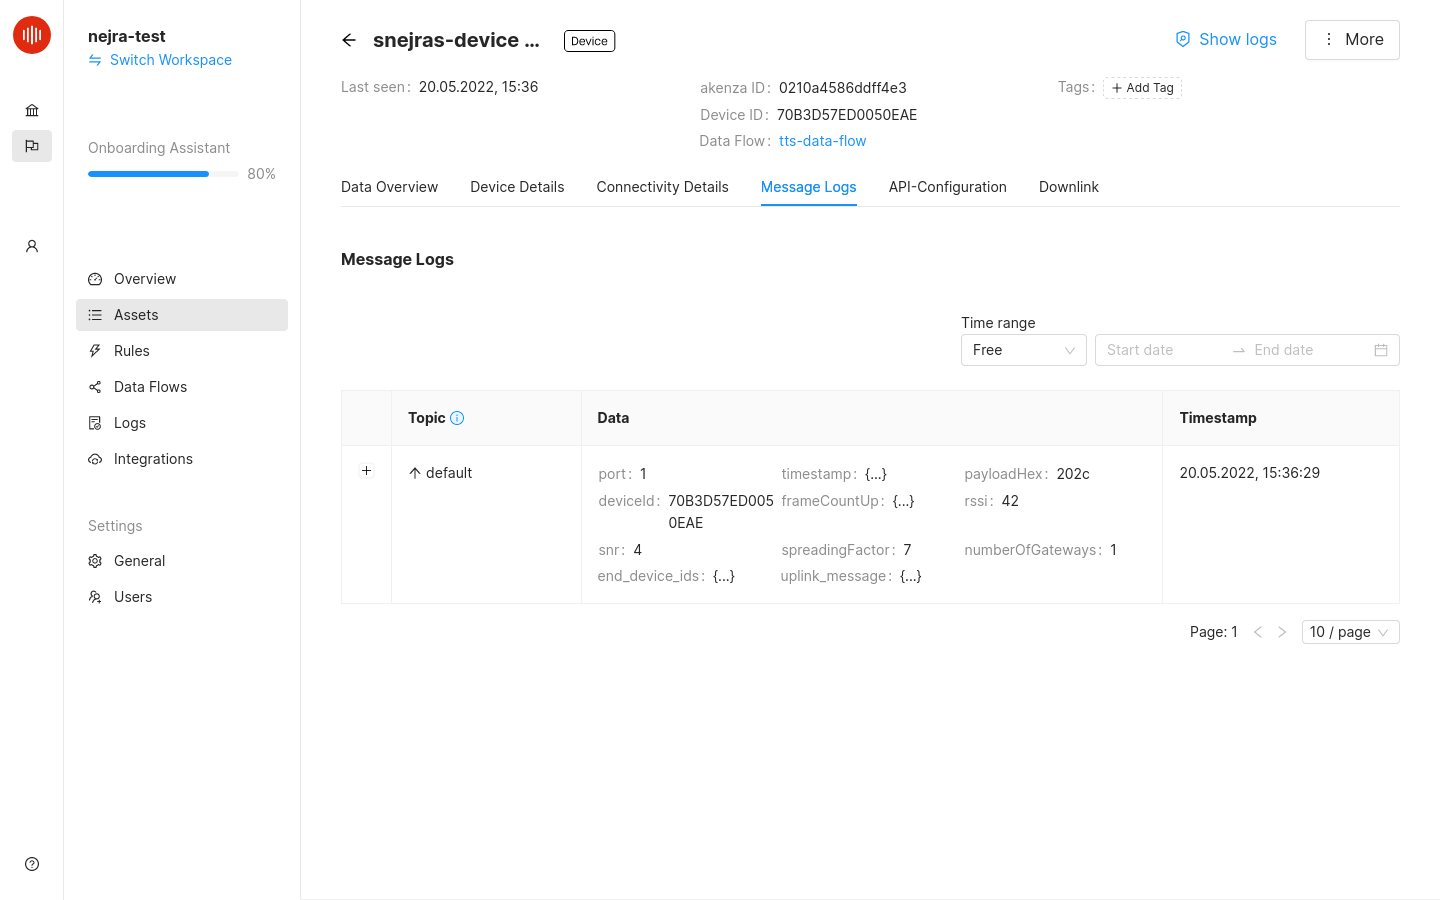
Finish by clicking Update device in the top right corner. Immediately after updating, you will see that new options are available in your device’s overview page such as Data Overview and Message Logs. Your akenza device is now fully capable of receiving uplinks and sending downlinks to the end device connected to The Things Stack.
Visit the official Akenza documentation page for more information on managing integrations, data flows, devices and rules on akenza.