thethings.iO is hardware and connectivity agnostic enterprise IoT plaform that enables deploying scalable and flexible IoT solutions. This simple platform offers to quickly connect your IoT products using multiple protocols, APIs to manage them and dashboards to visualize the incoming data.
Prerequisites
Setup thethings.iO
Log in to your thethings.iO user account.
On the left hand menu, navigate to Things.
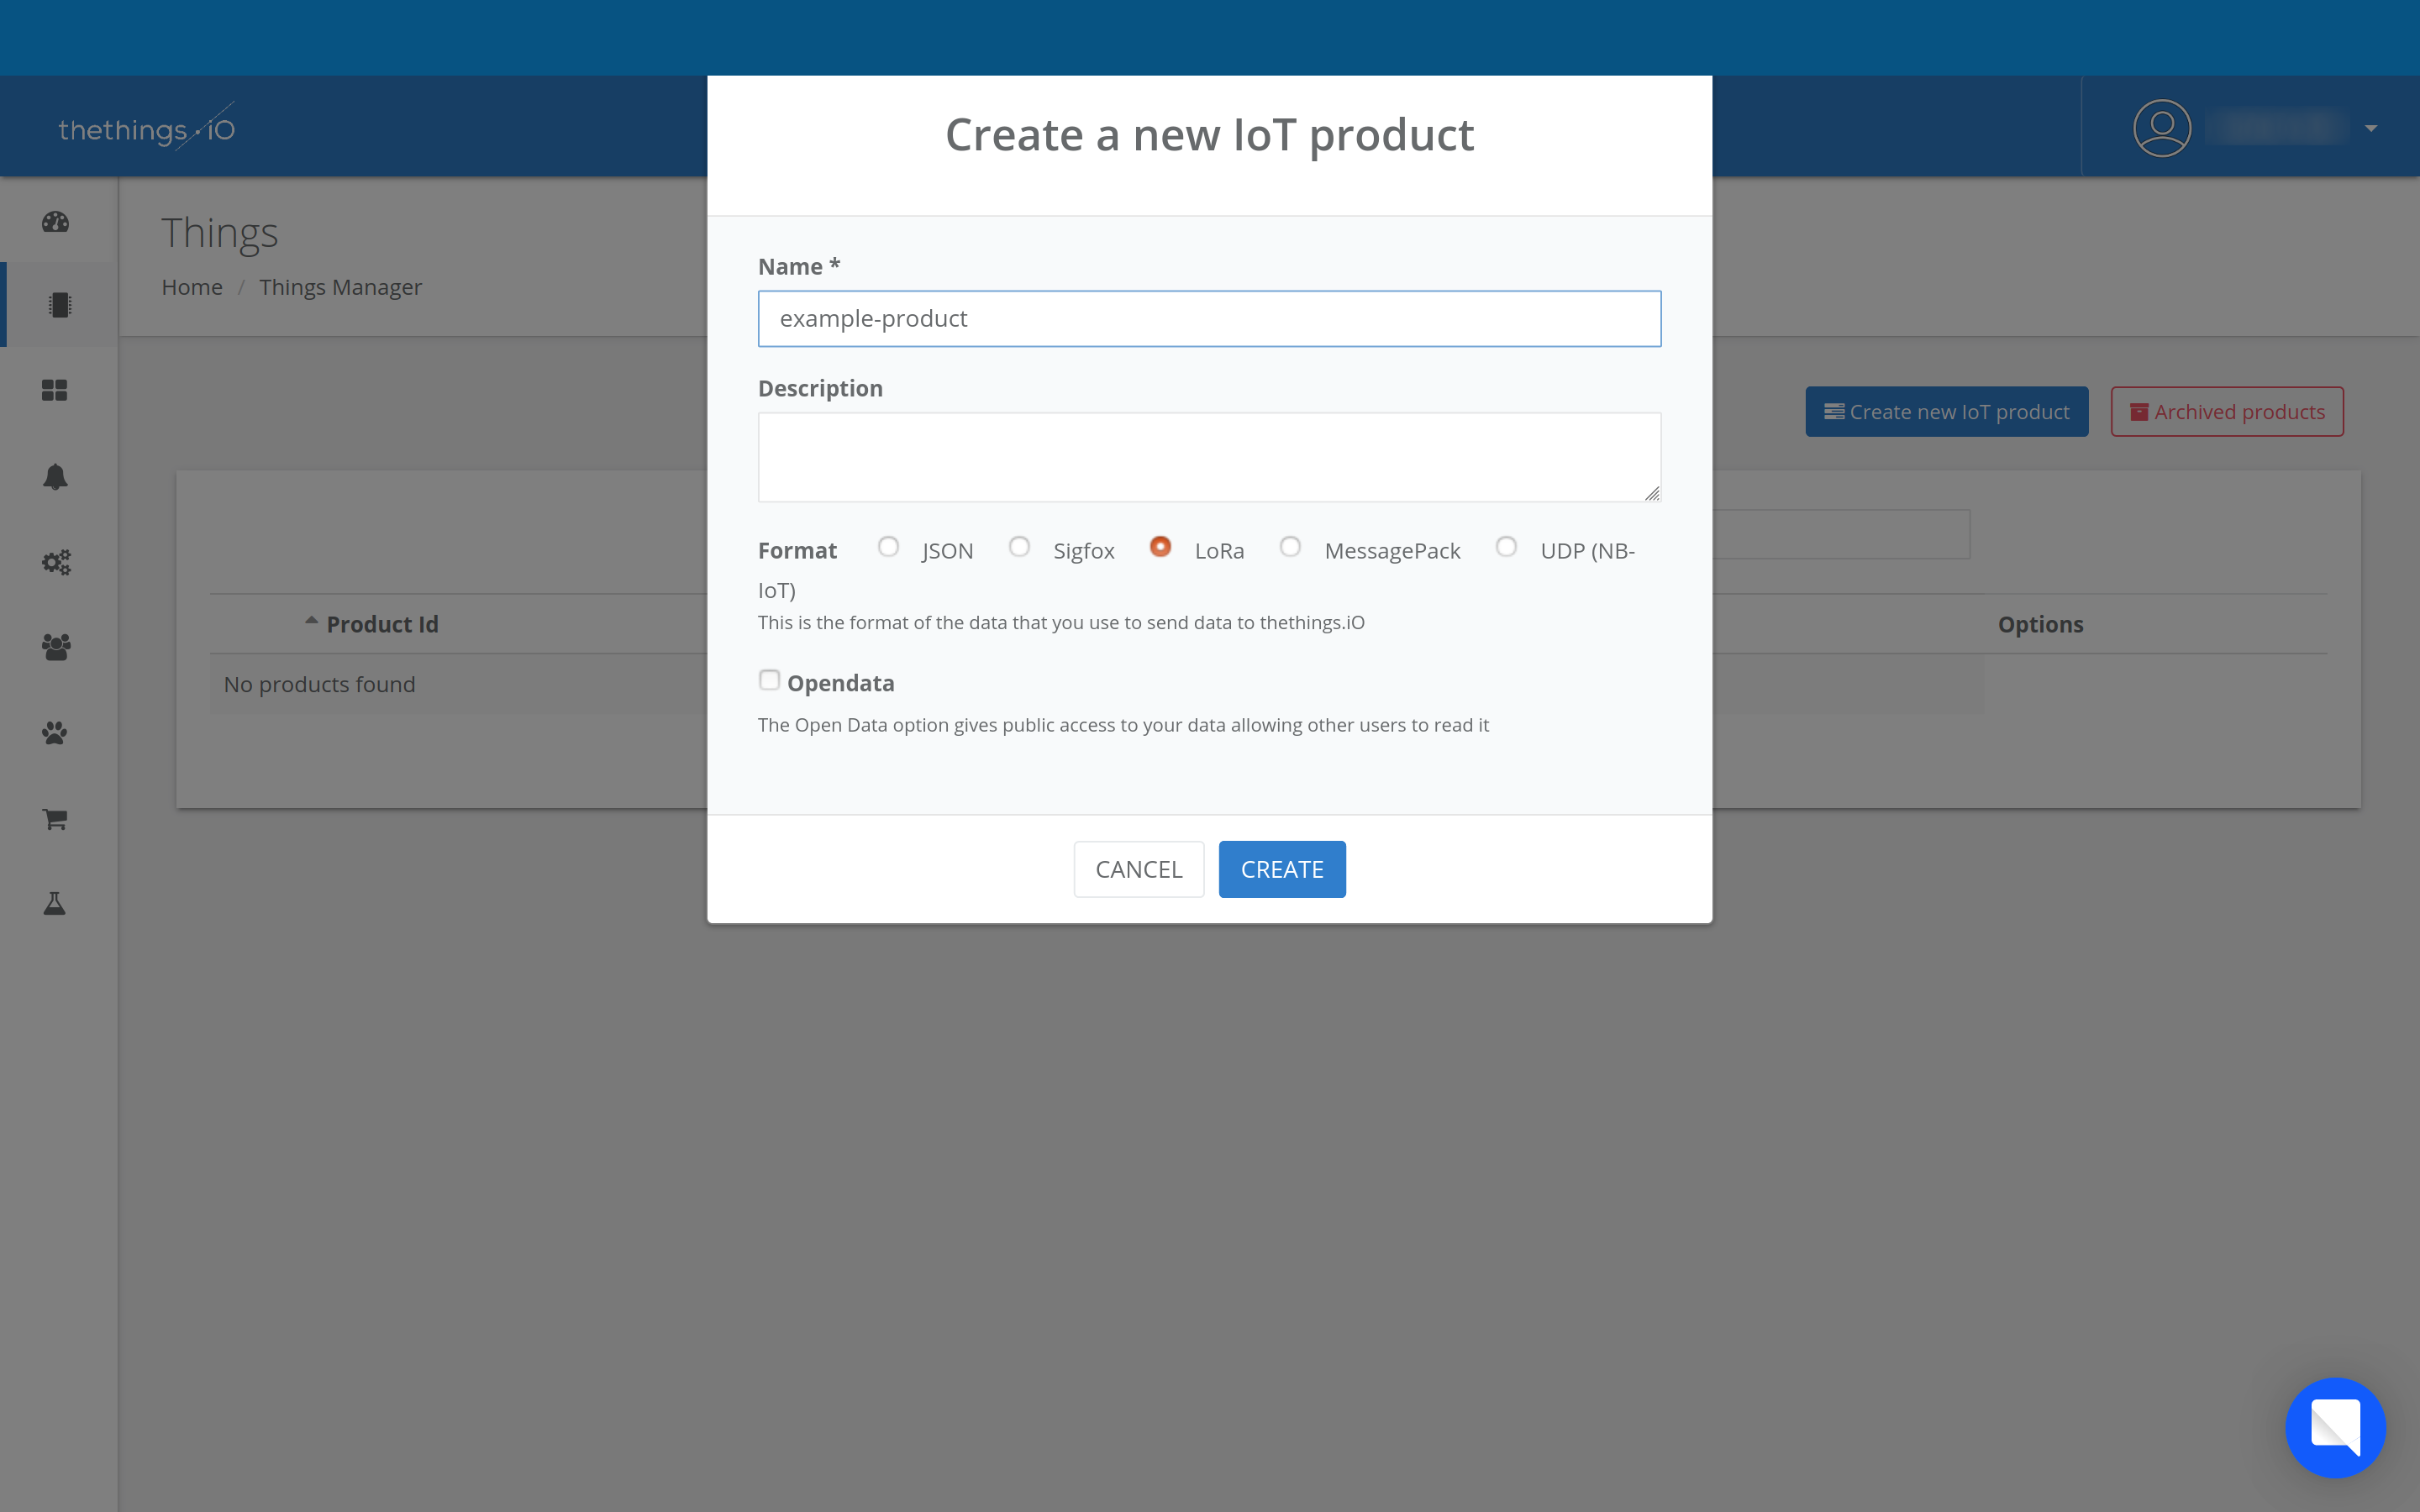
Click the Create new IoT product button. Give it a Name, choose LoRa as its format and finish with the Create button.
To parse the data coming from The Things Stack, we use thething.iO’s Cloud Code Function.
On the left hand menu, navigate to Cloud Code. Since you have created a new LoRa product, a lora_parser Cloud Code Function is automatically generated for you - you can find it under Functions.
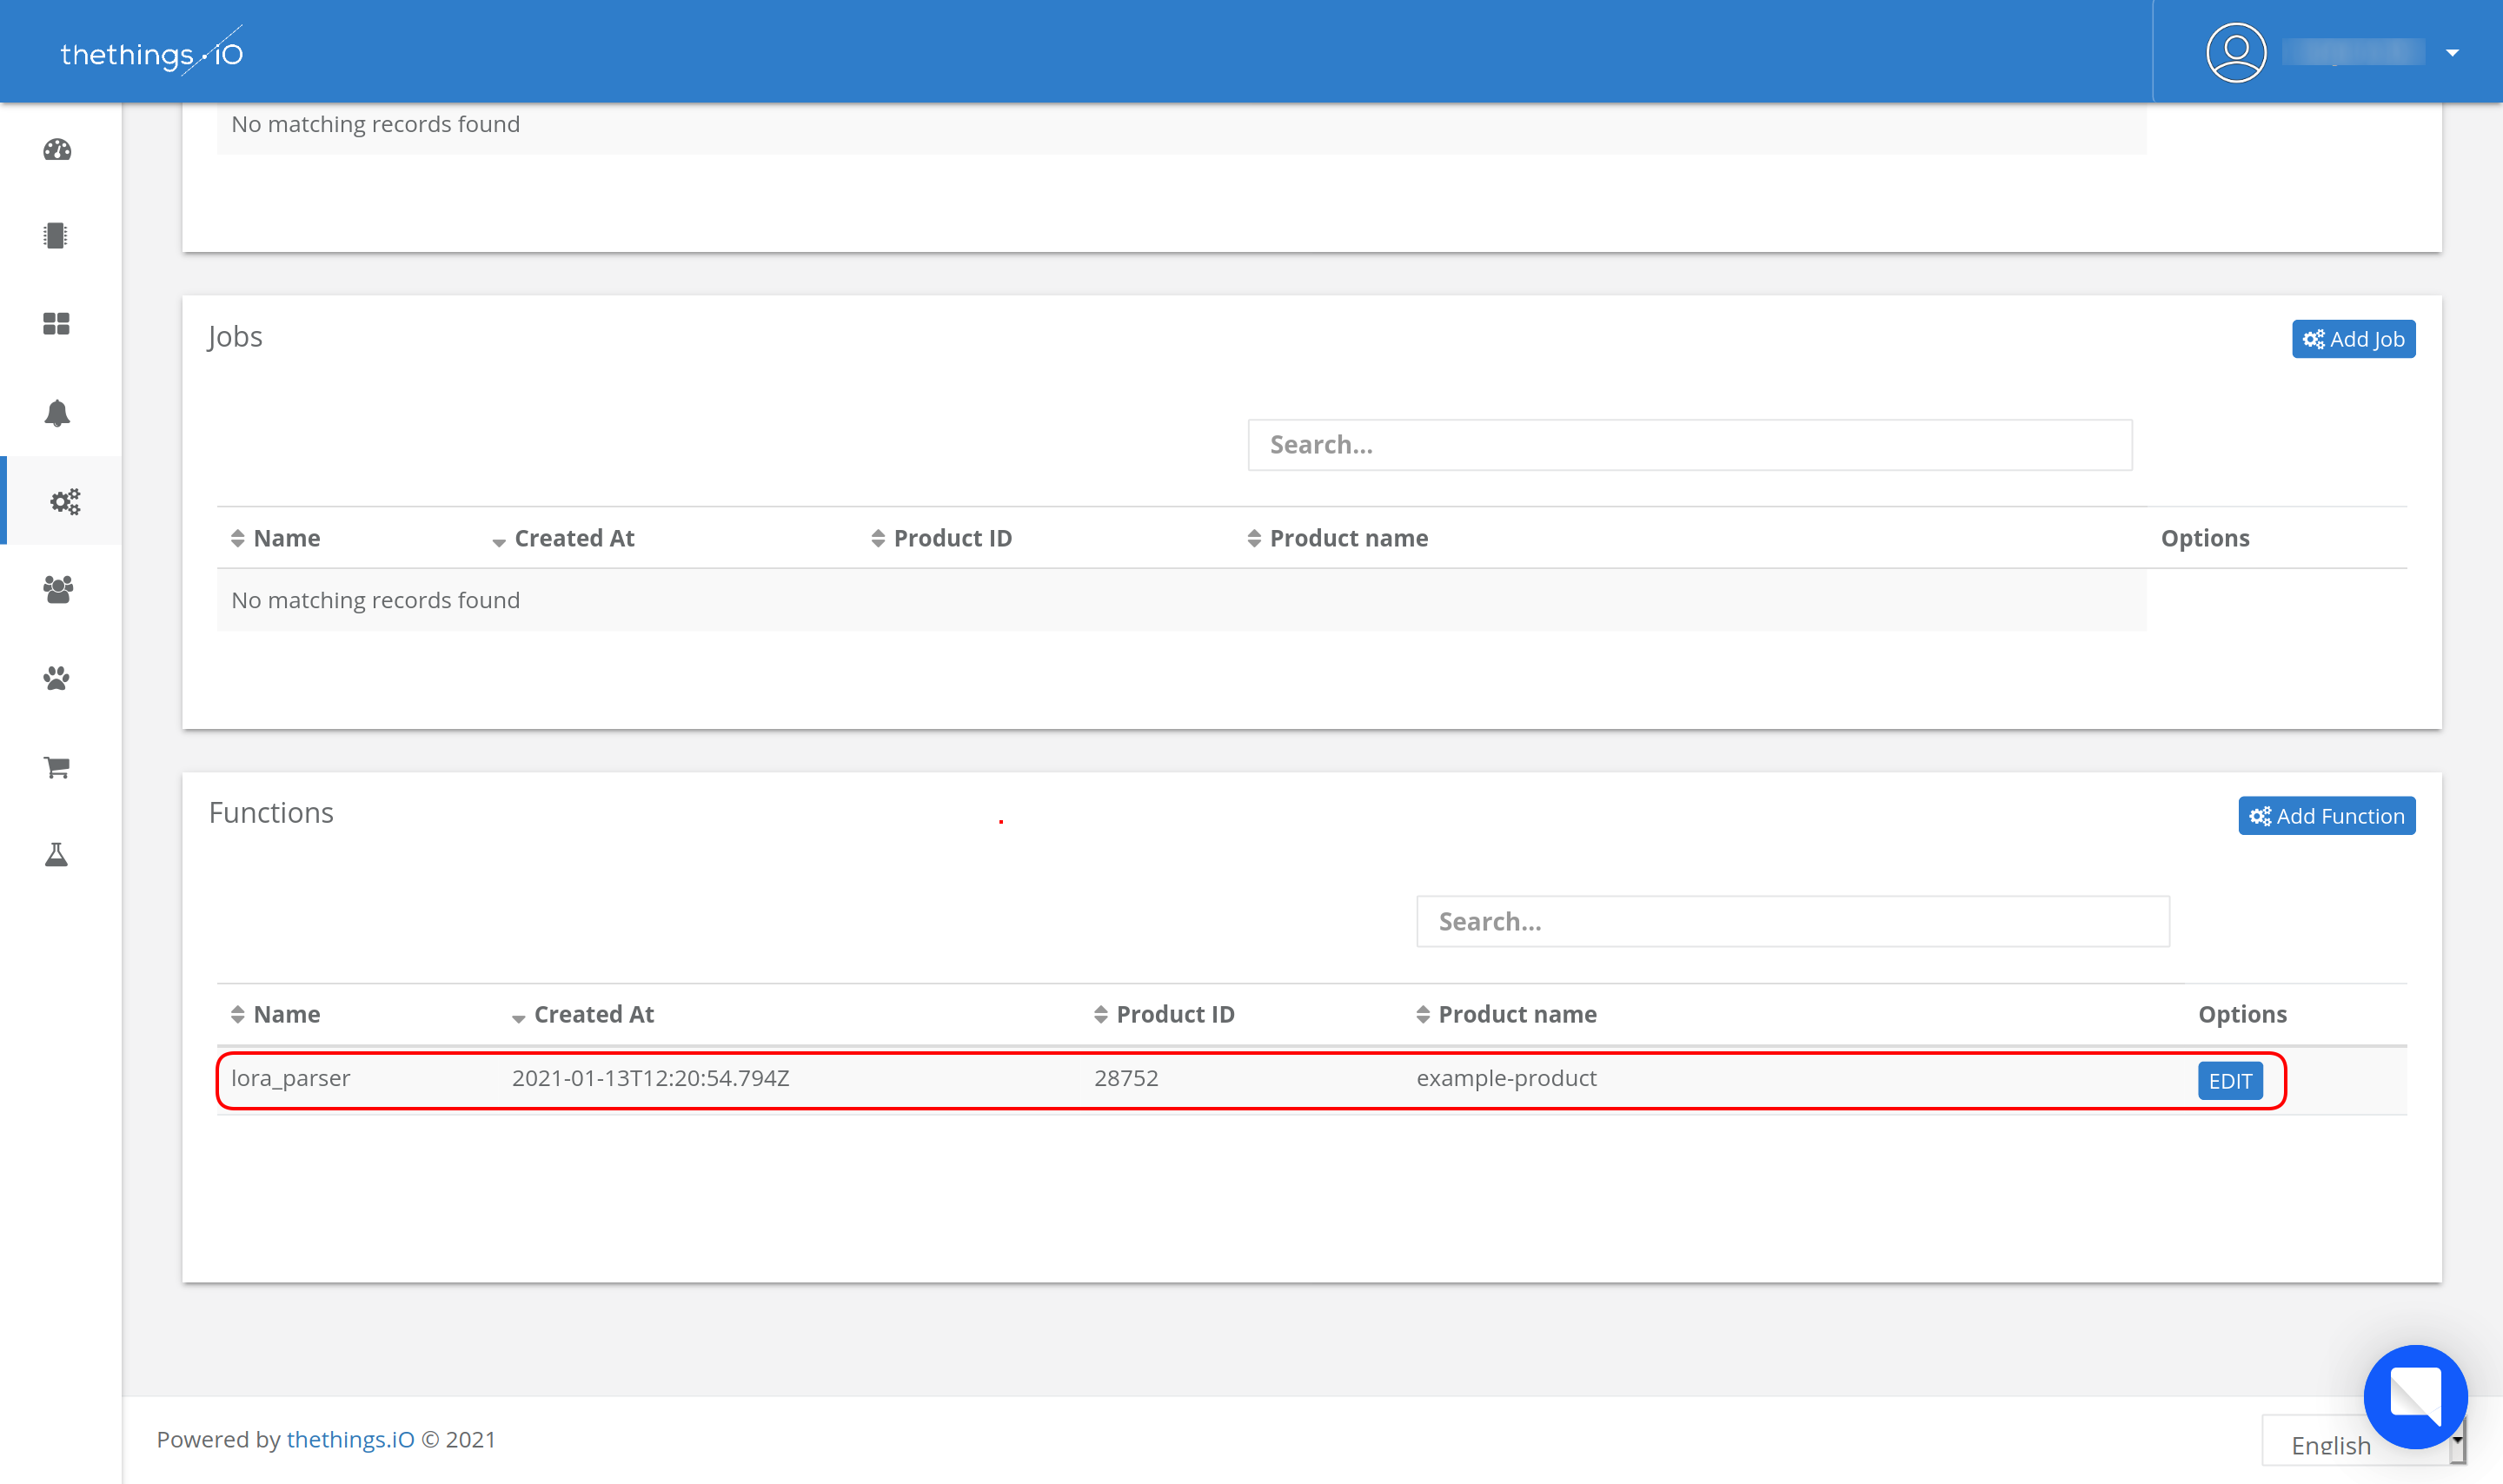
To parse the data correctly, you need to modify this function according to the payload you are sending from The Things Stack. Checking Data Formats in the the official The Things Stack documentation might be useful.
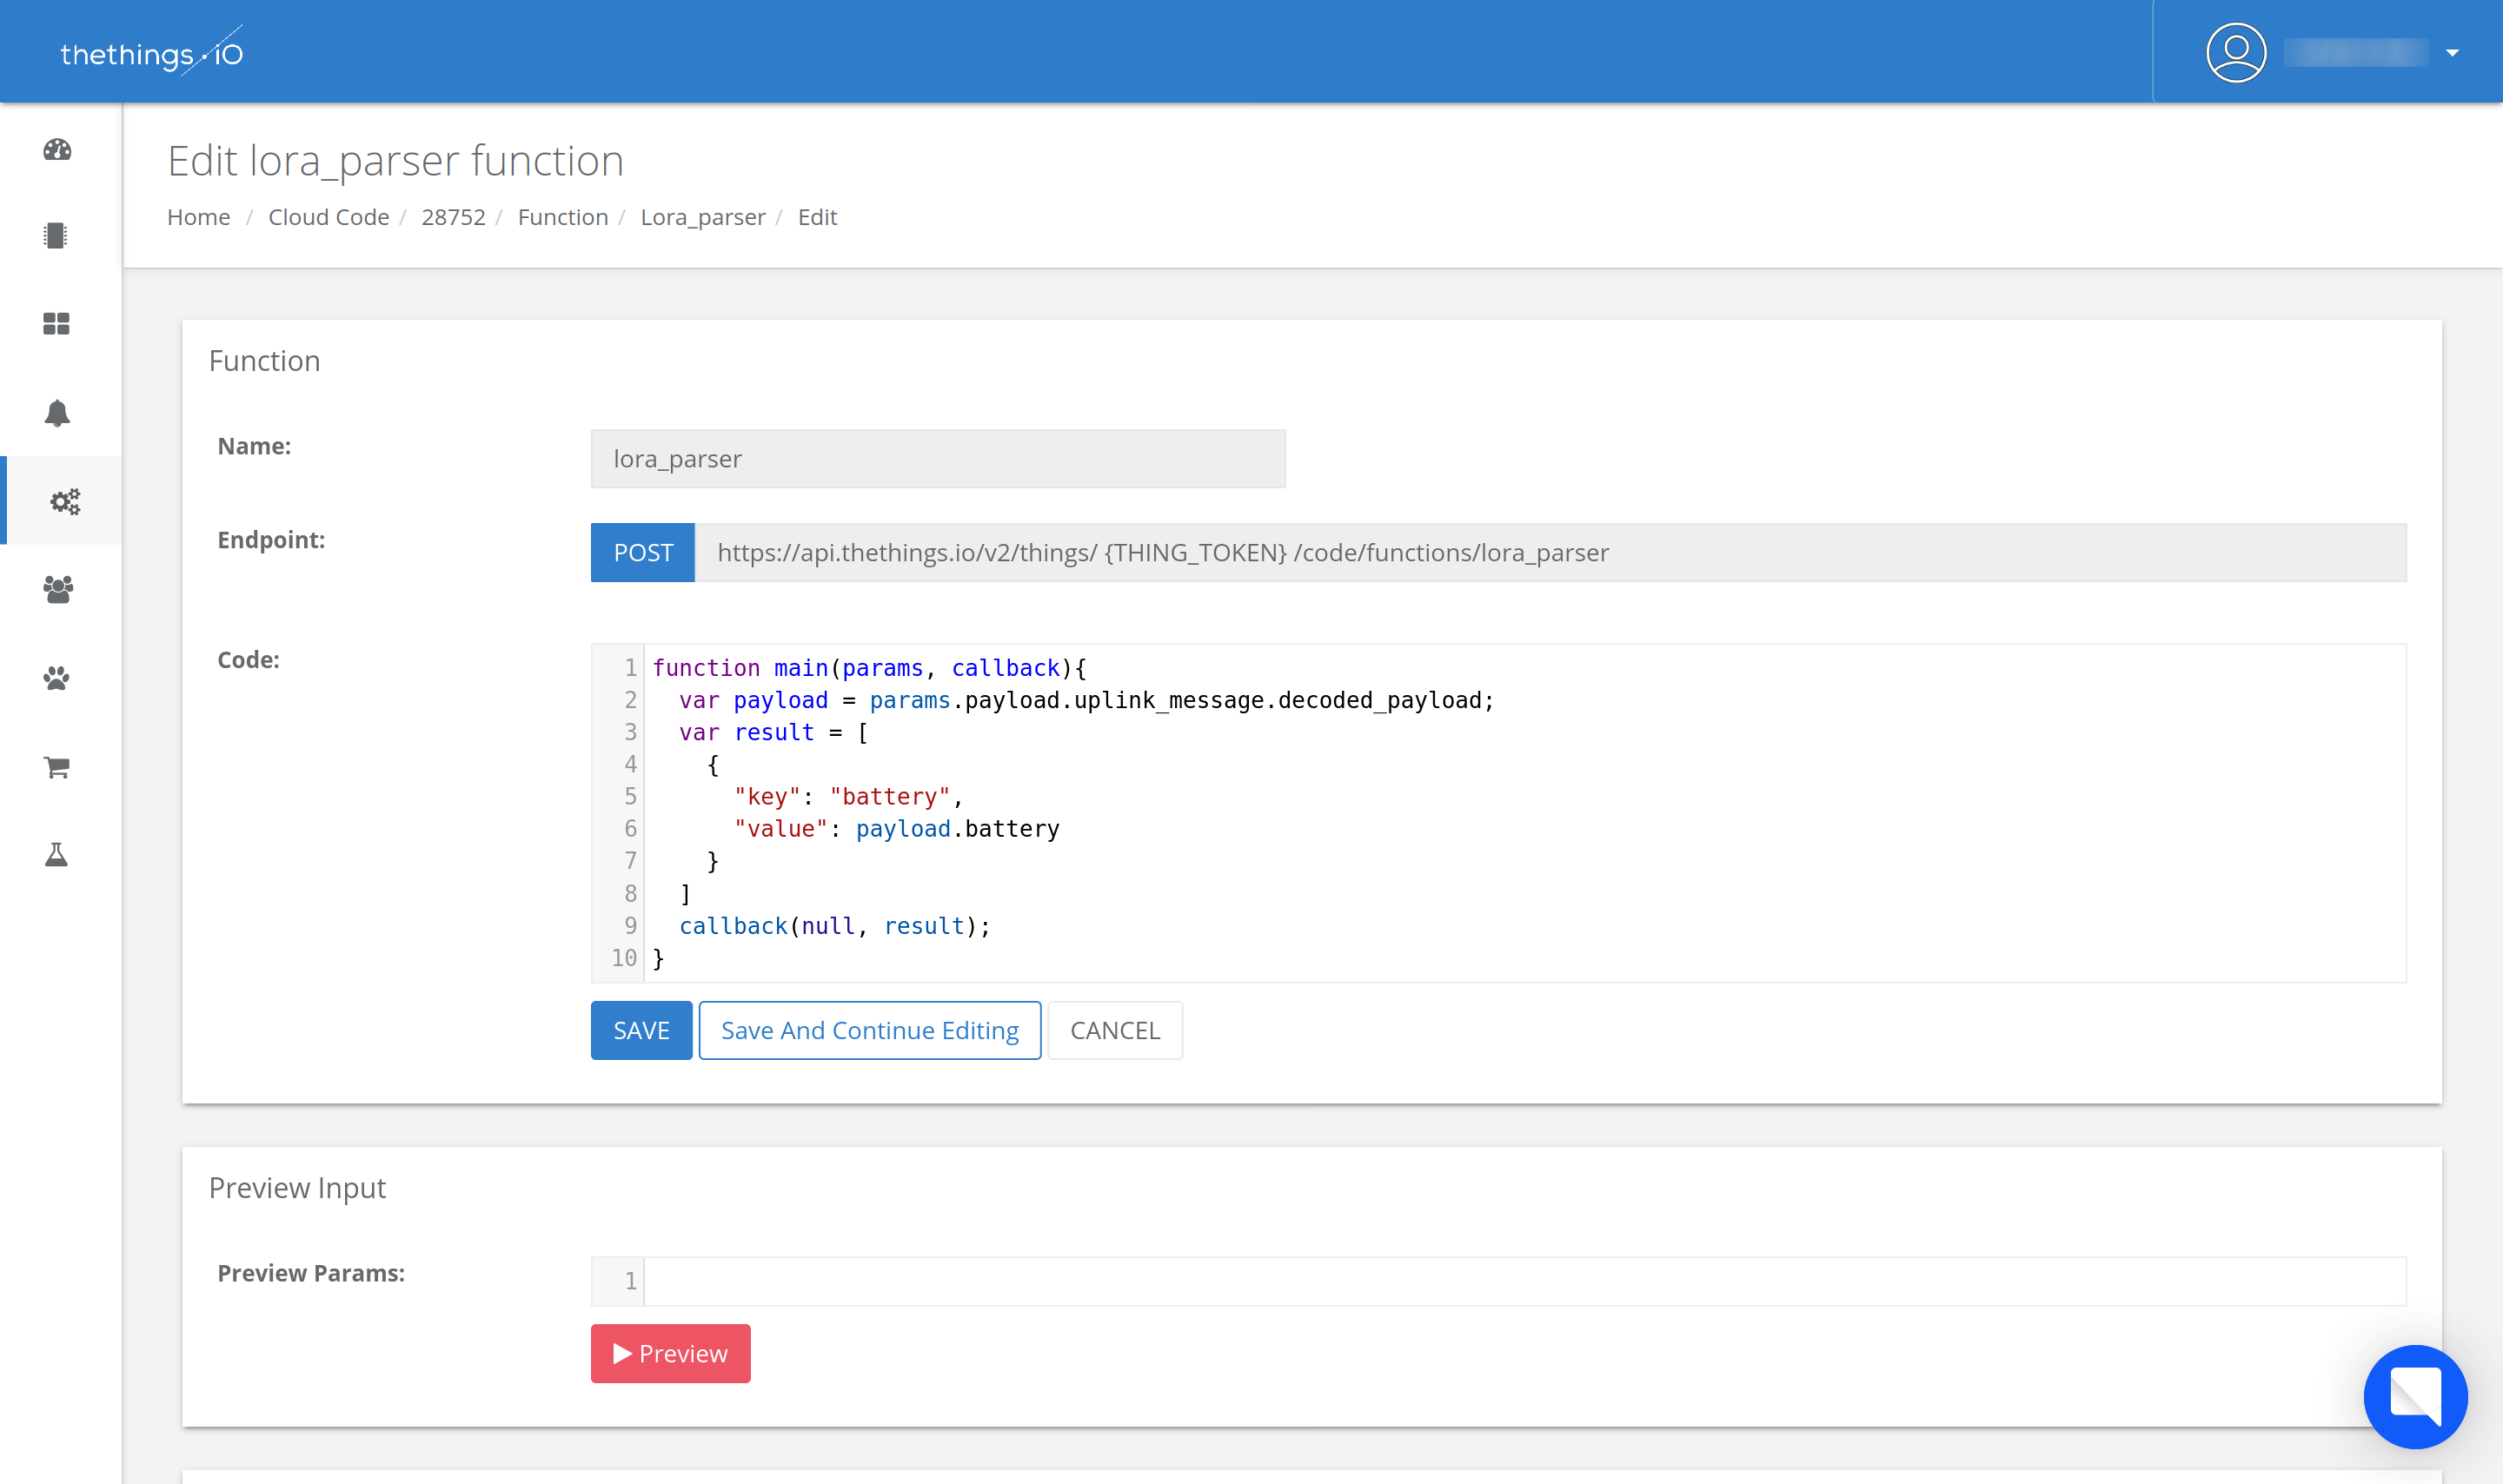
To modify the lora_parser function code, click the Edit button on its right.
In the Code window, paste the following code, adjust it to your uplink data and click Save:
function main(params, callback) {
  var payload = params.payload.uplink_message.decoded_payload;
  var result = [
    {
      key: "battery",
      value: payload.battery,
    },
  ];
  callback(null, result);
}
Once you have created the product and the parser function, thethings.iO setup is ready. The next step will be creating the Webhook integration on The Things Stack.
To complete the Webhook integration, you will need some information about the product you created in the previous steps. You can find the Product ID and its Hash in the Details window of the created product.
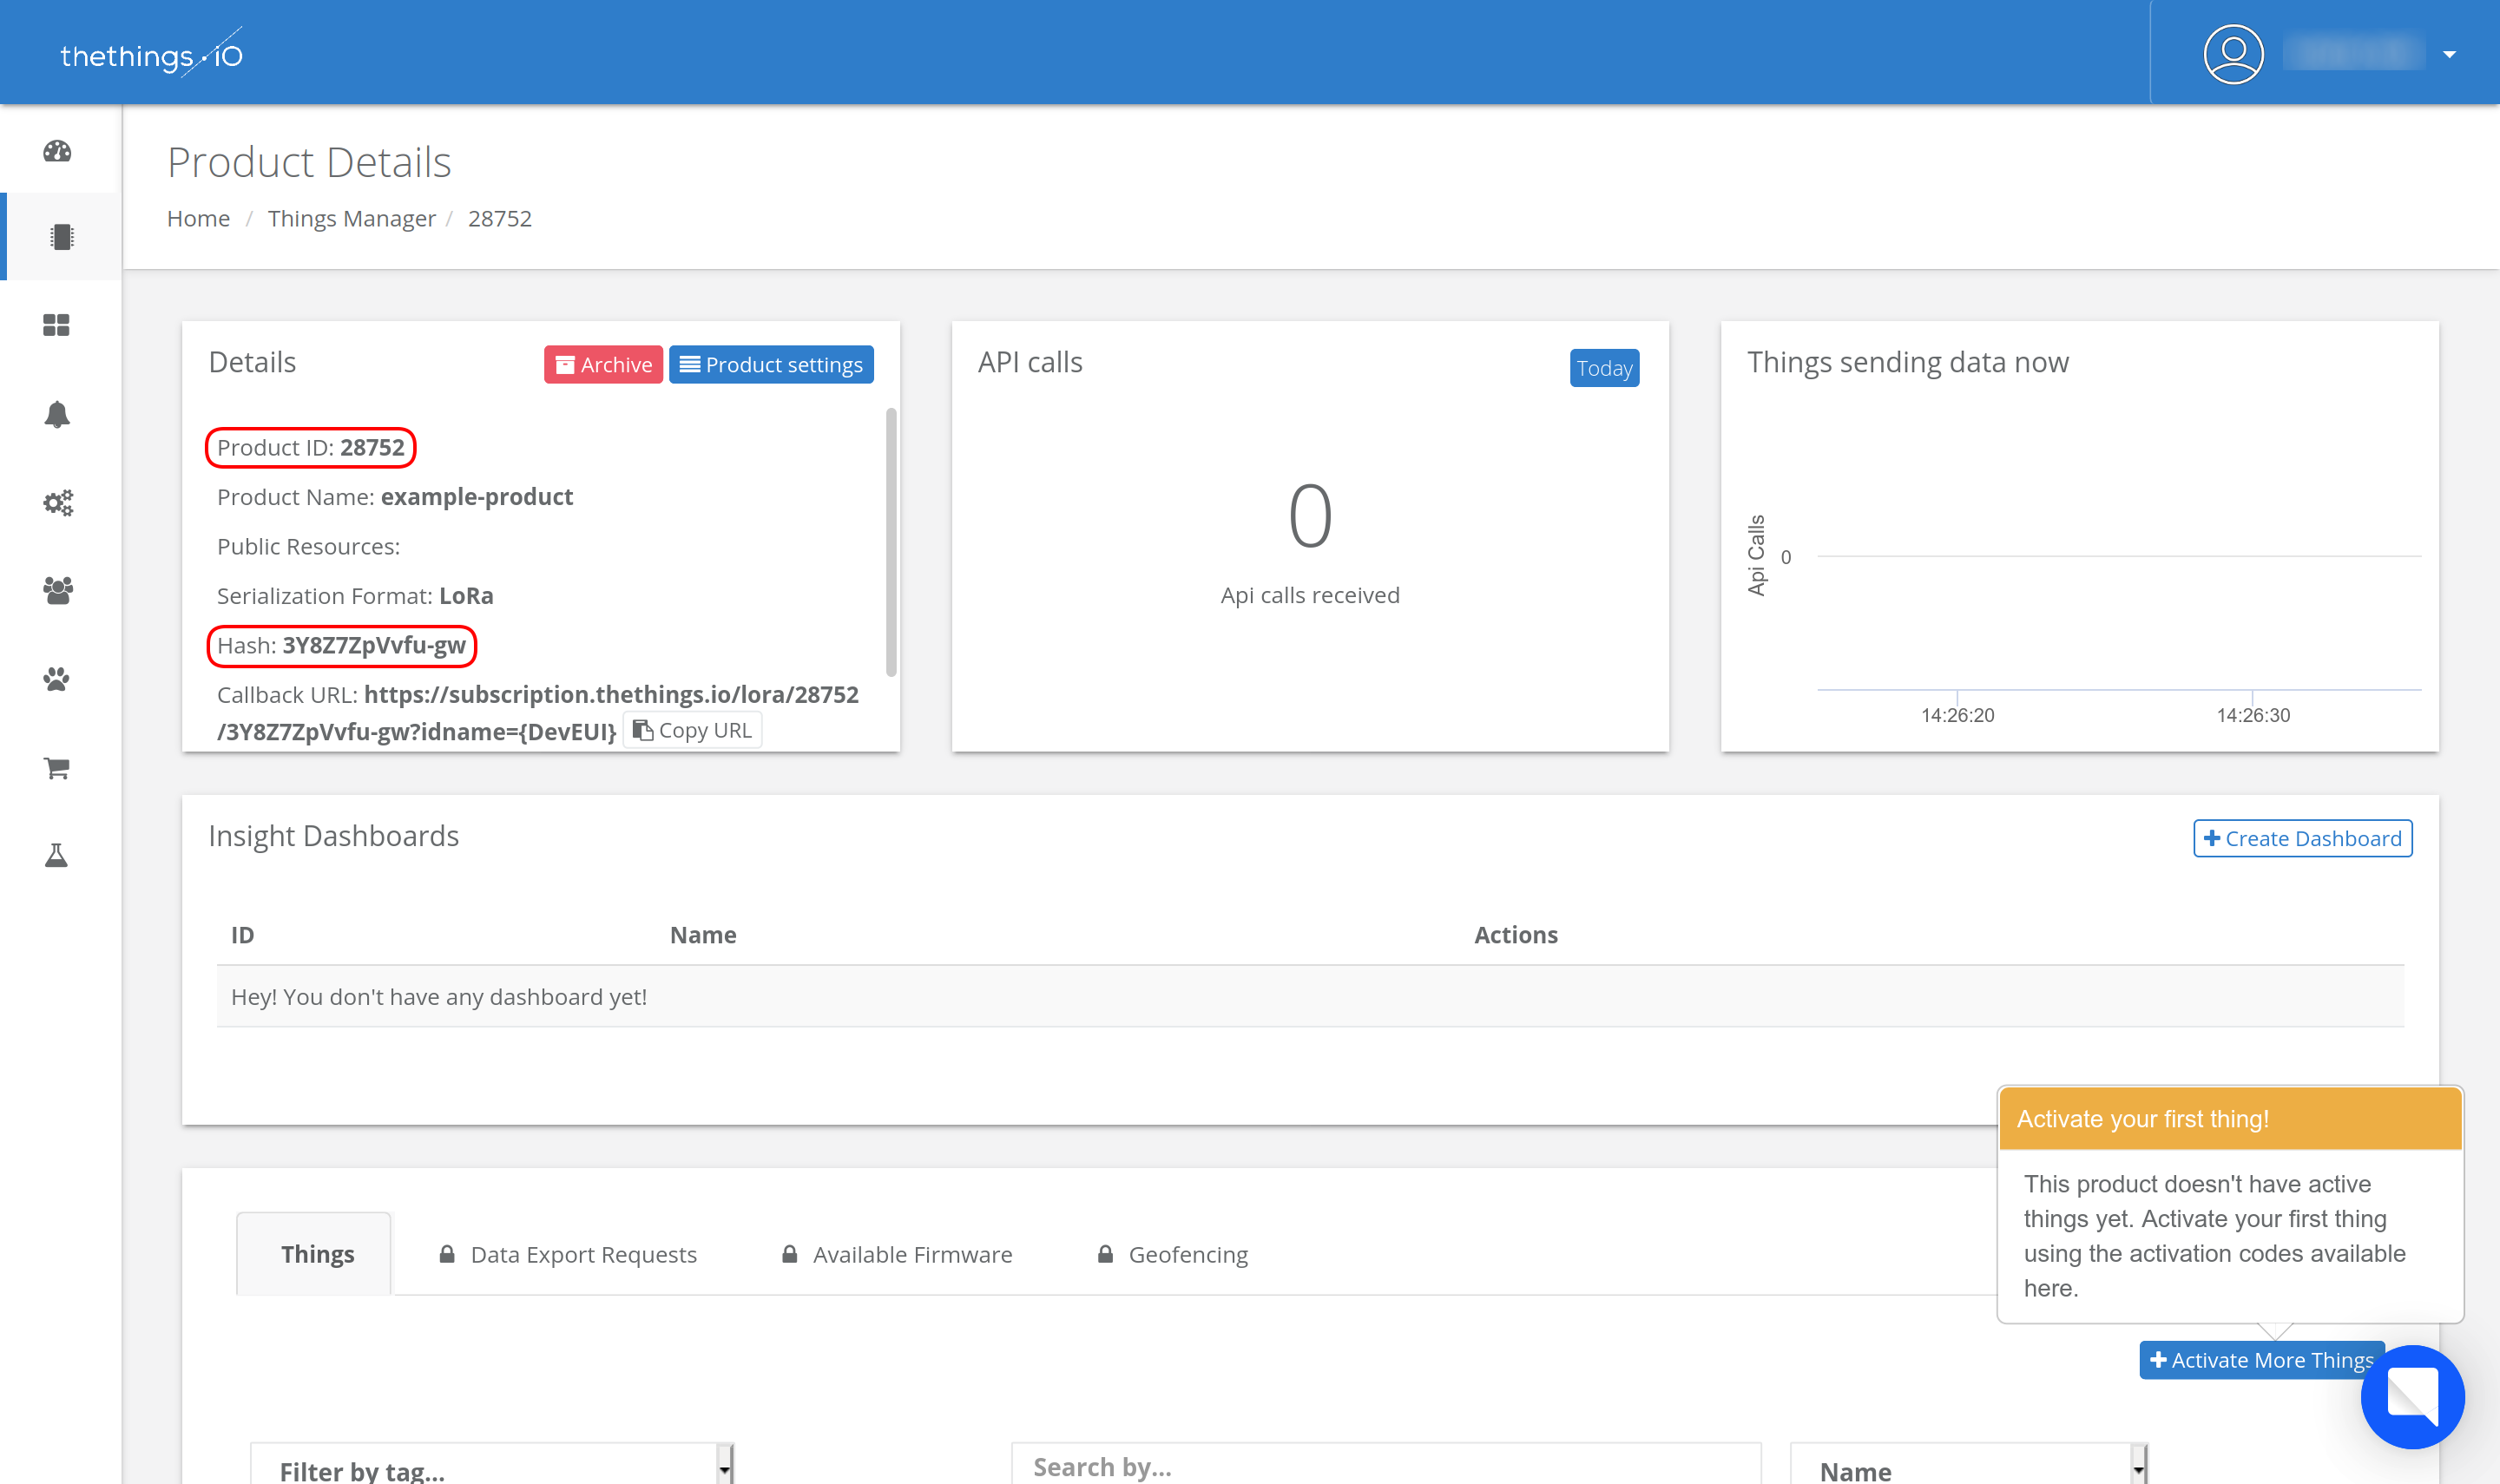
At this point, you can see that the API has not been called yet. Also, if you scroll down and check the Things section, you will see that your product does not have any things activated yet. After we complete the integration, a thing will be activated within your product, you will see the API calls and you will be able to visualize the incoming data!
Configure The Things Stack
Next is to create a Webhook integration on The Things Stack by using thethings.iO Webhook template.
On The Things Stack, navigate to Integrations → Webhooks and choose thethings.iO Webhook template.
Name your integration by filling in the Webhook ID field.
Paste the Product ID and Hash values from thethings.iO into the equally named fields of the Webhook template.
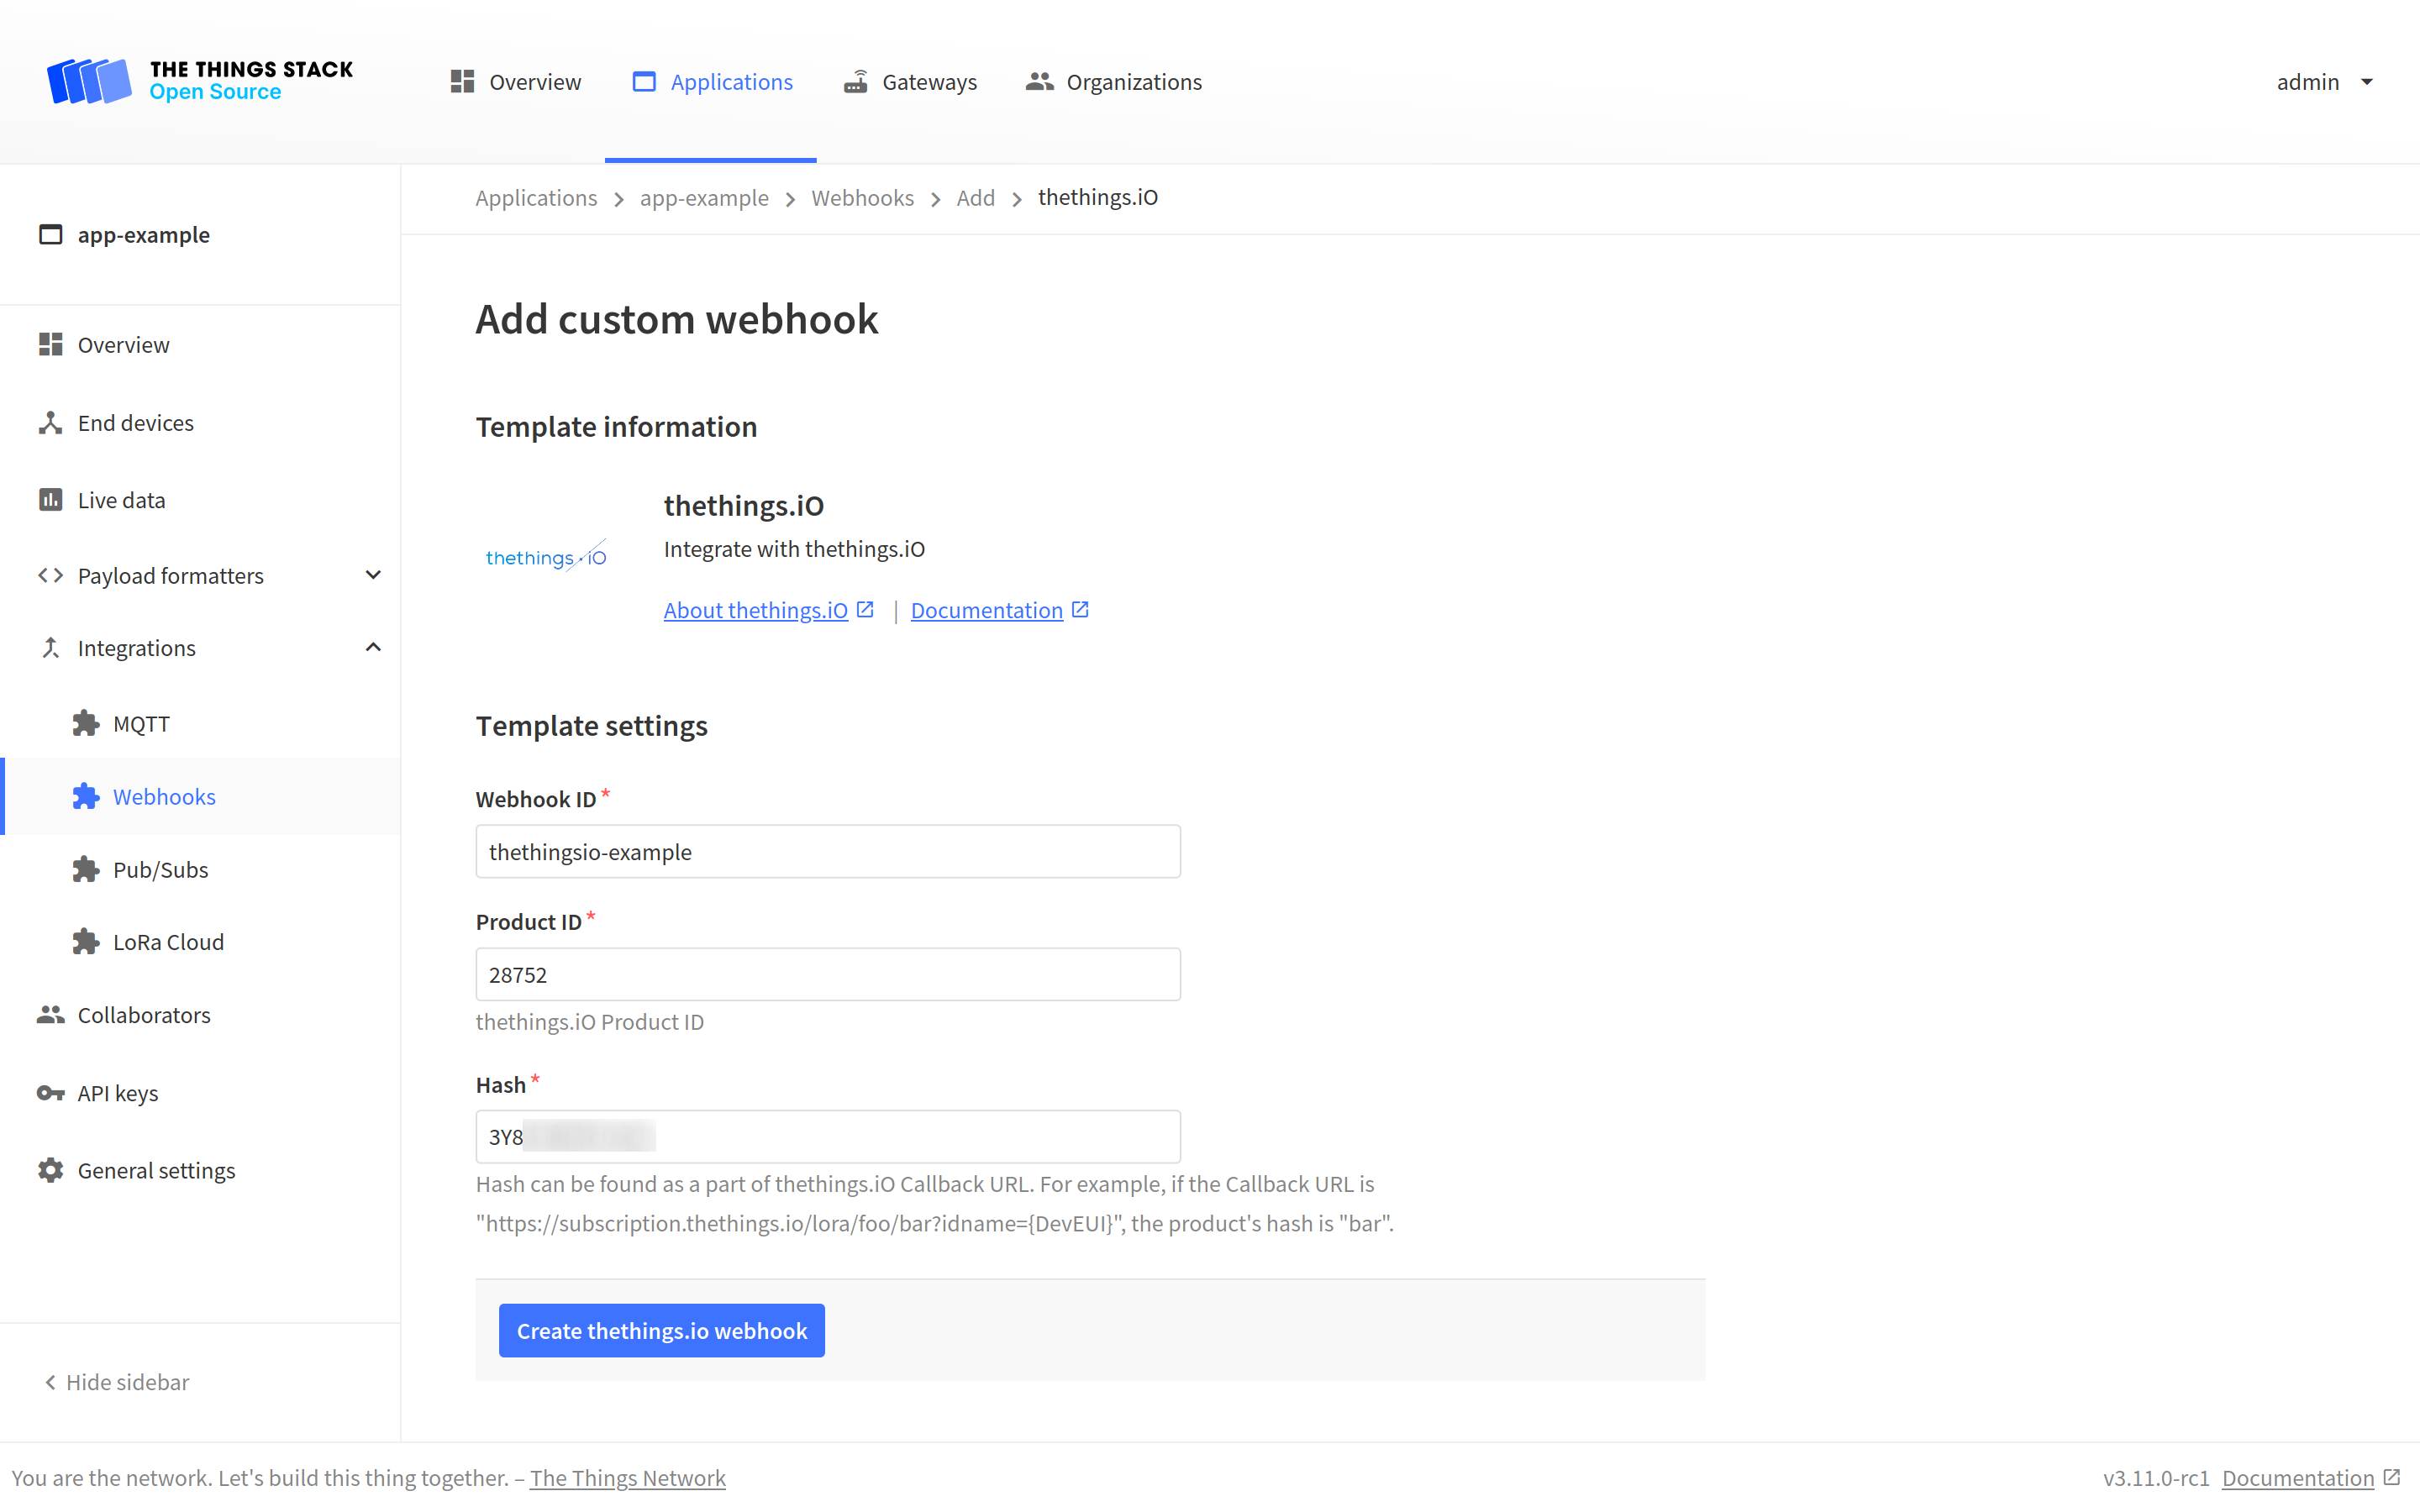
Hit the Create thethings.io webhook button to finish.
To see the values of all parameters of the thethins.iO integration, click on the integration after you created it with the Webhook template. If you do this, you will see that the final callback URL has the following structure: https://subscription.thethings.io/lora/{Product ID}/{Hash}?idname=end_device_ids.dev_eui.
Monitor Your Data
After you have created the Webhook integration on The Things Stack, you can monitor the incoming data on thethings.iO.
Go back to thethings.iO and navigate to your product’s details page.
In the API calls and the Things sending data now windows, you will see the incoming API calls.
If you scroll down, on the Things tab, you will see that now you have one activated thing! Click on its Details button on the right.
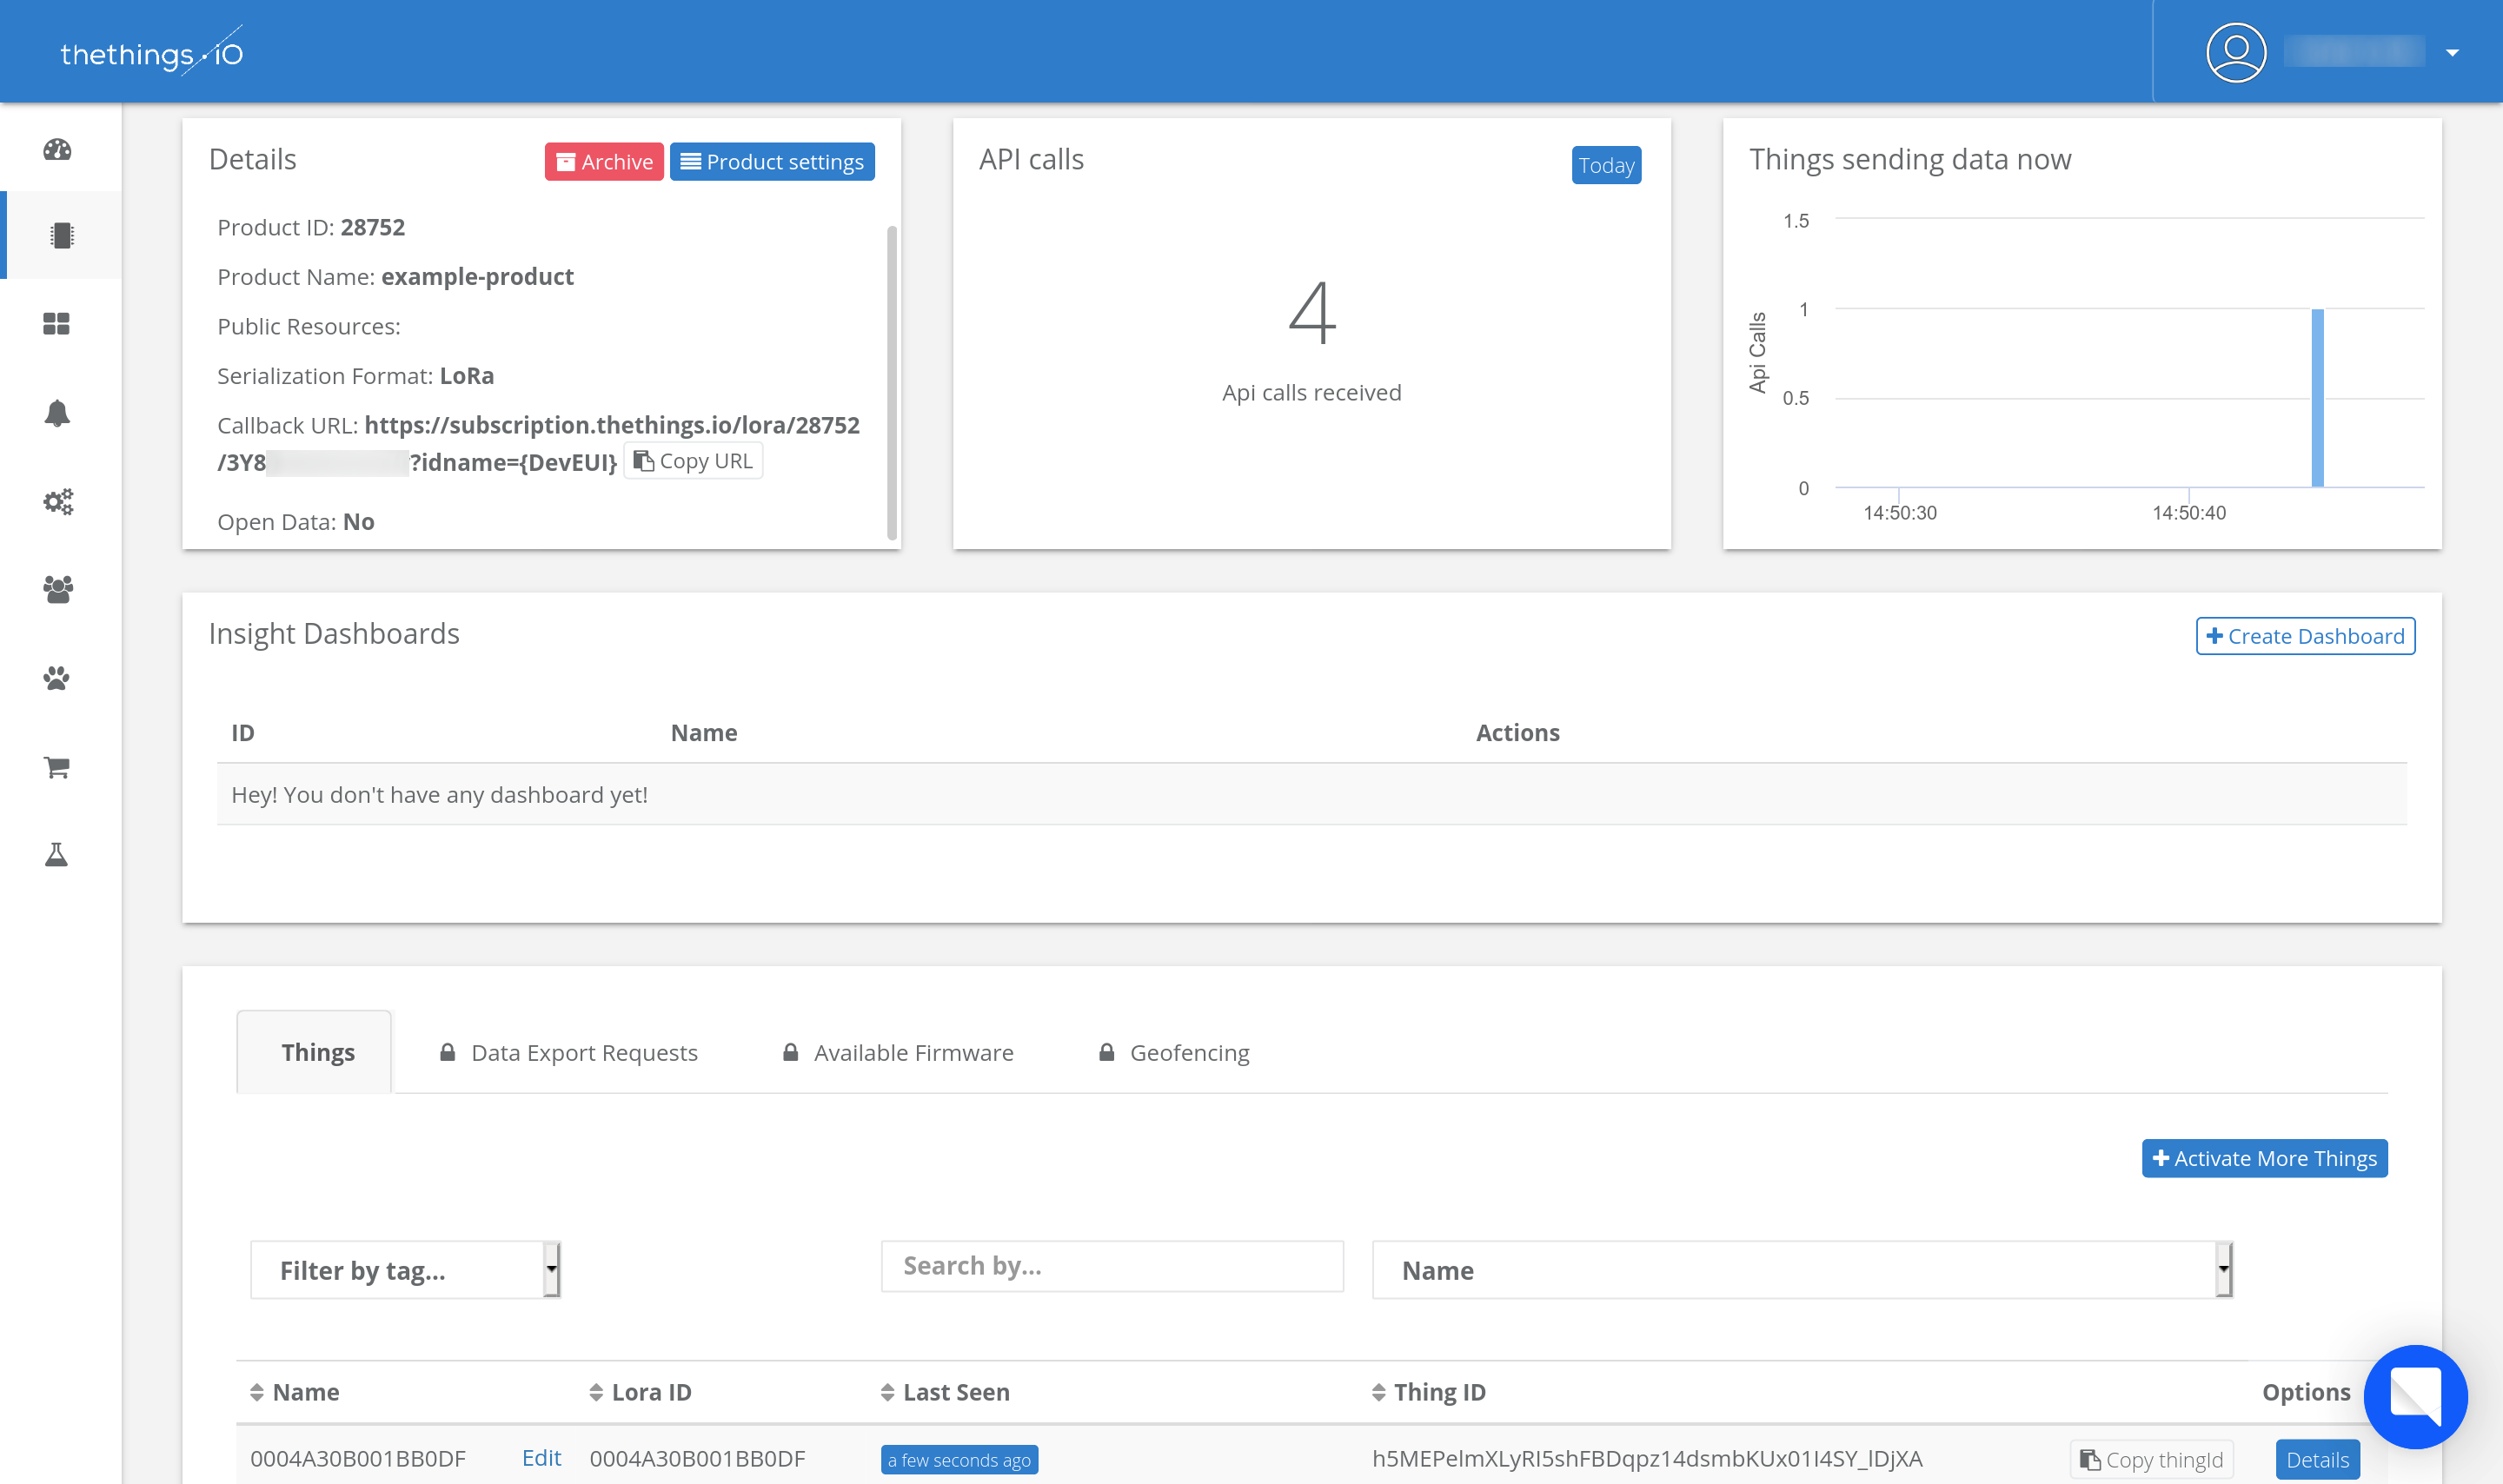
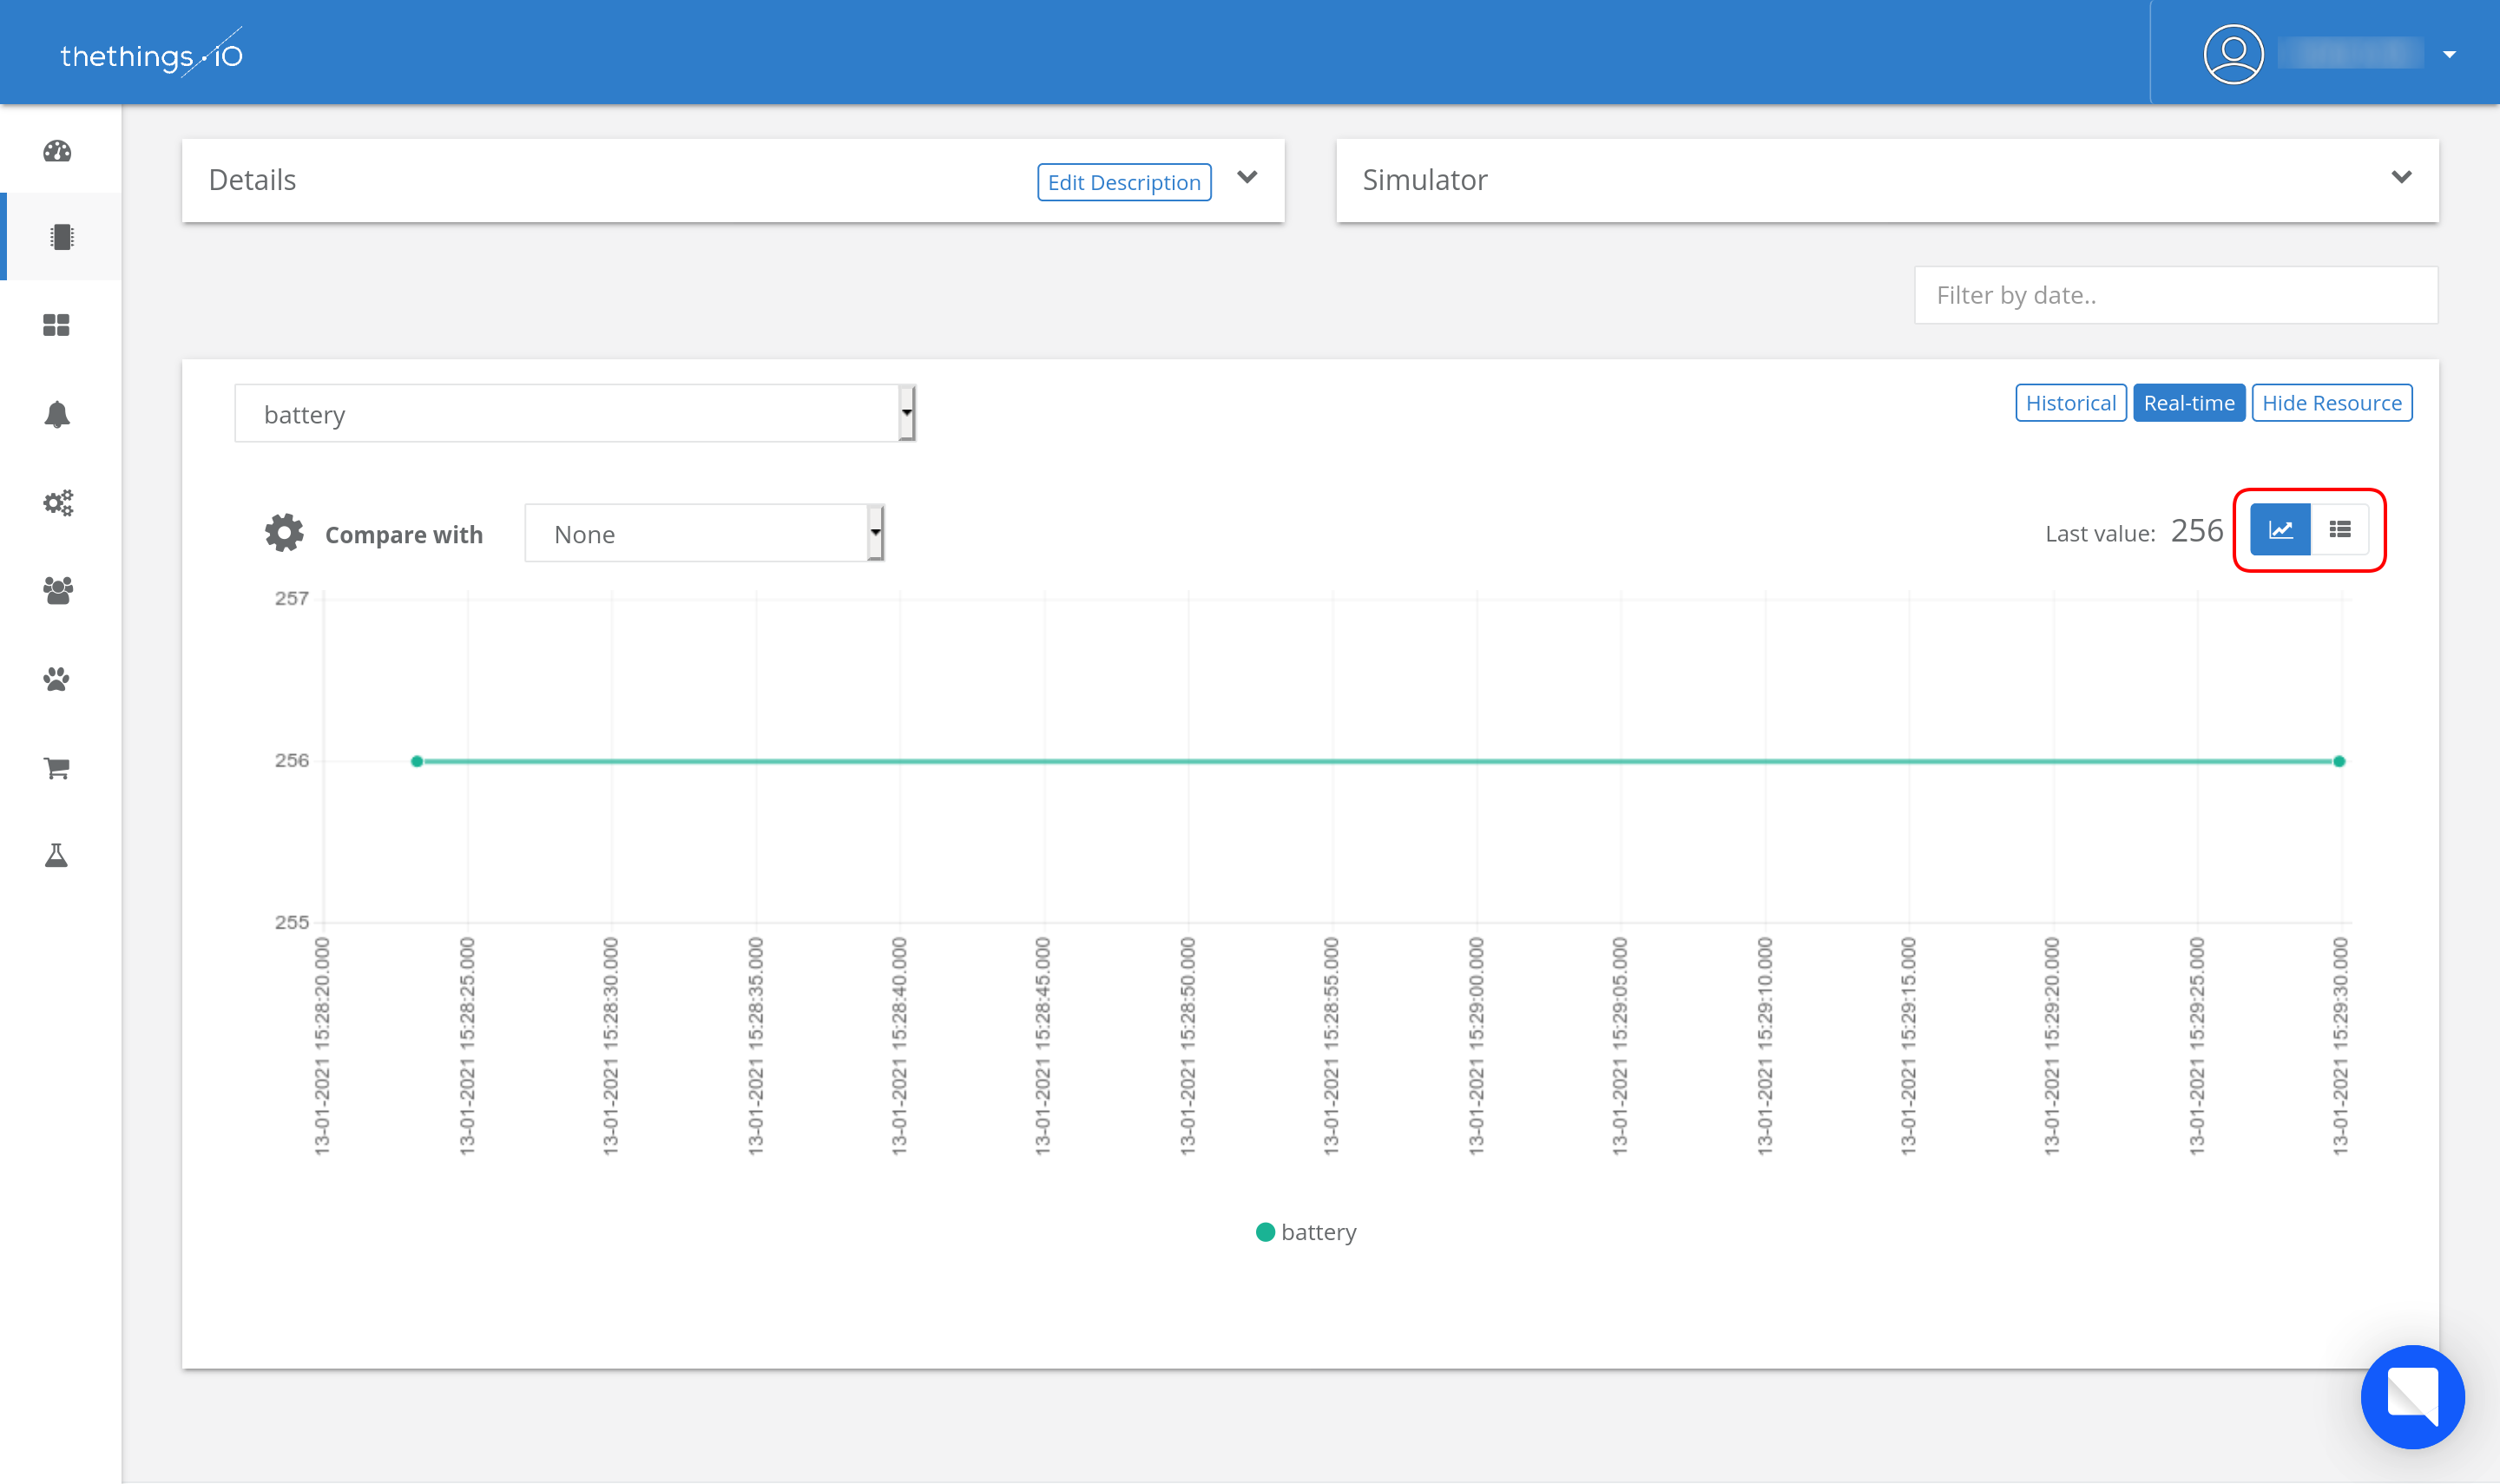
In the Thing Details section, scroll down to see the incoming data. Switch between marked buttons to see the data in numeric format, or as a real-time graph.
