Ubidots provides a secure and easy way to build IoT solutions for students, makers and researchers. It is used for sending data from any Internet-enabled device to the cloud, triggering actions and alerts based on that data, and visualizing it.
Prerequisites
- A Ubidots user account.
Setup Ubidots
Log in to your Ubidots account and find the Devices tab in the upper part of your dashboard. In its drop-down list, choose Plugins.

Click on the + or on the Create Data Plugin button to create a new plugin.
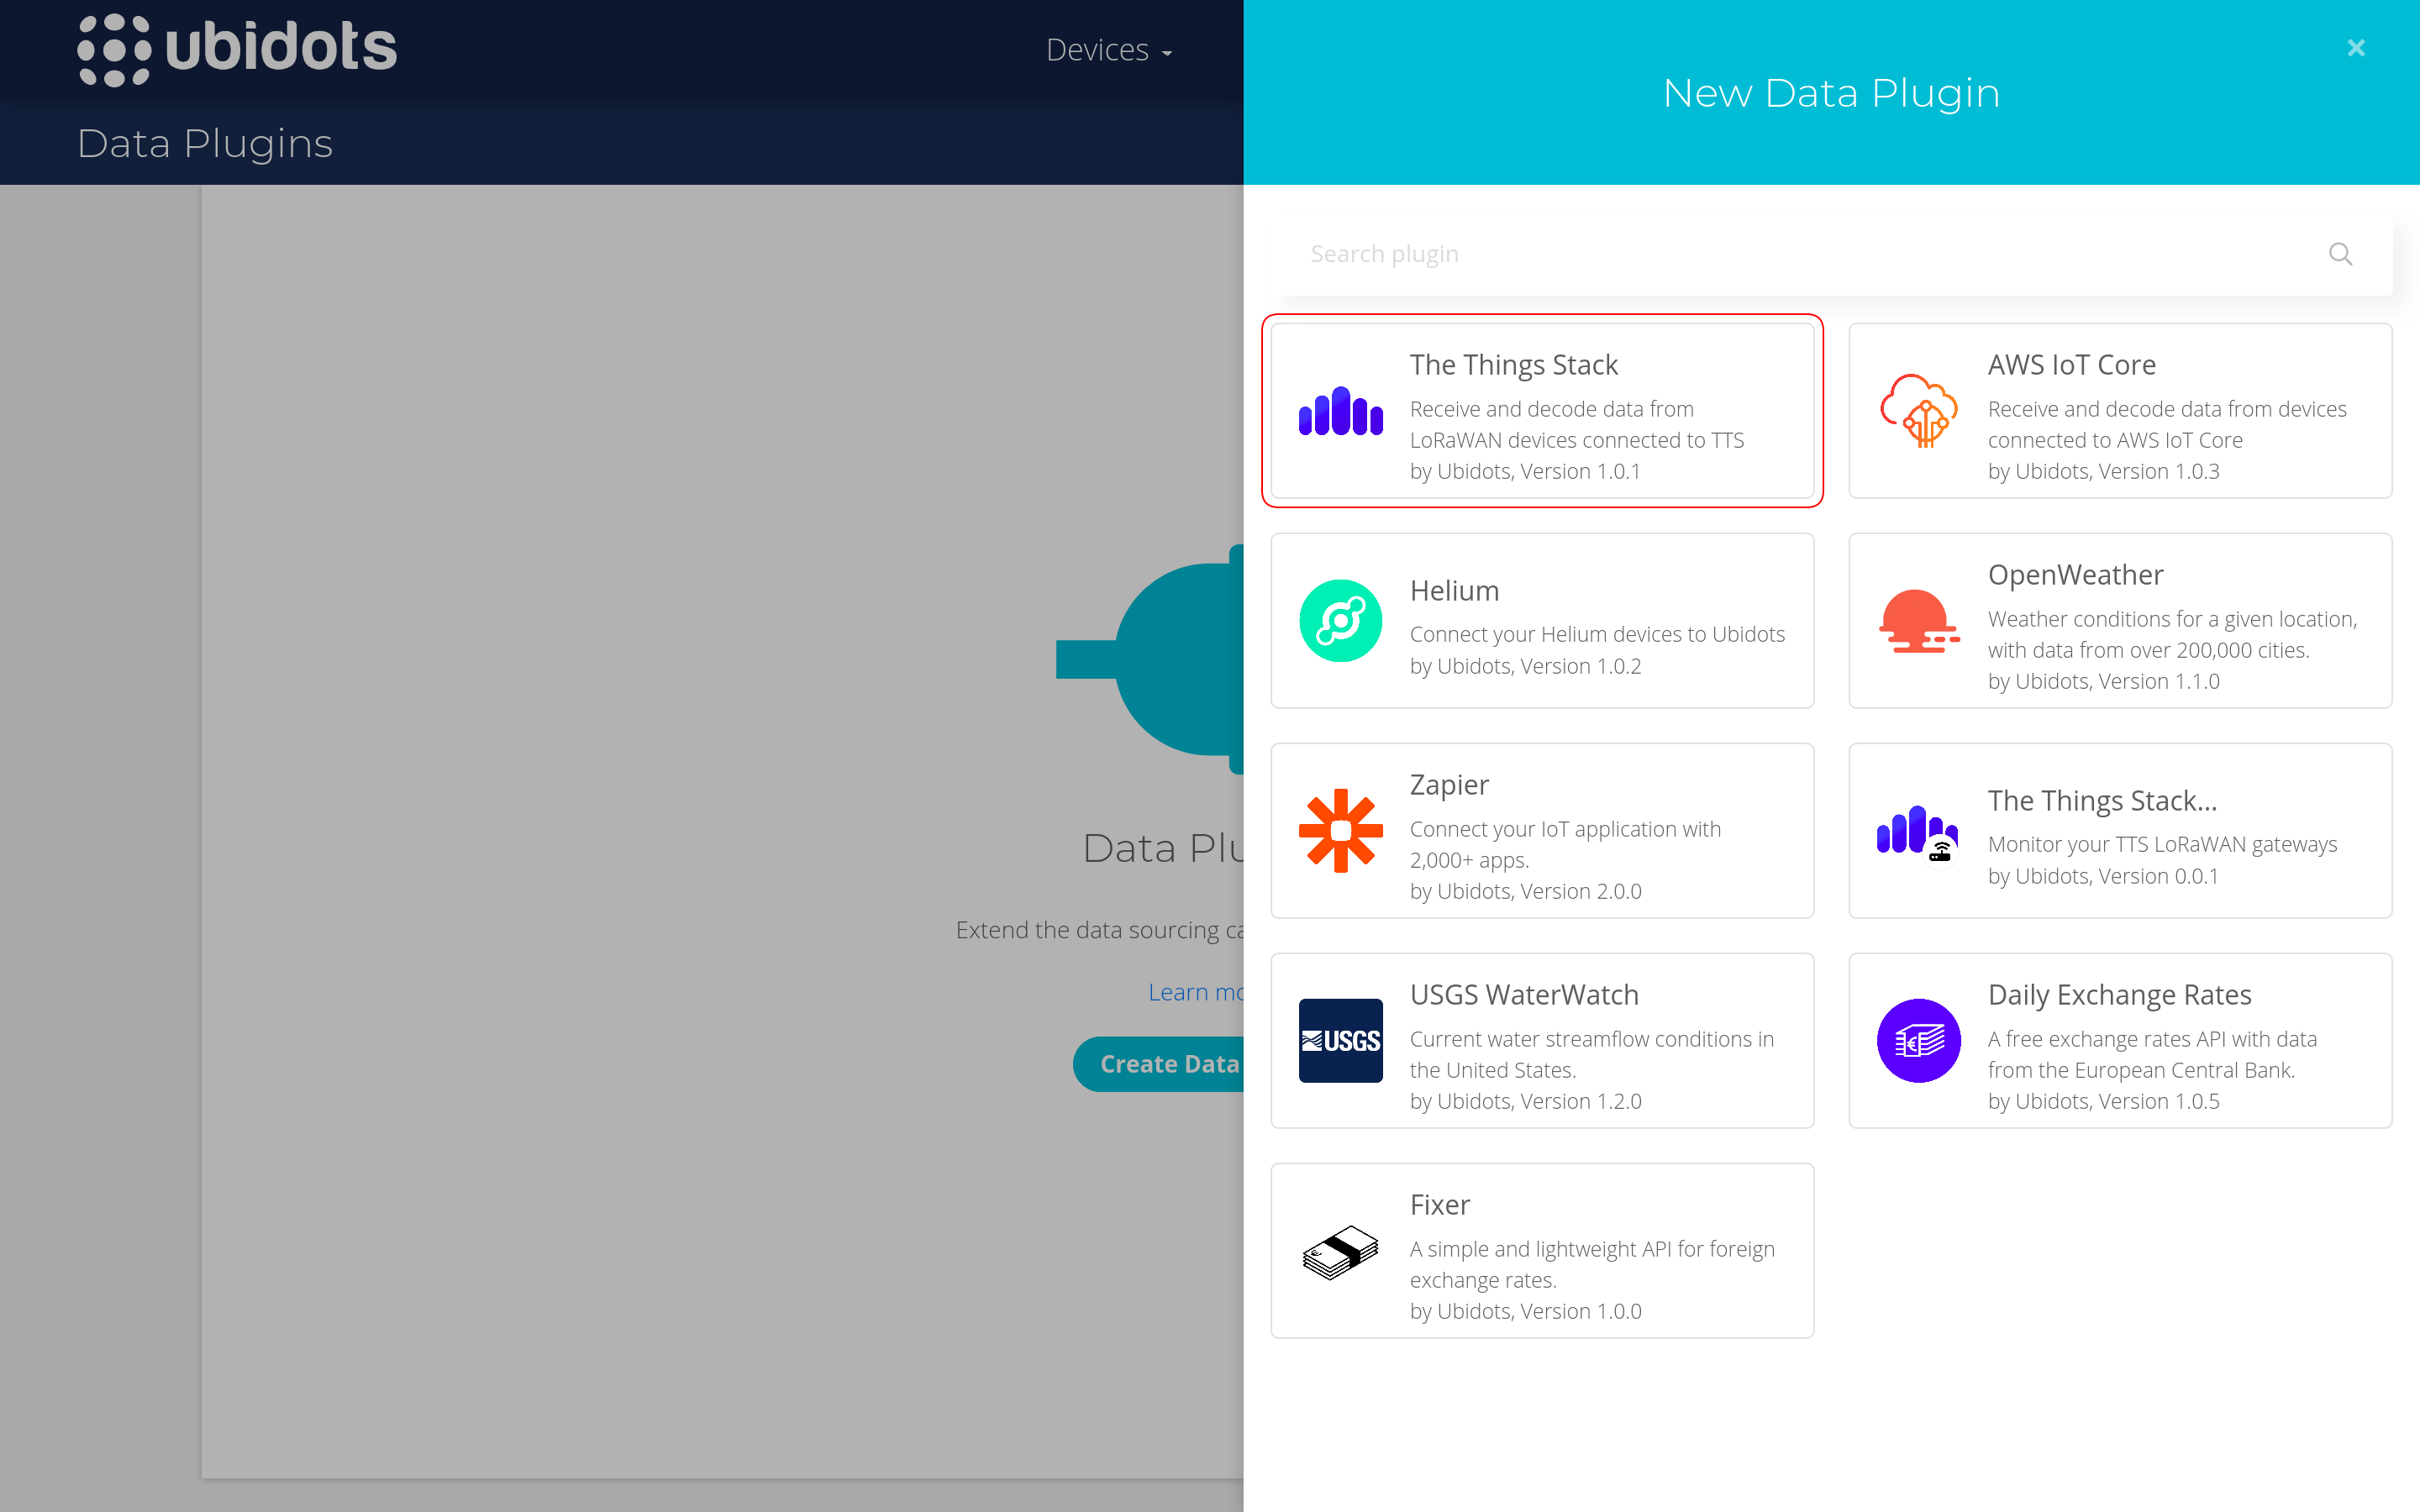
When you are presented with available plugins, select The Things Stack plugin.
You will see details about Inputs, Usage, etc. Move forward by clicking the > button.
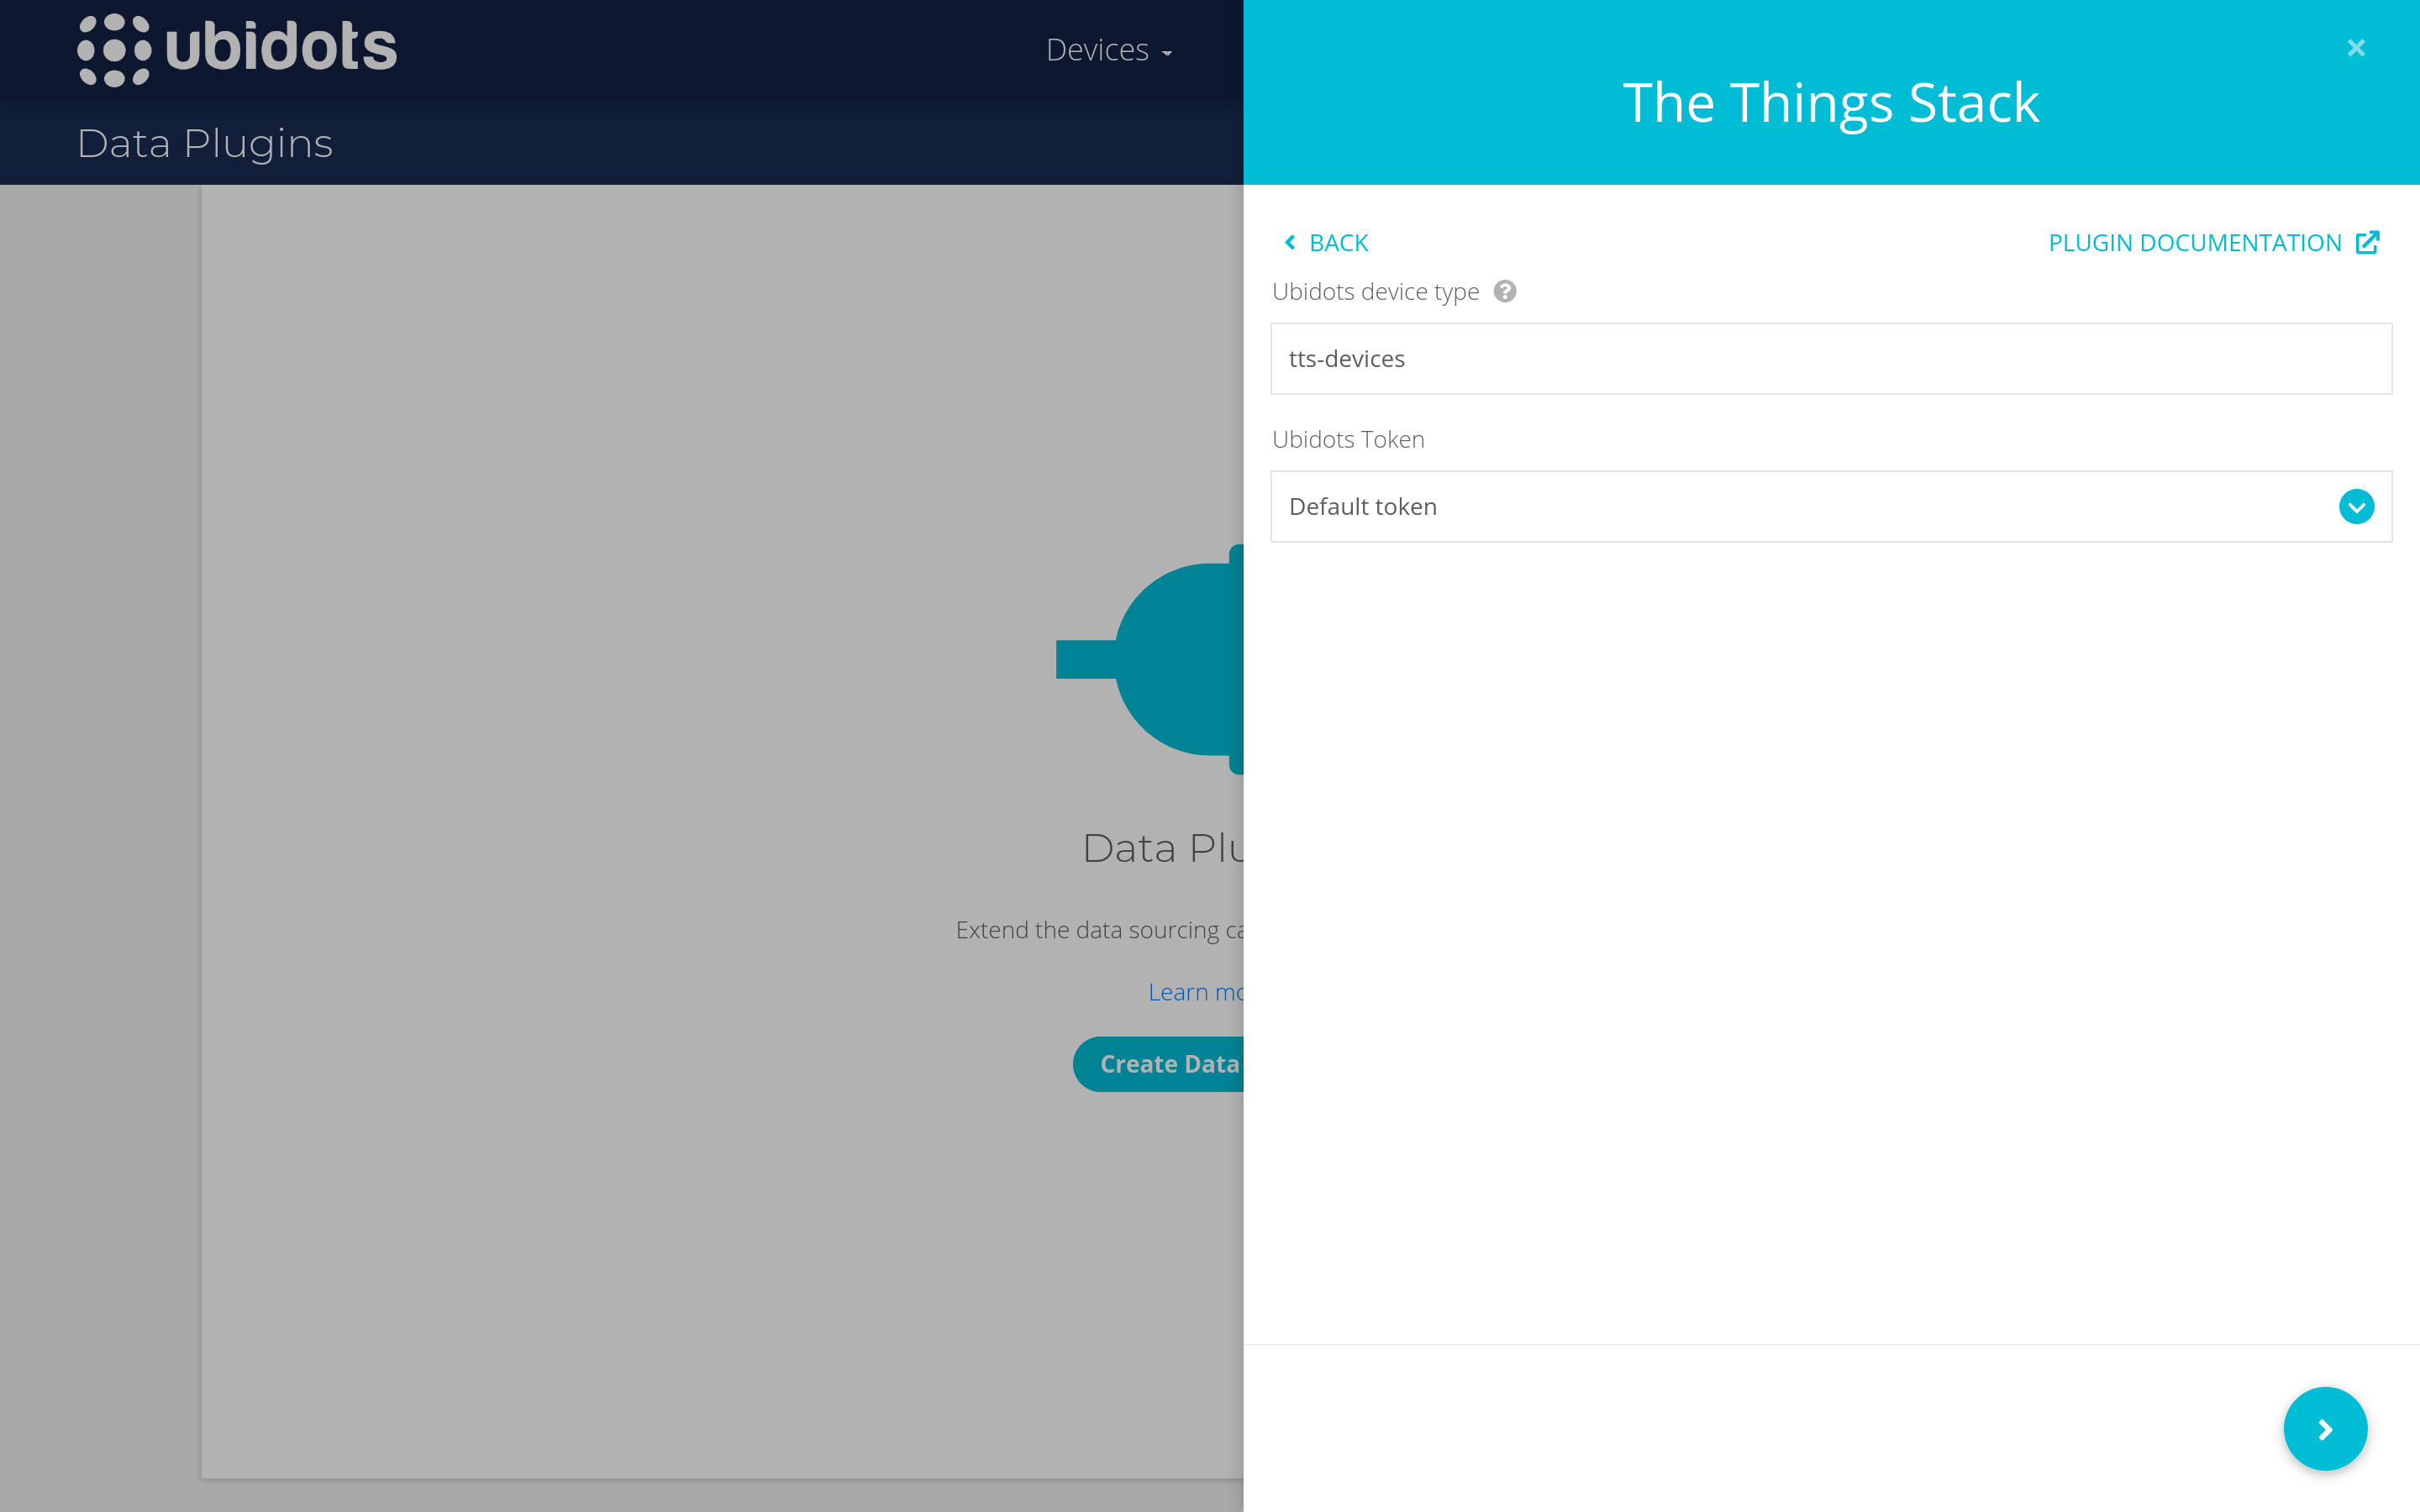
Next, you need to provide the name for a Ubidots device type after which a new device type will be created and linked to this plugin. This device type will later allow you to make changes for all devices that receive data through this plugin.
You also need to select a Ubidots token. You can use the Default token, but creating a new token specifically for this plugin is recommended.
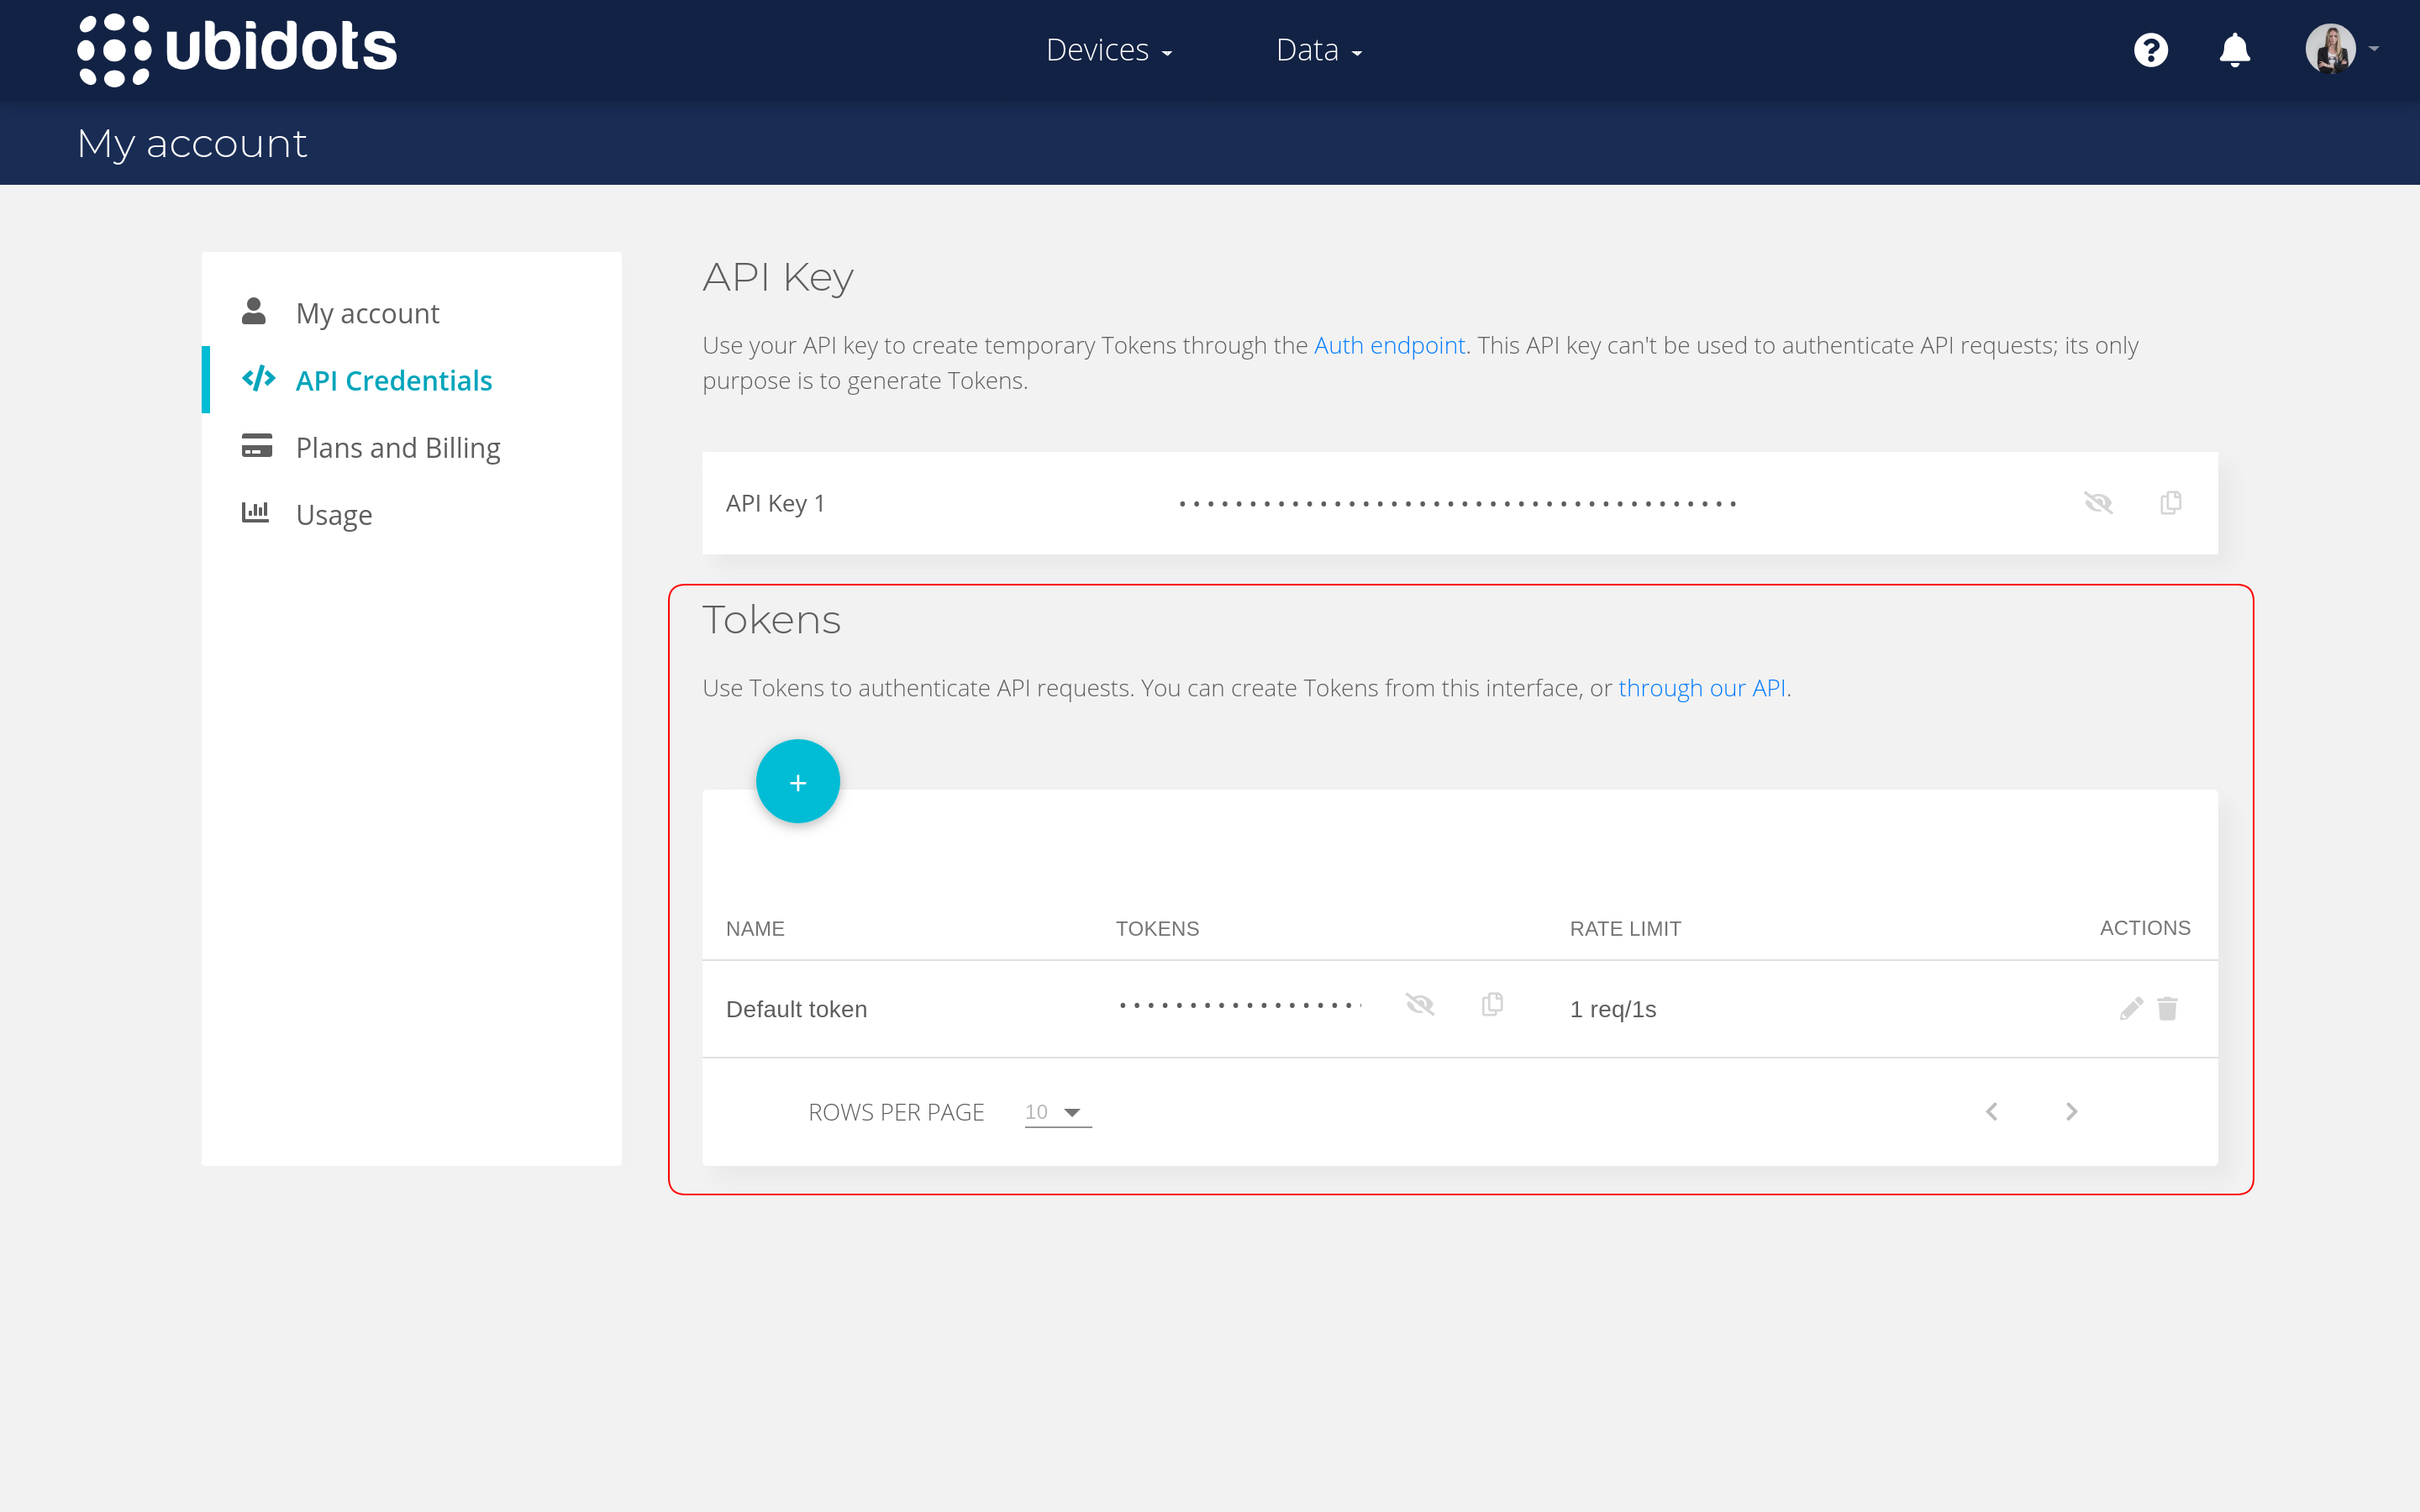
To create a new token, first click on your avatar in the upper right corner and select API Credentials. Then select More below the Default token and add a new token within the API Credentials page.
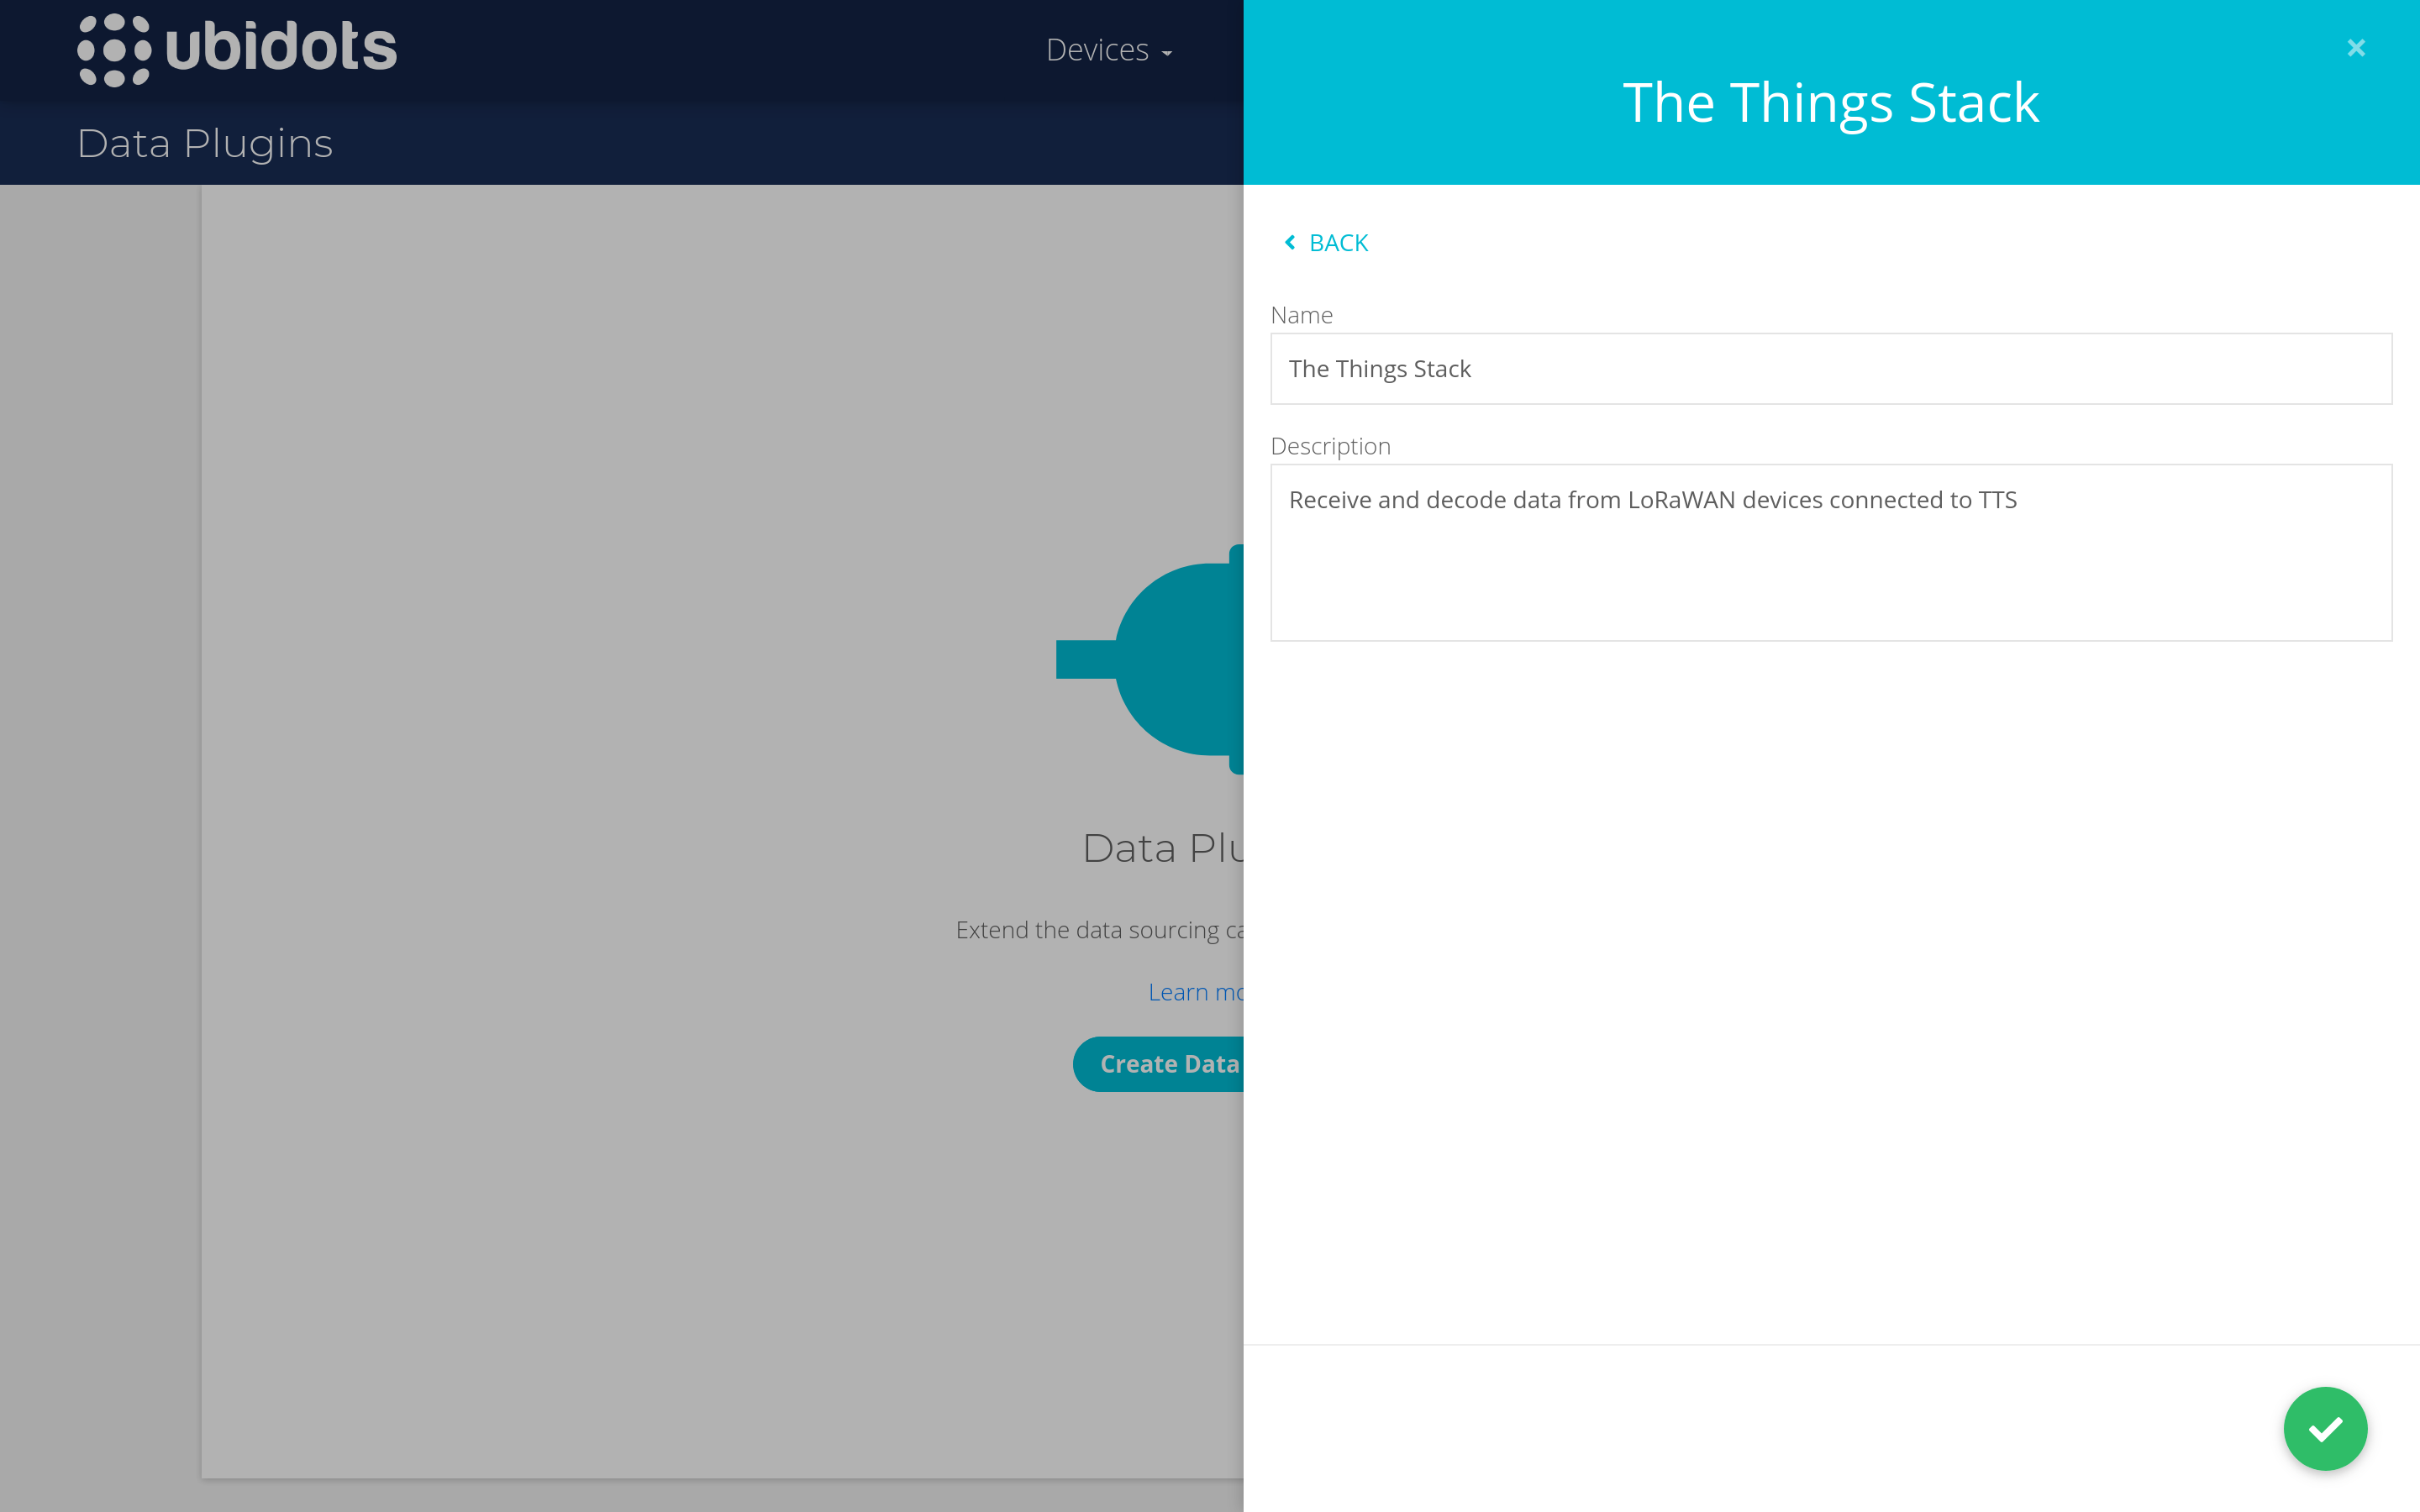
Select > to continue and then hit the checkmark to finish.
After a few moments, your newly created plugin will show the status Running.

To complete the integration with The Things Stack, you will need to provide the plugin ID and aforementioned token.
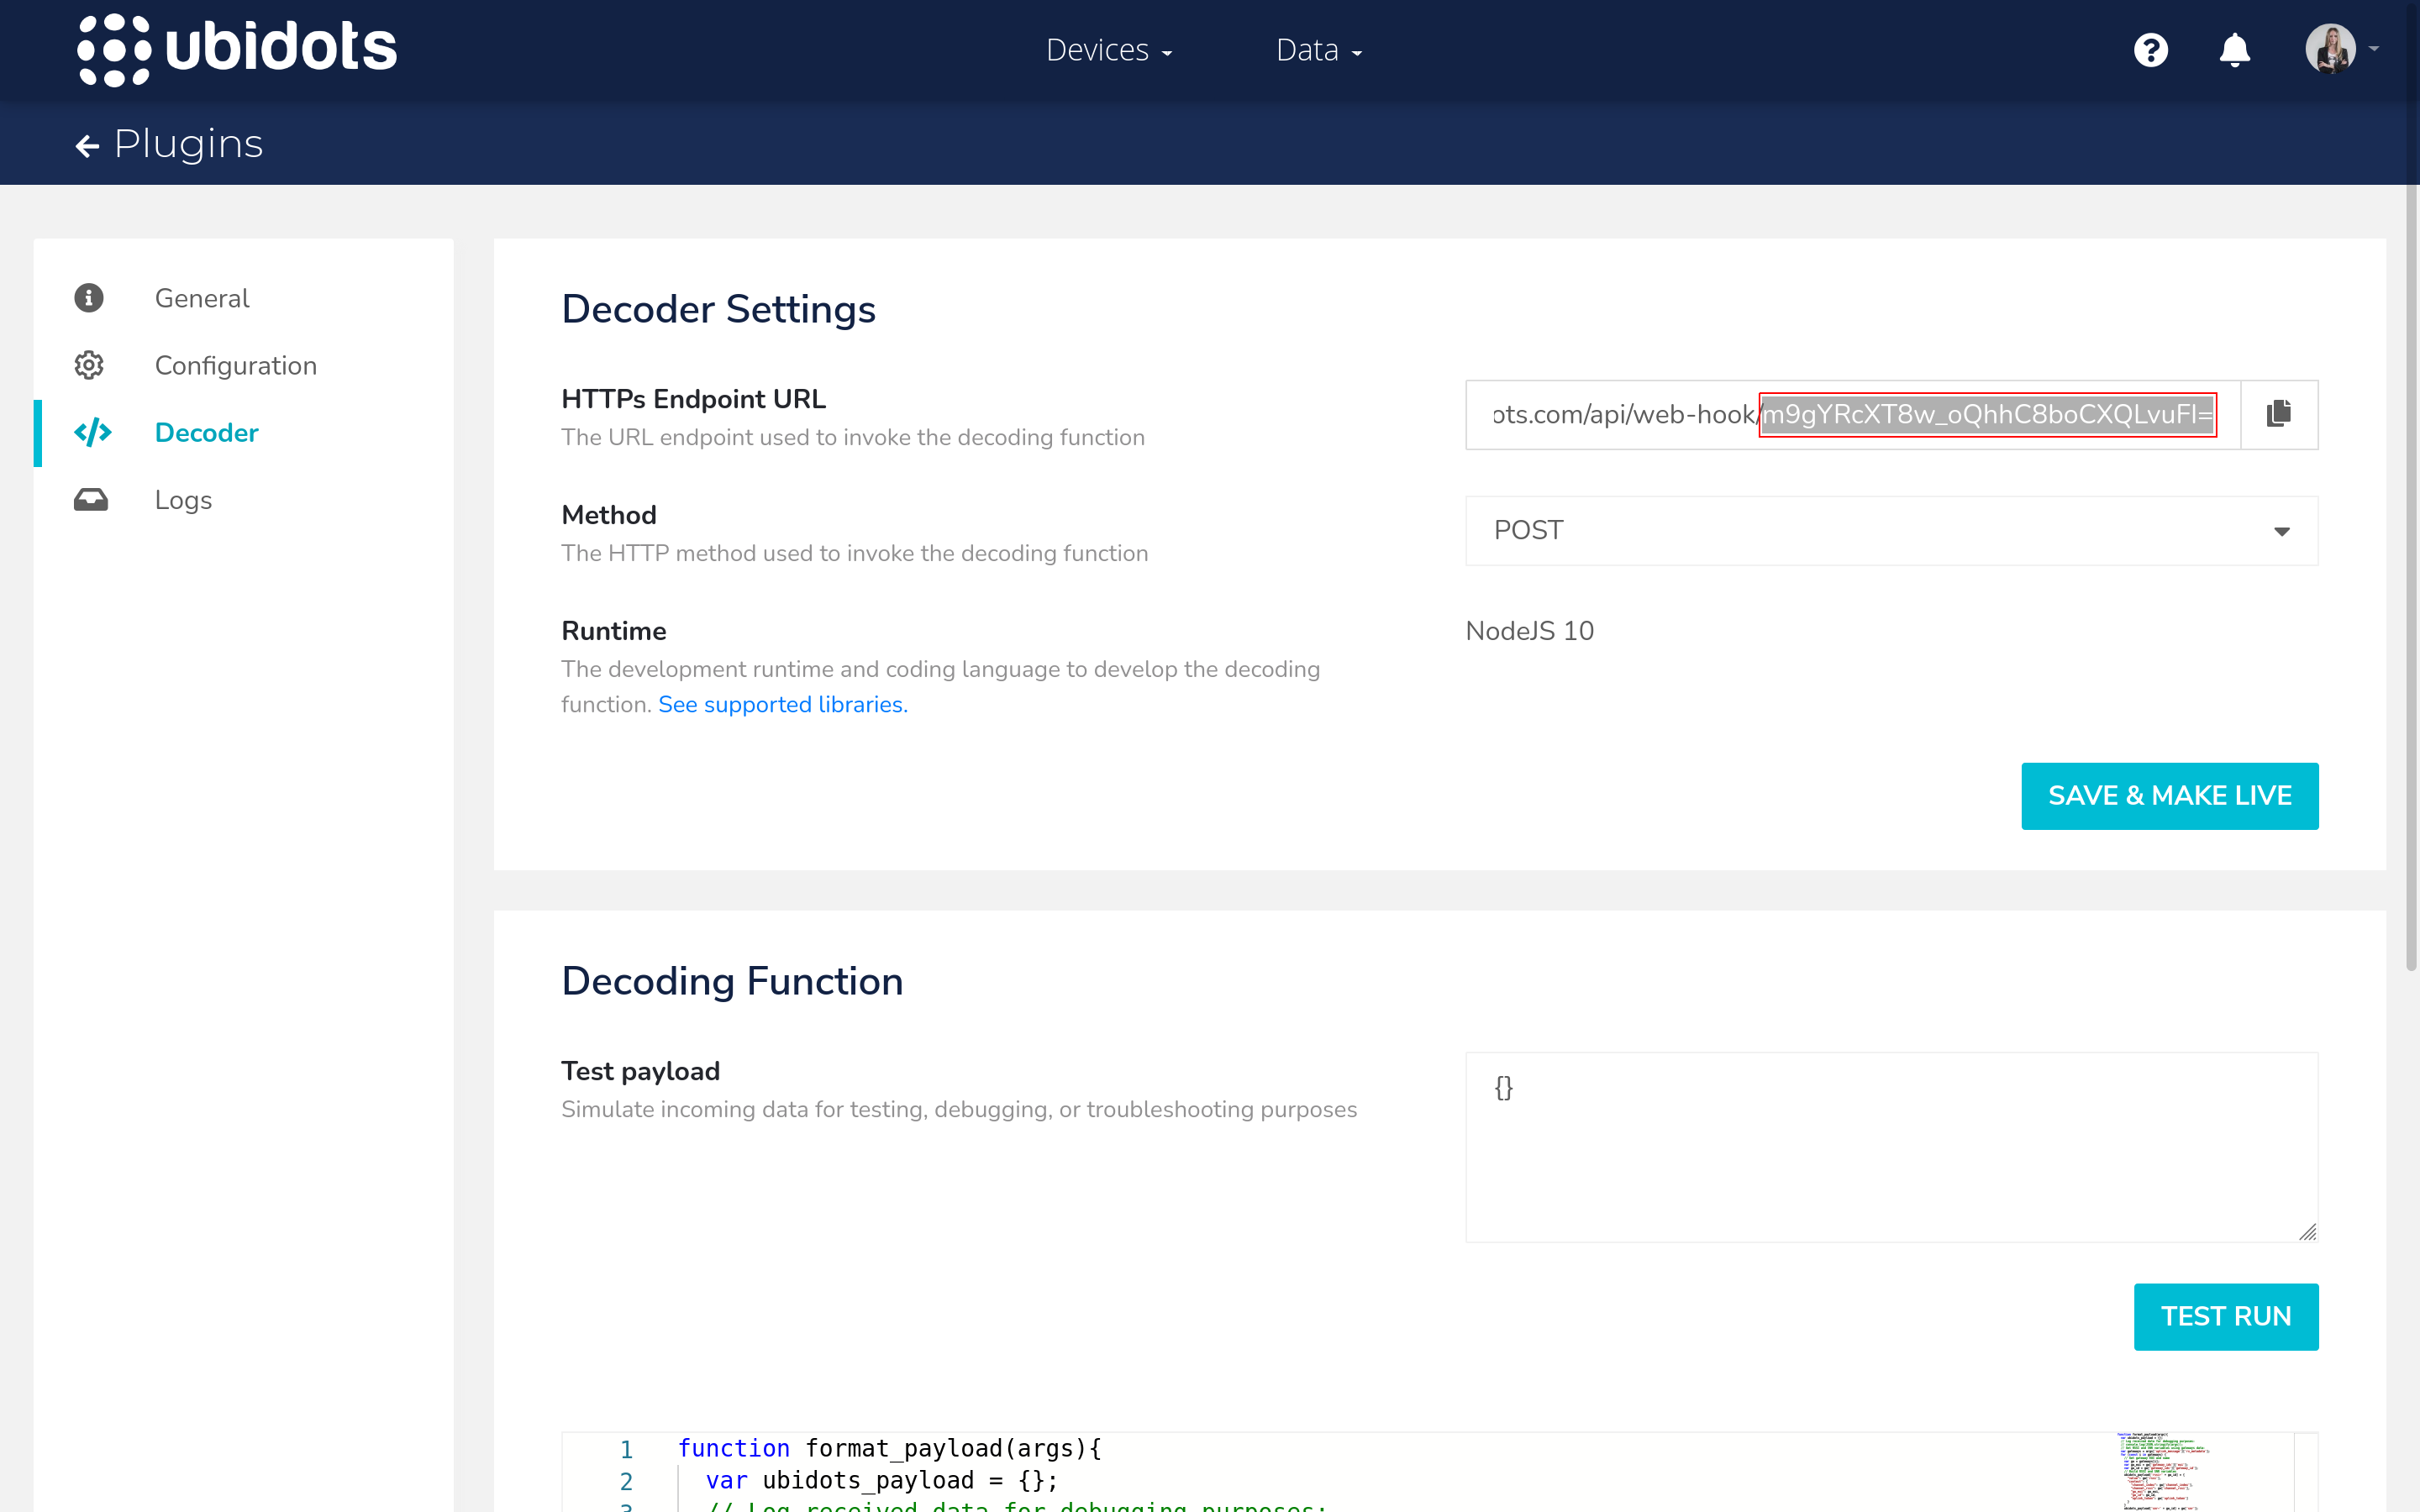
To find the plugin ID, click on your newly created plugin and navigate to the Decoder tab on the left. The plugin ID is available as part of the HTTPs Endpoint URL (as highlighted on the image below).
Setup Payload Decoder
To decode the payload that is being sent from your end device in uplink messages, in order to present it on the Ubidots dashboard, you have two quite simple options:
- to create an uplink payload formatter on The Things Stack (with a Ubidots-friendly format)
- to edit the pre-loaded sample decoder on Ubidots in a way that it decodes the Base64-encoded raw payload received from The Things Stack in
uplink_message.frm_payloadfield
In this section, we show you an example of how to do the first option. The pre-loaded sample payload decoder on Ubidots contains comments which can help you decode your payload either way.
If you are using an uplink payload formatter on The Things Stack to decode your payload, the decoded values will be contained in the uplink_message.decoded_payload field of your uplink message. See examples below.
Example JavaScript uplink payload formatter
function decodeUplink(input) {
  var bytes = input.bytes;
  var temperature = bytes[0] | bytes[2];
  var humidity = bytes[1]| bytes[3];
  return {
    data: {
      temperature: temperature,
      humidity: humidity
    },
    warnings: [],
    errors: []
  };
}
Example `uplink_message` object containing decoded payload
{
    "uplink_message": {
      "session_key_id": "AXqFkTMicRIyXZ/Mvzl02w==",
      "f_port": 8,
      "f_cnt": 202,
      "frm_payload": "ICw=",
      "decoded_payload": {
        "humidity": 44,
        "temperature": 32
      },
      "rx_metadata": [
        {
          "gateway_ids": {
            "gateway_id": "gw1",
            "eui": "B827EBFFFE8DB885"
          },
          "time": "2021-07-08T11:17:59.131695Z",
          "timestamp": 3940207243,
          "rssi": -27,
          "channel_rssi": -27,
          "snr": 9.2,
          "uplink_token": "ChIKEAoEc2VlZBIIuCfr//6NuIUQi5Xr1g4aDAjmvZuHBhDNk4rVAyD43Zy11u6C",
          "channel_index": 4
        }
      ],
      "settings": {
        "data_rate": {
          "lora": {
            "bandwidth": 125000,
            "spreading_factor": 7
          }
        },
        "coding_rate": "4/5",
        "frequency": "867300000",
        "timestamp": 3940207243,
        "time": "2021-07-08T11:17:59.131695Z"
      },
      "received_at": "2021-07-08T11:17:58.984396504Z",
      "consumed_airtime": "0.046336s"
    }
}
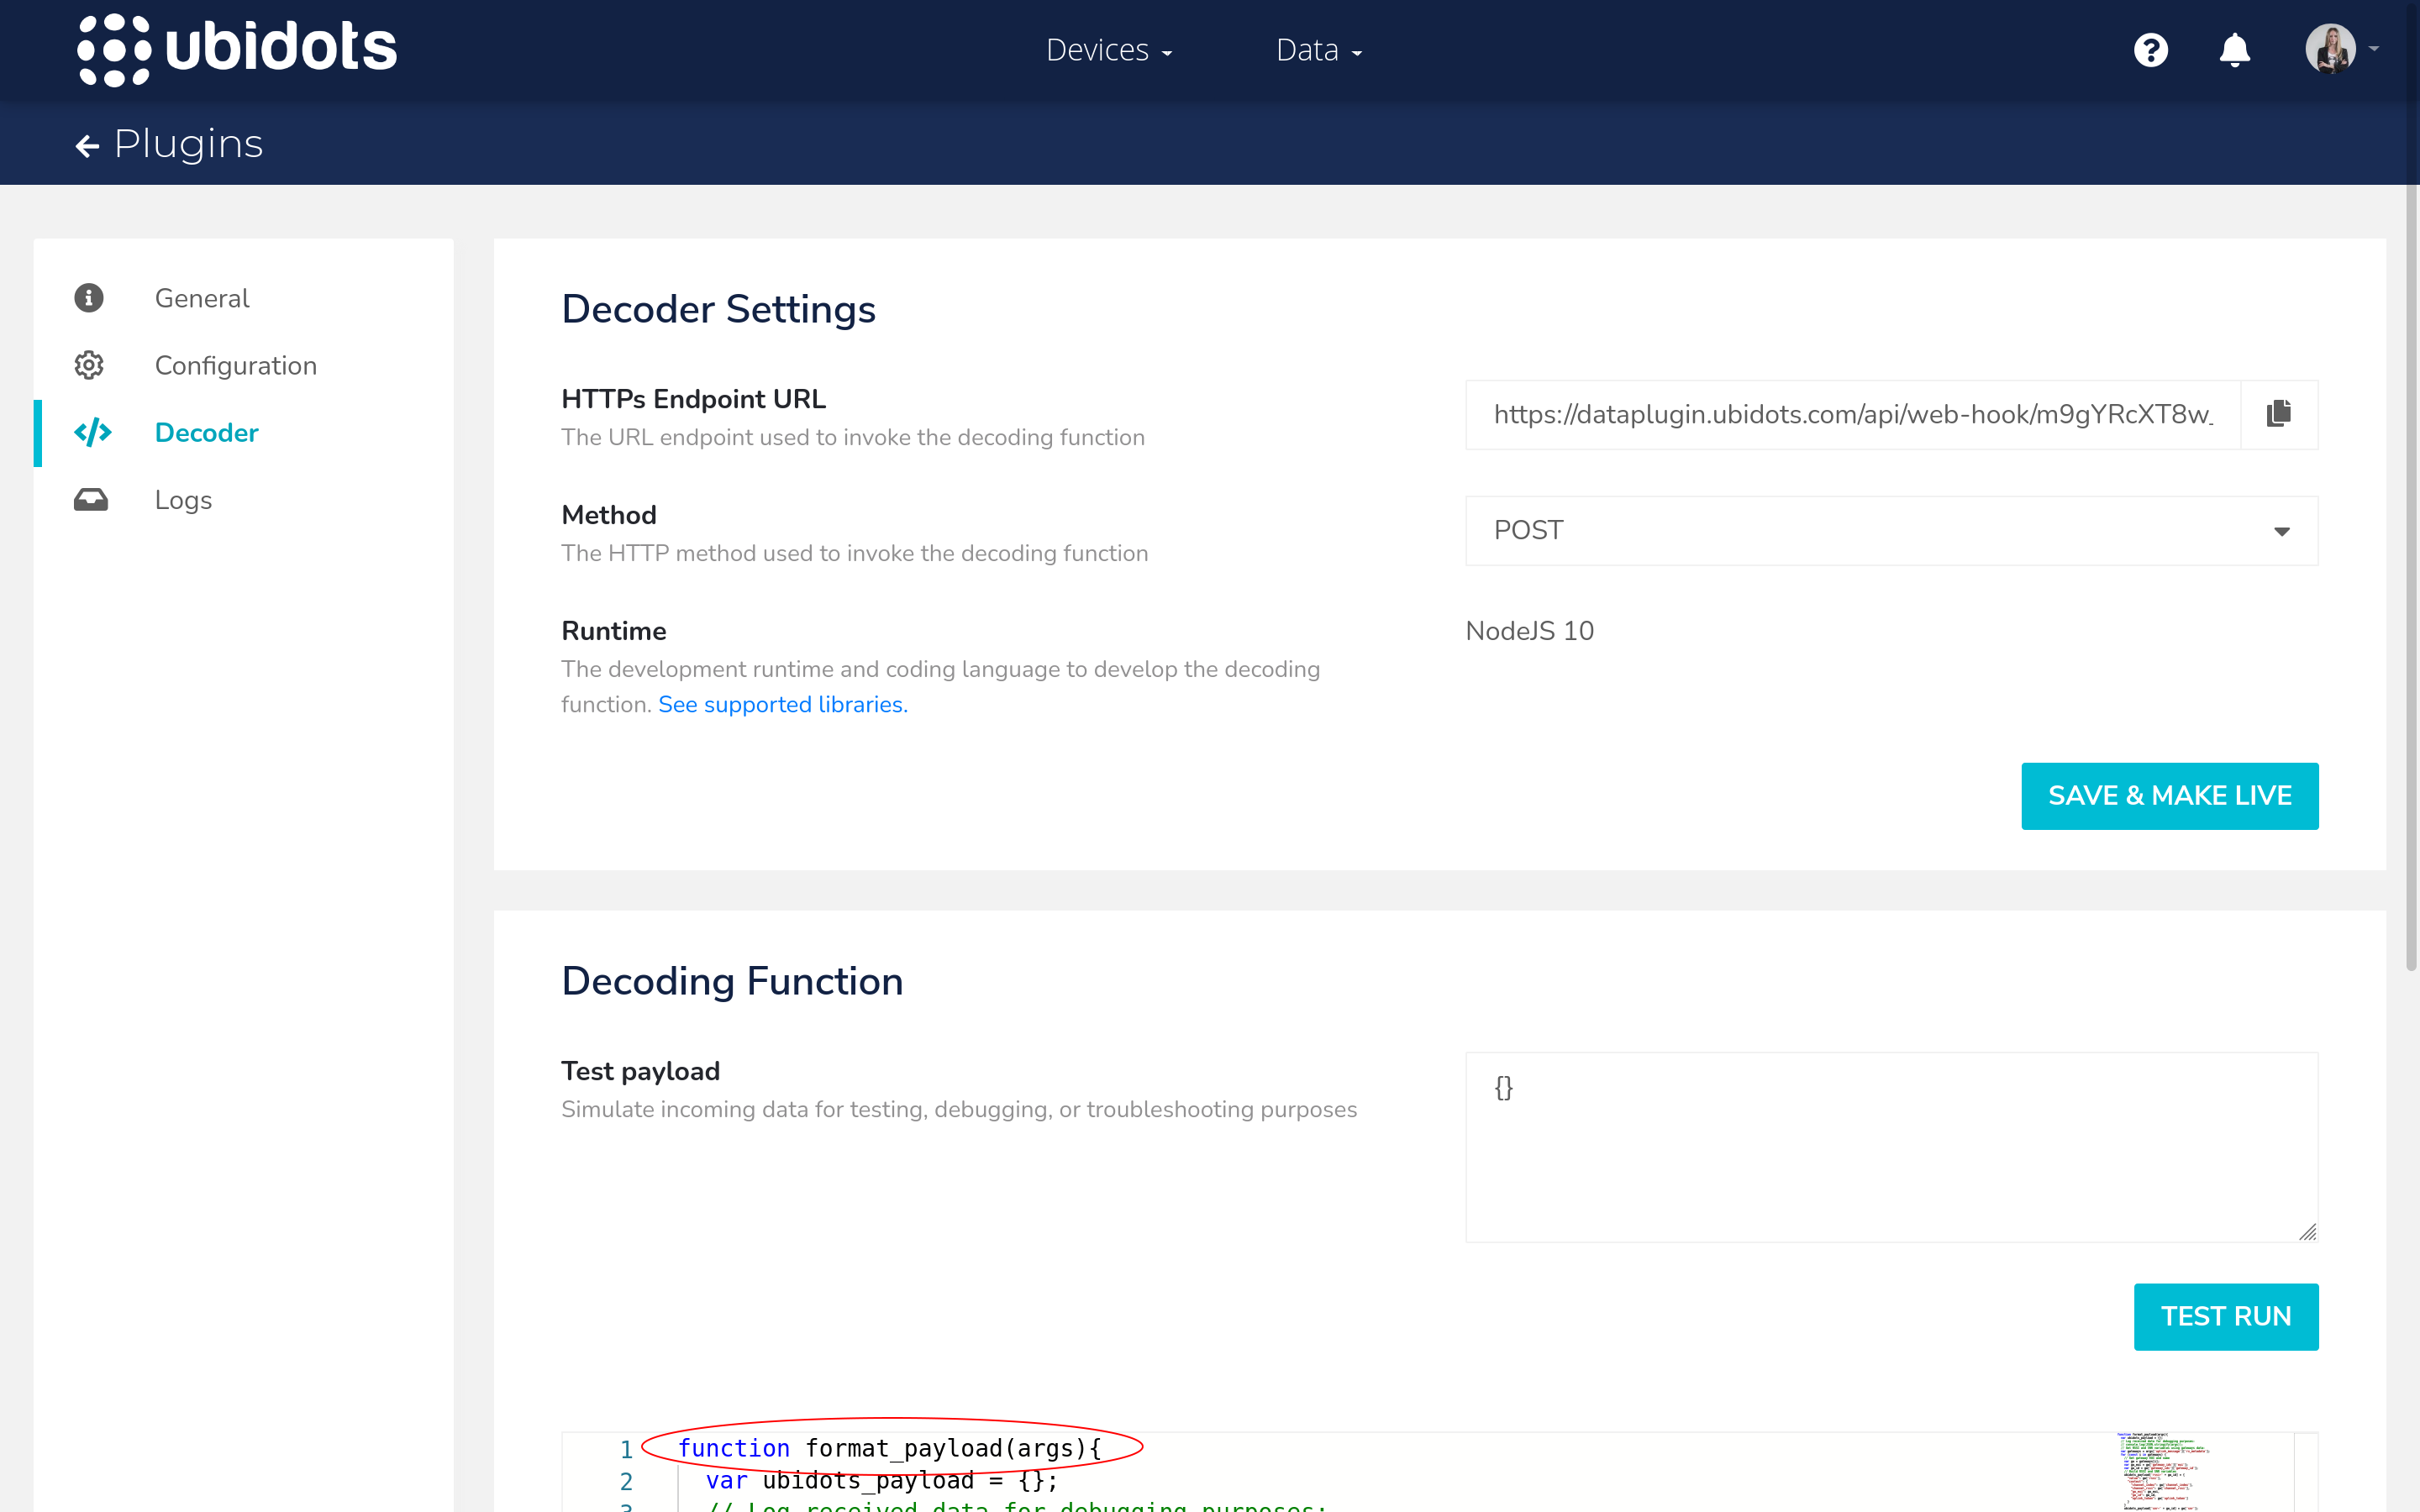
To ensure that Ubidots checks the decoded_payload field for decoded values, and not uplink_message.frm_payload, you need to uncomment the following line in the format_payload function that is a part of the sample payload decoder on Ubidots:
var decoded_payload = args['uplink_message']['decoded_payload'];
and you need to comment (or remove) the following lines in the same function:
let bytes =  Buffer.from(args['uplink_message']['frm_payload'], 'base64');
var decoded_payload = decodeUplink(bytes)['data'];
You can find Ubidots’ pre-loaded sample payload decoder in your newly created plugin’s menu, if you navigate to Decoder on the left and scroll down to the Decoding Function window. There you can edit it and finish with Save & Make Live.
Configure The Things Stack
When you have prepared the setup on Ubidots, it is the time to create a Webhook integration on The Things Stack by using the Ubidots Webhook template.
Note:
Advanced users can also use UbiFunctions module to complete this integration.On The Things Stack, navigate to Integrations → Webhooks and choose the Ubidots Webhook template.
Name your integration by filling in the Webhook ID.
Paste the Plugin ID and Ubidots token values from Ubidots.
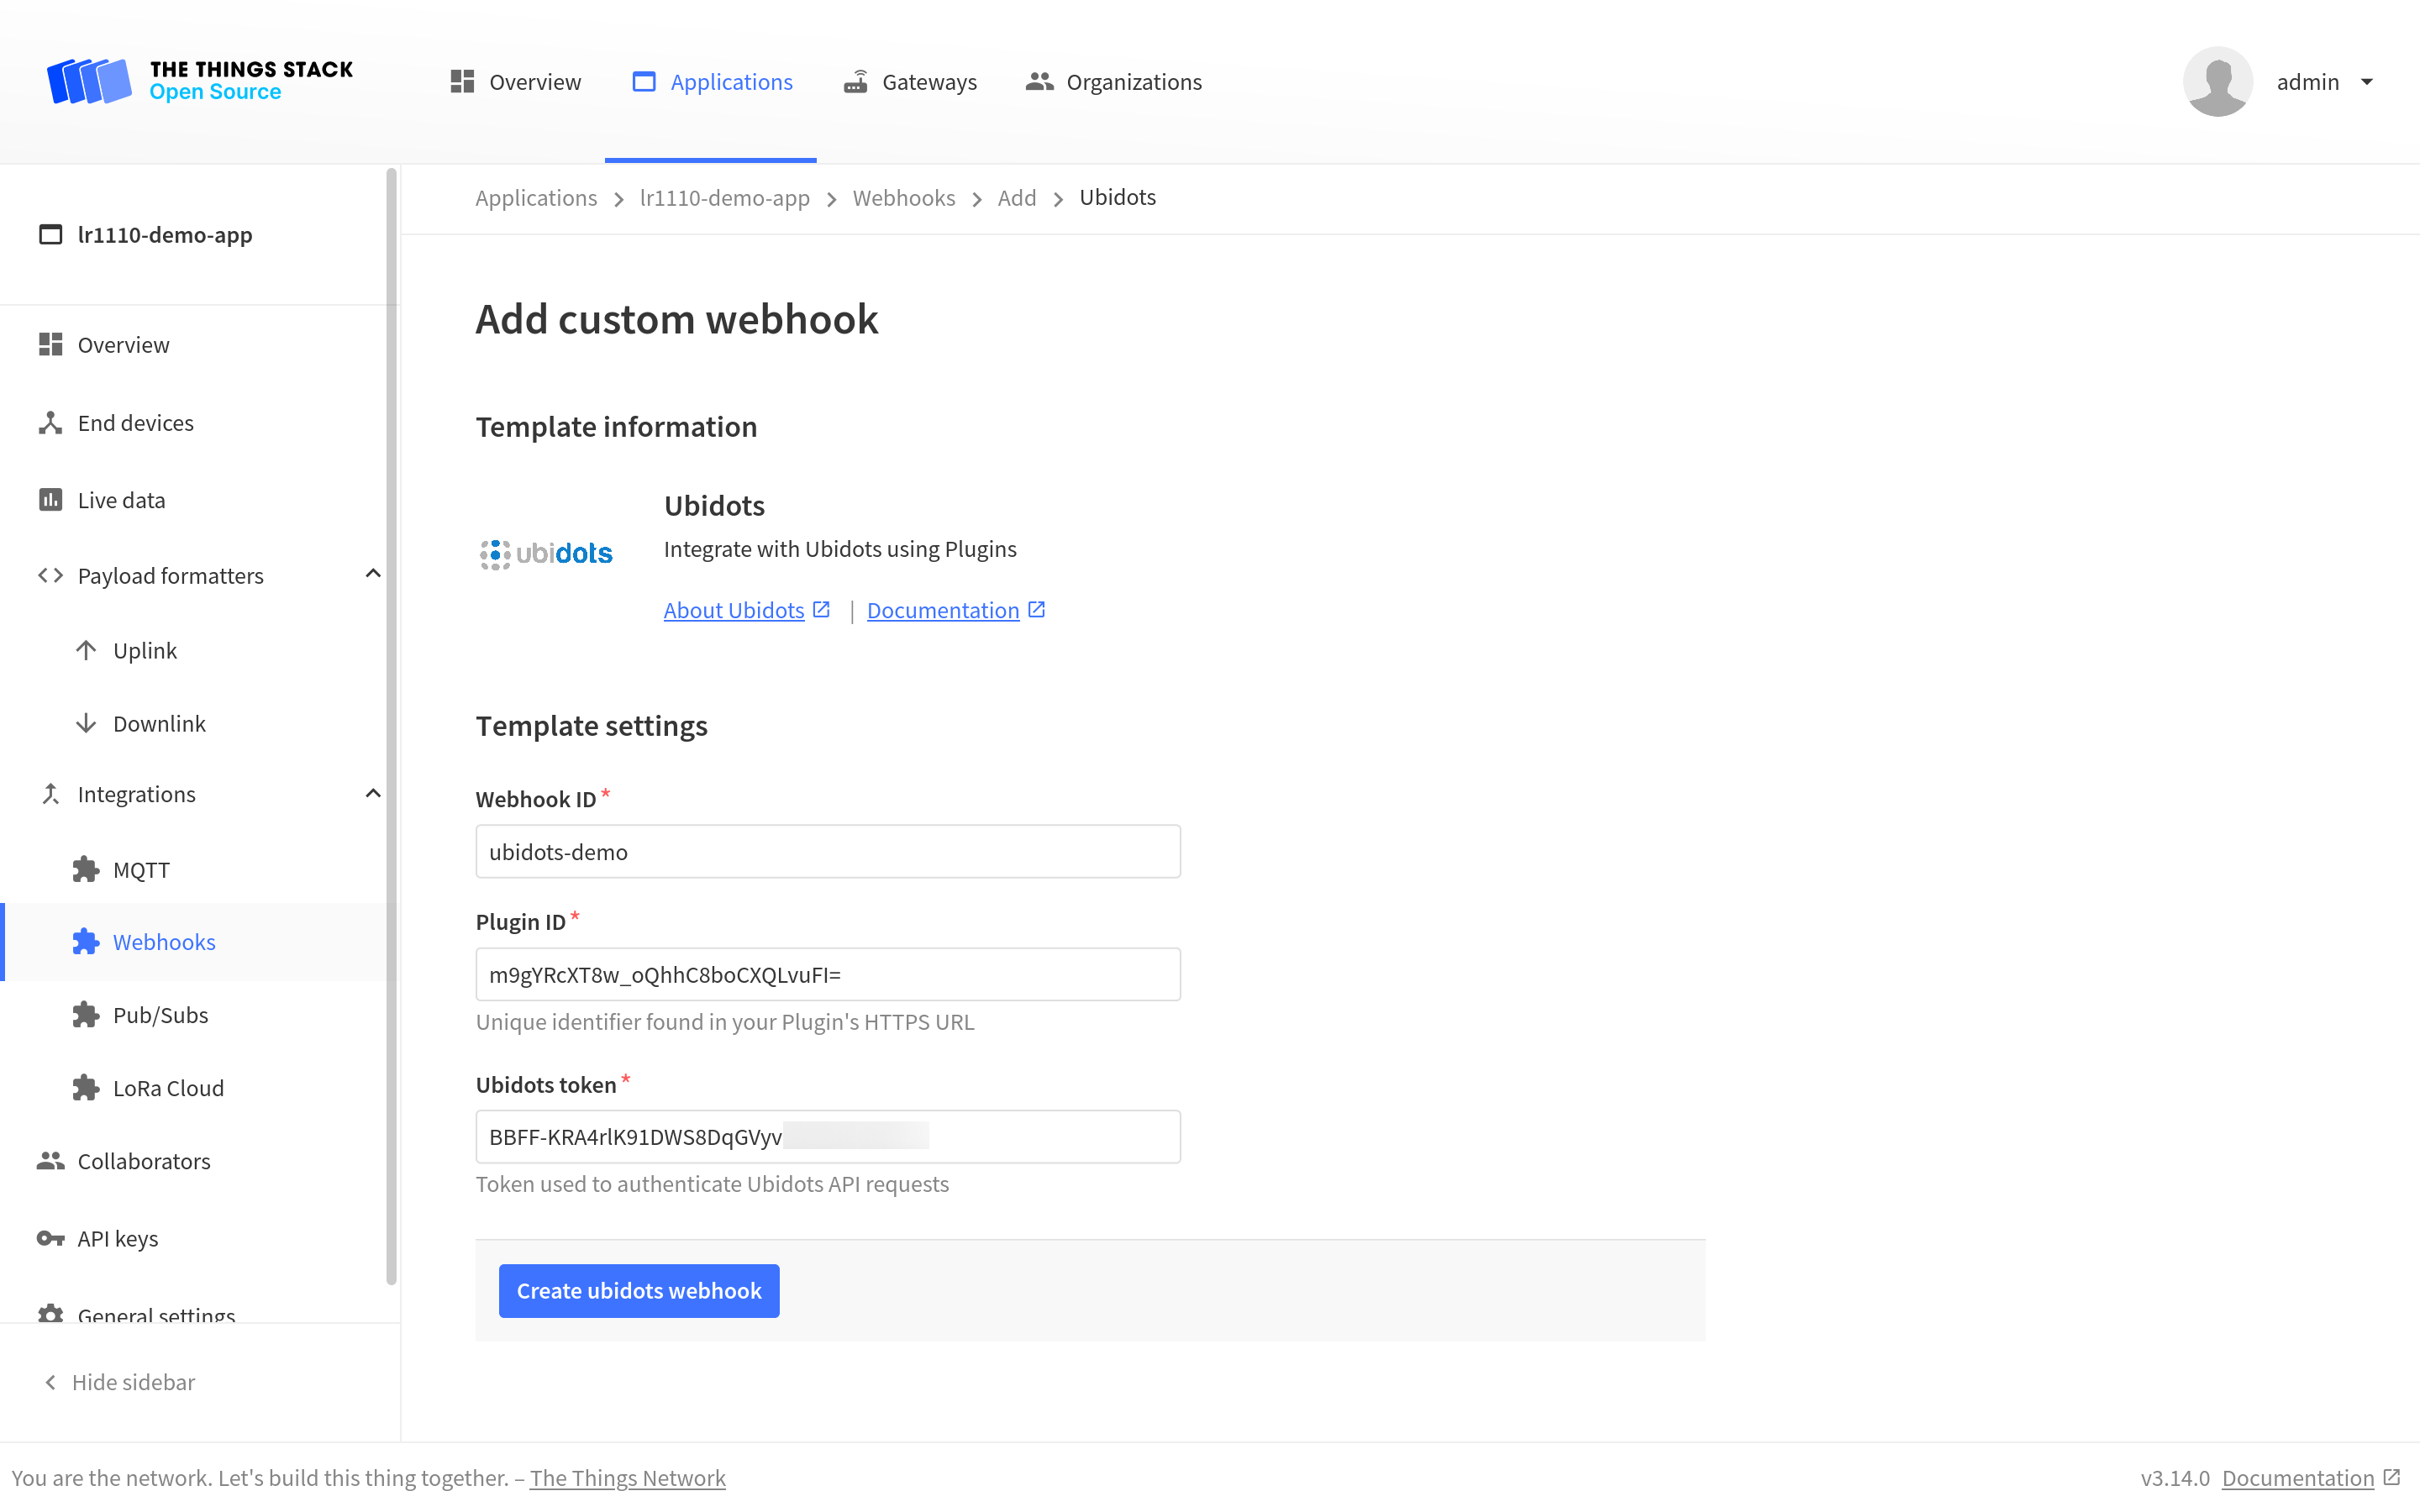
To see the values of all parameters of the Ubidots integration, click on the integration after you created it with the Webhook template.
Monitor Your Data
After you have completed the integration, navigate to Devices menu. You will see your end device appearing in the end devices list as soon as it sends an uplink message.

Select your device to enter its dashboard. Some variables are automatically loaded from uplink metadata, while some are loaded as a payload decoder result (like humidity and temperature in this example).

You can further use Ubidots features to monitor, process or visualize your data.