This section shows how to build an end-to-end solution to control the Kuando Busylight with the Generic Node Sensor Edition (GNSE).
Registering The Things Indoor Gateway
Register The Things Indoor Gateway on The Things Stack by following these instructions. Once registered, your gateway will be ready to receive uplinks and forward downlinks.
Creating an Application
Create a new application on The Things Stack by following these instructions.
Adding GNSE
Add GNSE to The Things Stack by following these instructions.
Note:
Your GNSE comes pre-programmed with a vanilla application that can be used with this project. Full instructions on how to program GNSE can be found here.After adding GNSE, navigate to its Live data tab (Applications -> your application -> End devices -> your GNSE).
Power cycle your GNSE by either pressing the reset button or removing and re-inserting its batteries. Once power cycled, you can immediately see messages arriving, such as Accept join-request and Forward join-accept.
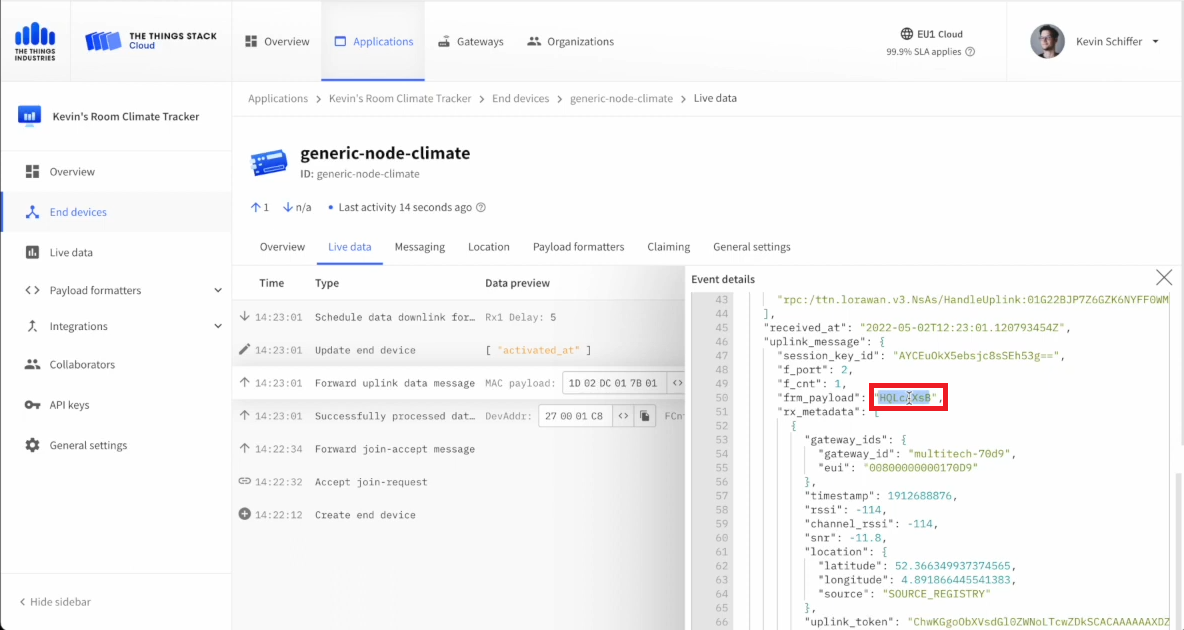
Now press the user button on top of the GNSE. In the Live data section, you should see an uplink data message received by The Things Stack application.
Select the uplink message. Scroll down and locate the frm_payload (frame payload) field. Note that the payload is encoded and requires decoding to understand it.
Using Payload Formatters
To decode the payload you will need a payload formatter.
Create a payload formatter for the uplink messages using the following JavaScript formatter code:
function decodeUplink(input) {
  var data = {};
  data.batt_volt = input.bytes[0] / 10;
  data.temperature = ((input.bytes[1] << 8) + input.bytes[2] - 500) / 10;
  data.humidity = ((input.bytes[3] << 8) + input.bytes[4]) / 10;
  data.button_press = input.bytes[5];

  return {
    data: data,
  };
}
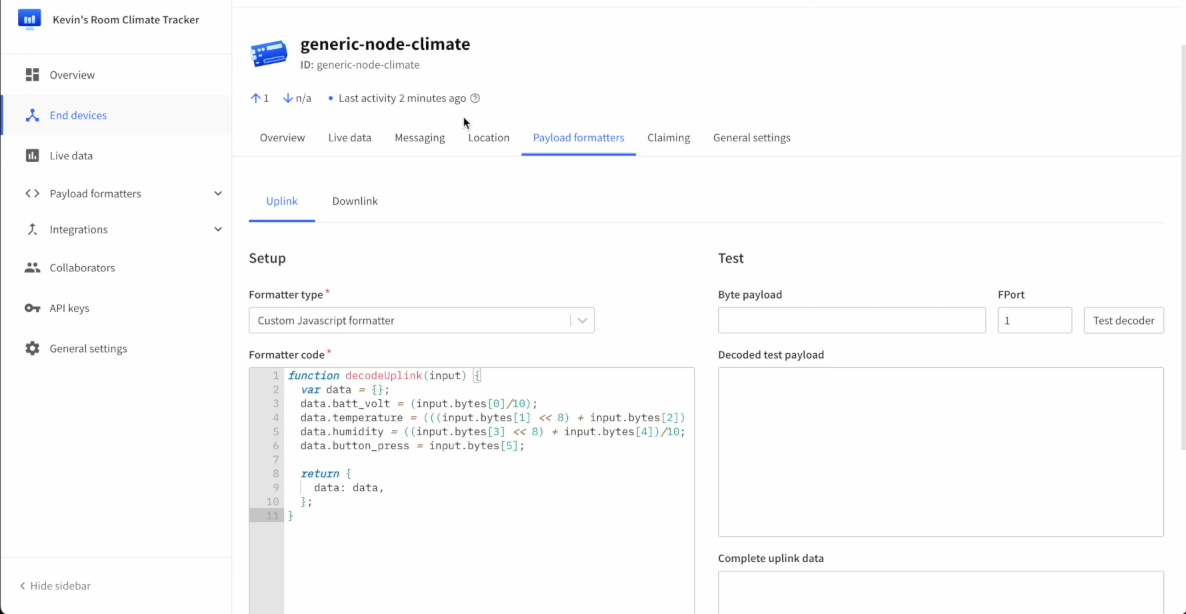
To test it, go back to the Live data tab and copy the MAC payload (find it in the Forward uplink data message event).
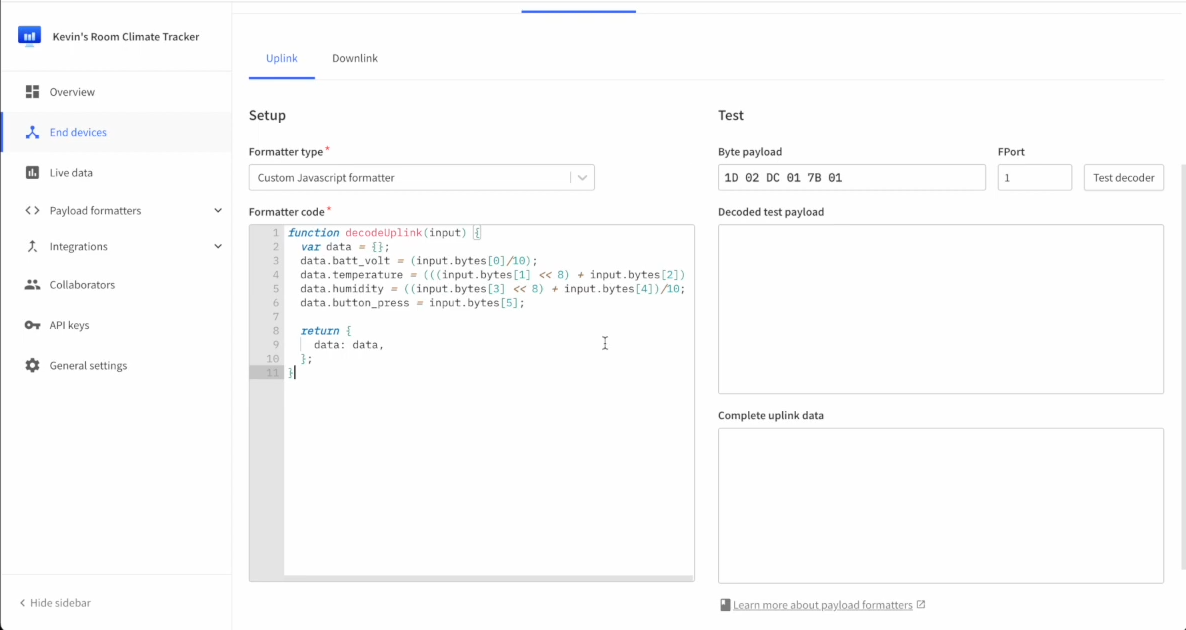
Next paste it in the Byte payload field. Then press the Test decoder button. The result of decoding will be displayed in the Decoded test payload box.
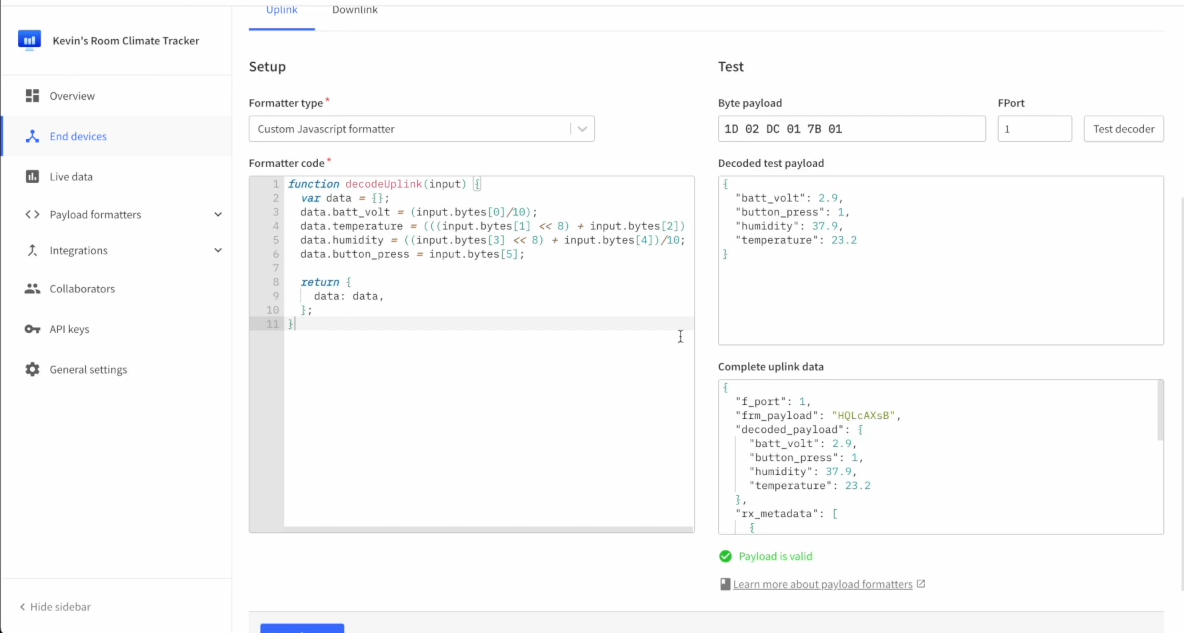
Select Save changes.
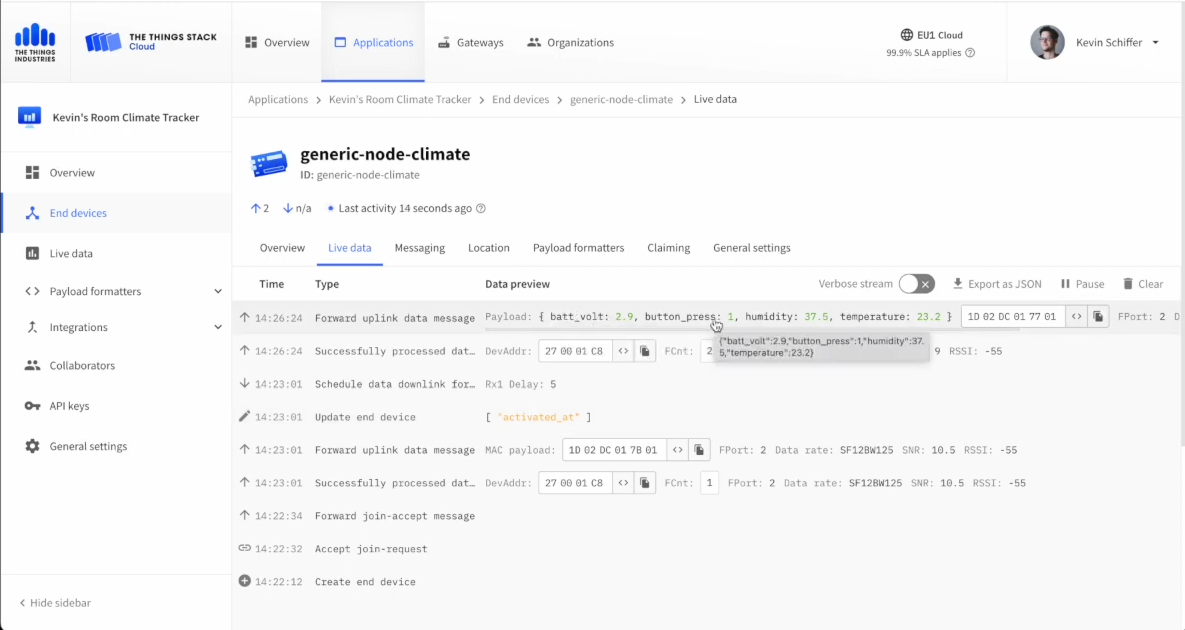
Now go back to the Live data tab and press the user button on GNSE. The payload of the uplink data message gets decoded as shown below:
Creating an Integration using Webhooks
A webhook helps you to send data from one application to another whenever a given event occurs. In this solution, The Things Stack application will send the temperature received by the sensor to the custom application through a webhook to display a temperature graph.
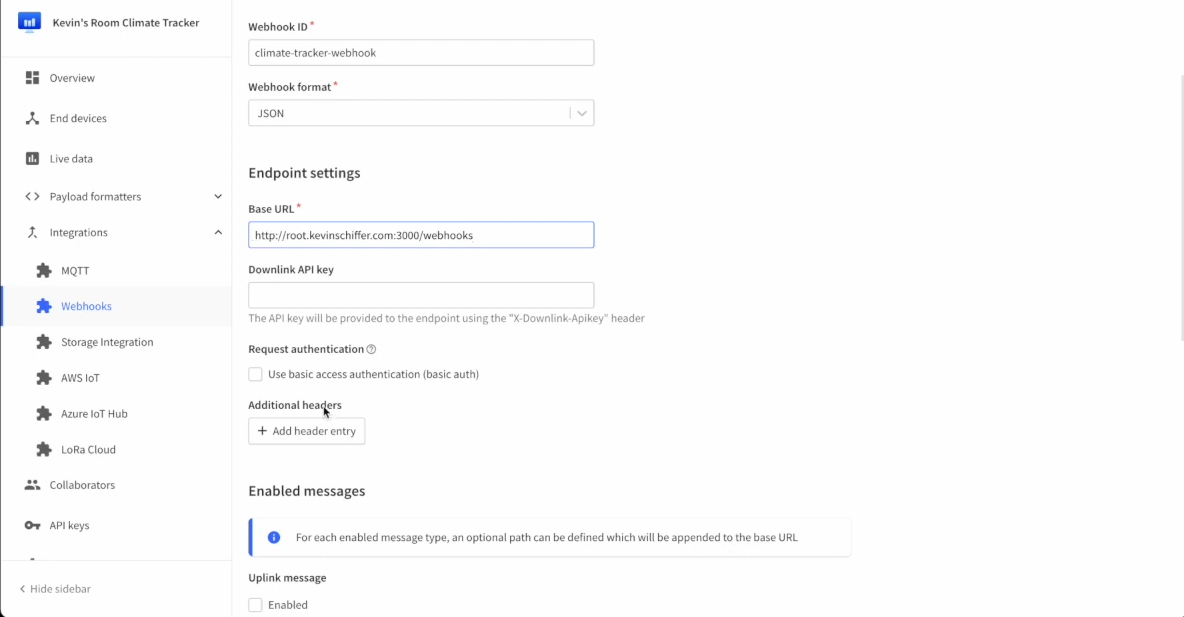
Create a custom webhook in JSON format by providing the base URL and endpoint, for example, http://root.yourhost.com:3000/webhooks. Select the checkbox Enabled next to the Uplink message event type. This will configure your webhook to send all uplink messages from your device to your custom application.
Node.js Application
A simple Node.js application can be used to expose an HTTP server that takes the temperature and humidity data received through the webhook and displays it on a chart. The source files you need for this project can be found in this GitHub repository.
Install Node.js and NPM (or yarn) on your computer. Installation instructions for each software can be found on their respective websites.
Run yarn install or yarn to install all its dependencies.
Clone the GitHub repository to your computer by typing the command git clone git@github.com:kschiffer/tts-demo-app.git
Create a file named config.env inside the tts-demo-app directory. Use the following commands:
cd tts-demo-app
vim config.env
Type the following content:
export TTN_APP_ID=yourname-climate-tracker
export API_KEY=
export TTN_WEBHOOK_ID=
export TTN_DEVICE_ID=
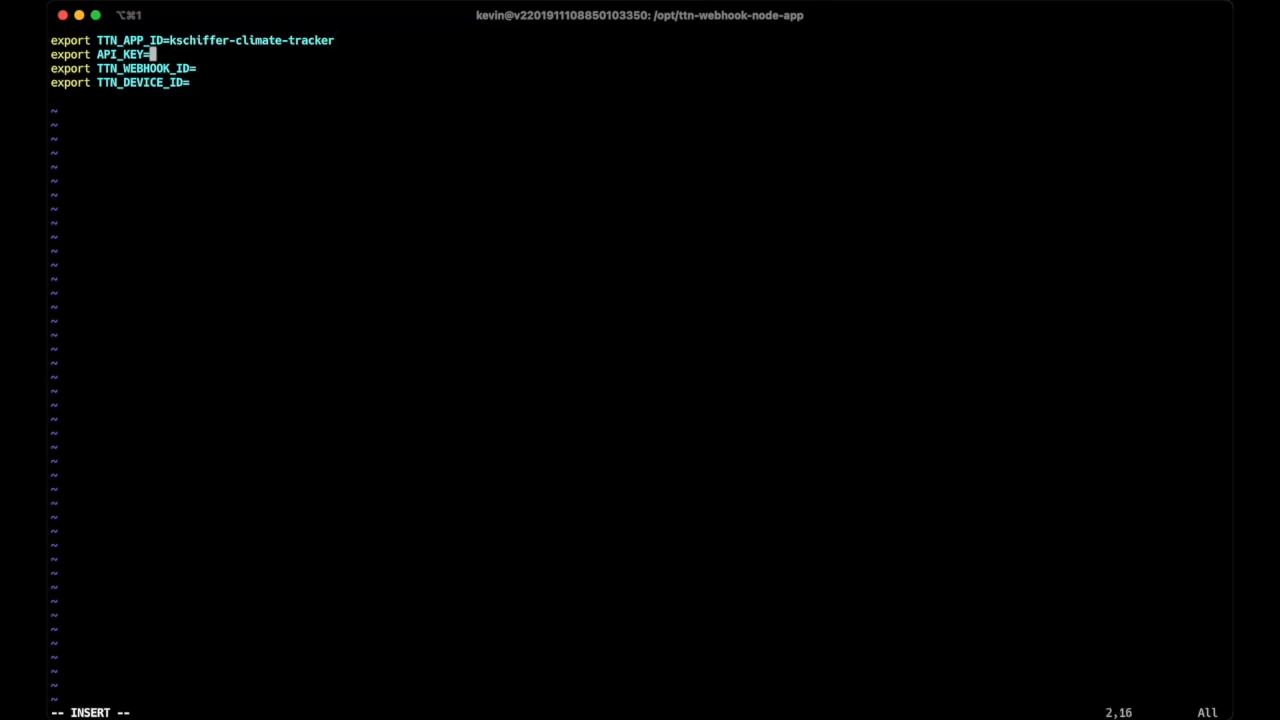
After editing, your configuration file looks something like this:
Save the configuration file ([esc][:wq][enter]), source it (source config.env) and then start the server (node index.js).
Find the index.js file in the tts-demo-app directory and open it. Edit the webhook endpoint (/webhooks) to match the endpoint you provided in the previous section.
app.post('/webhooks', (req, res) => {
  // Update chart
  const value = req.body.uplink_message.decoded_payload
  values.push(value)
  io.emit('data', value)
Open a web browser and go to the address your server is exposing. The address is something like this: http://yourhost.com:3000.
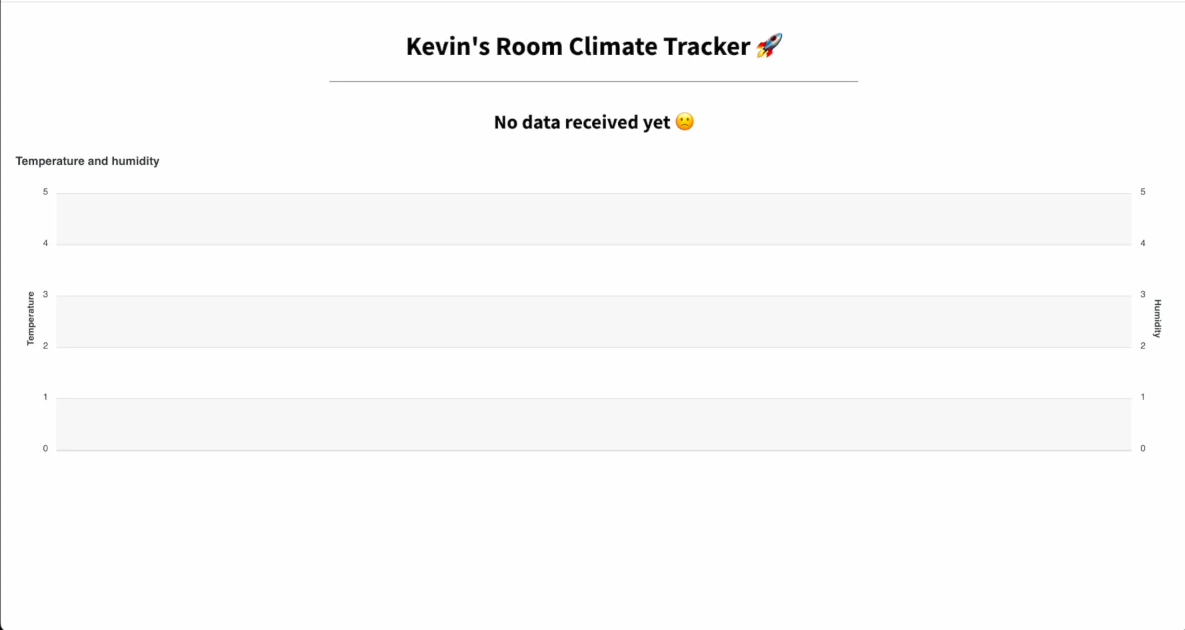
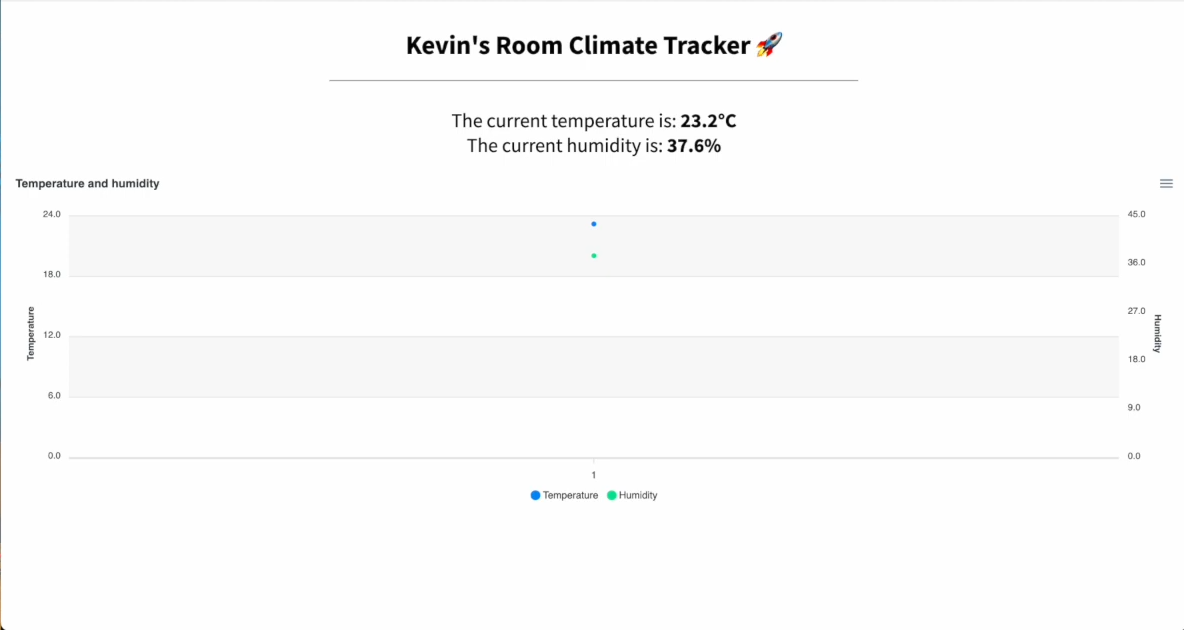
Now press the push button on GNSE. The current temperature and humidity will be immediately plotted on the chart.
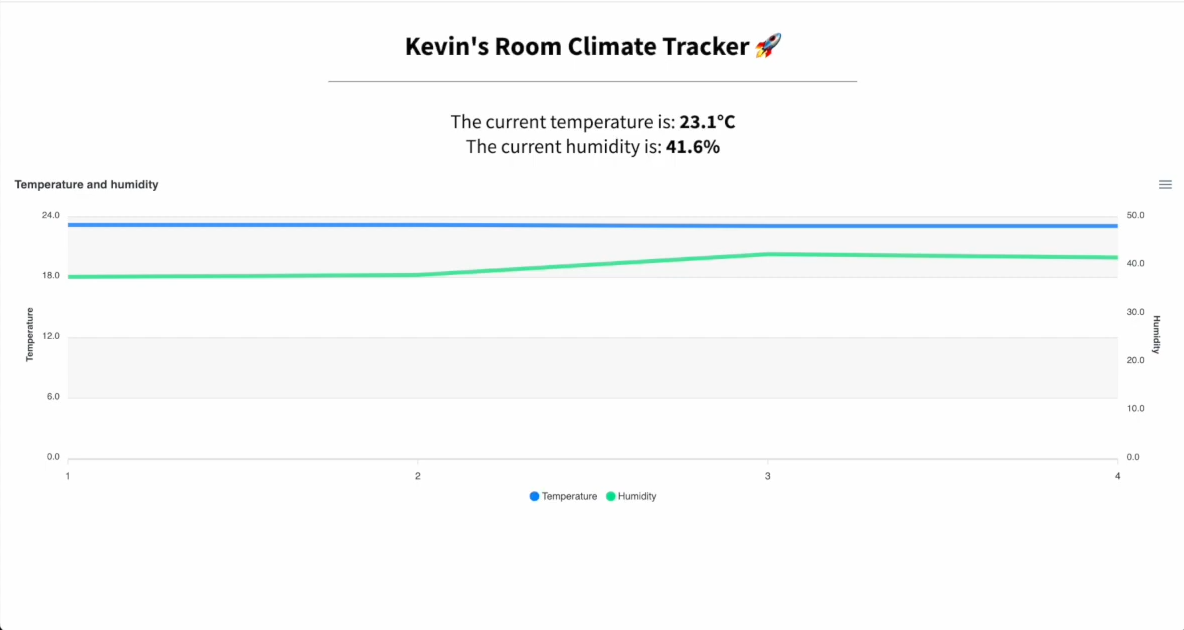
Press the push button a few more times and see how your chart behaves in time.
Adding Kuando Busylight
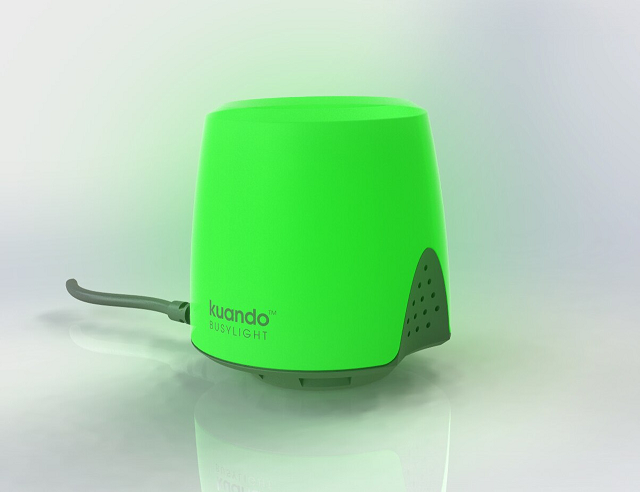
Kuando BusyLight is a light device that you can control using LoRaWAN downlinks. It is a class C end device that opens continuous receive windows so it is capable of receiving downlinks anytime.
To register the Kuando Busylight with The Things Stack, follow the steps outlined in Manually Registering an End Device section in the Adding Devices guide. When adding the device, make sure to select Class C (Continuous) from the Additional LoRaWAN class capabilities drop-down menu. You can find this by expanding the Show advanced activation, LoRaWAN class and cluster settings section.
Sending Downlink Messages to Kuando Busylight from The Things Stack Application
Let’s have a look at how to schedule downlink messages from The Things Stack application to control the Busylight.
In The Things Stack Console select the Messaging tab and then select the Downlink tab. Then configure the downlink as follows:
- Insert Mode: Replace Downlink Queue
- FPort:
15(as per the datasheet) - Payload type: Bytes
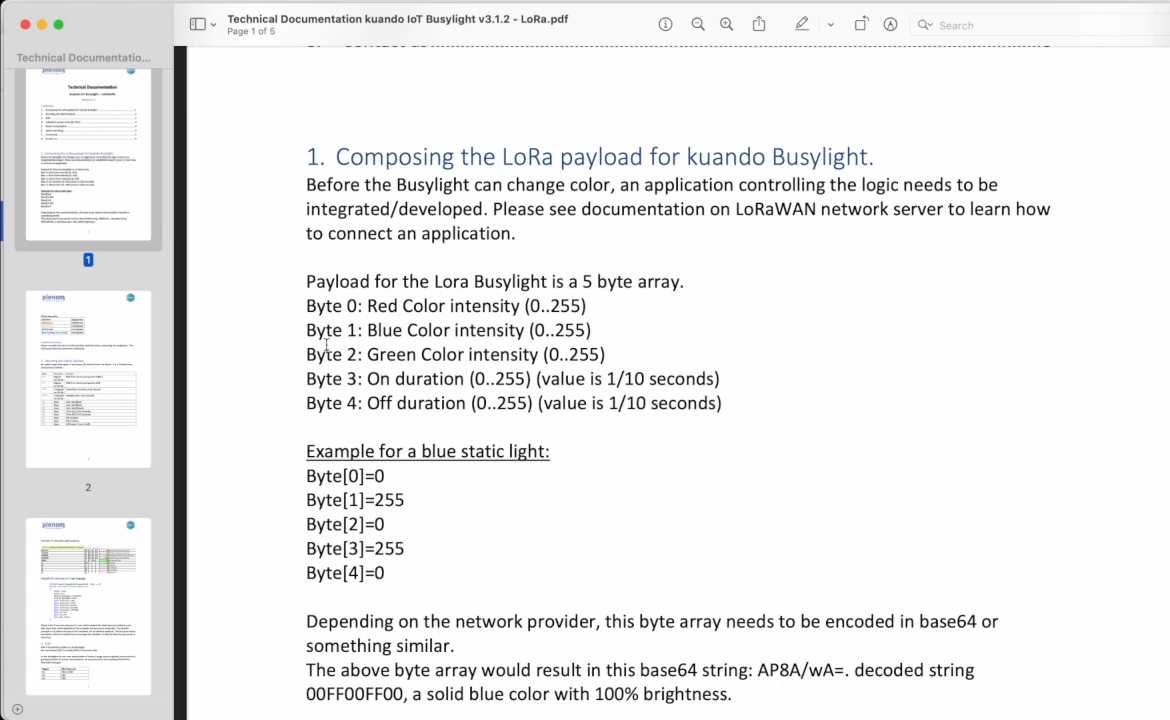
- Payload: type in FF FF FF FF 00 (this makes the Busylight solid white, no blinking)
Here is the payload structure for the downlink messages for your reference:
Select the Schedule downlink button. The Busylight will turn on solid white.
If you want to turn off the Busylight, type in FF FF FF 00 FF in the Payload text box and then select the Schedule downlink button again.
Going further
Editing the config.env file enables your custom application to read the button press event from an uplink message and then compose and send a downlink message through the webhook to ON or OFF the Busylight accordingly. Here is the code snippet:
// Switch busylight
  if (API_KEY && value && value.button_press) {
    isOn = !isOn
    const payload = Buffer.from(isOn ? new Uint8Array([255, 255, 255, 255, 0]) : new Uint8Array([255, 255, 255, 0, 255])).toString('base64')

    axios({
      method: 'post',
      url: webhookUri,
      headers: { Authorization: `Bearer ${API_KEY}` },
      data: {
        downlinks: [{
          frm_payload: payload,
          f_port: 15
Stop your custom application server ([Ctrl + C]) and open the configuration file again (vim config.env).
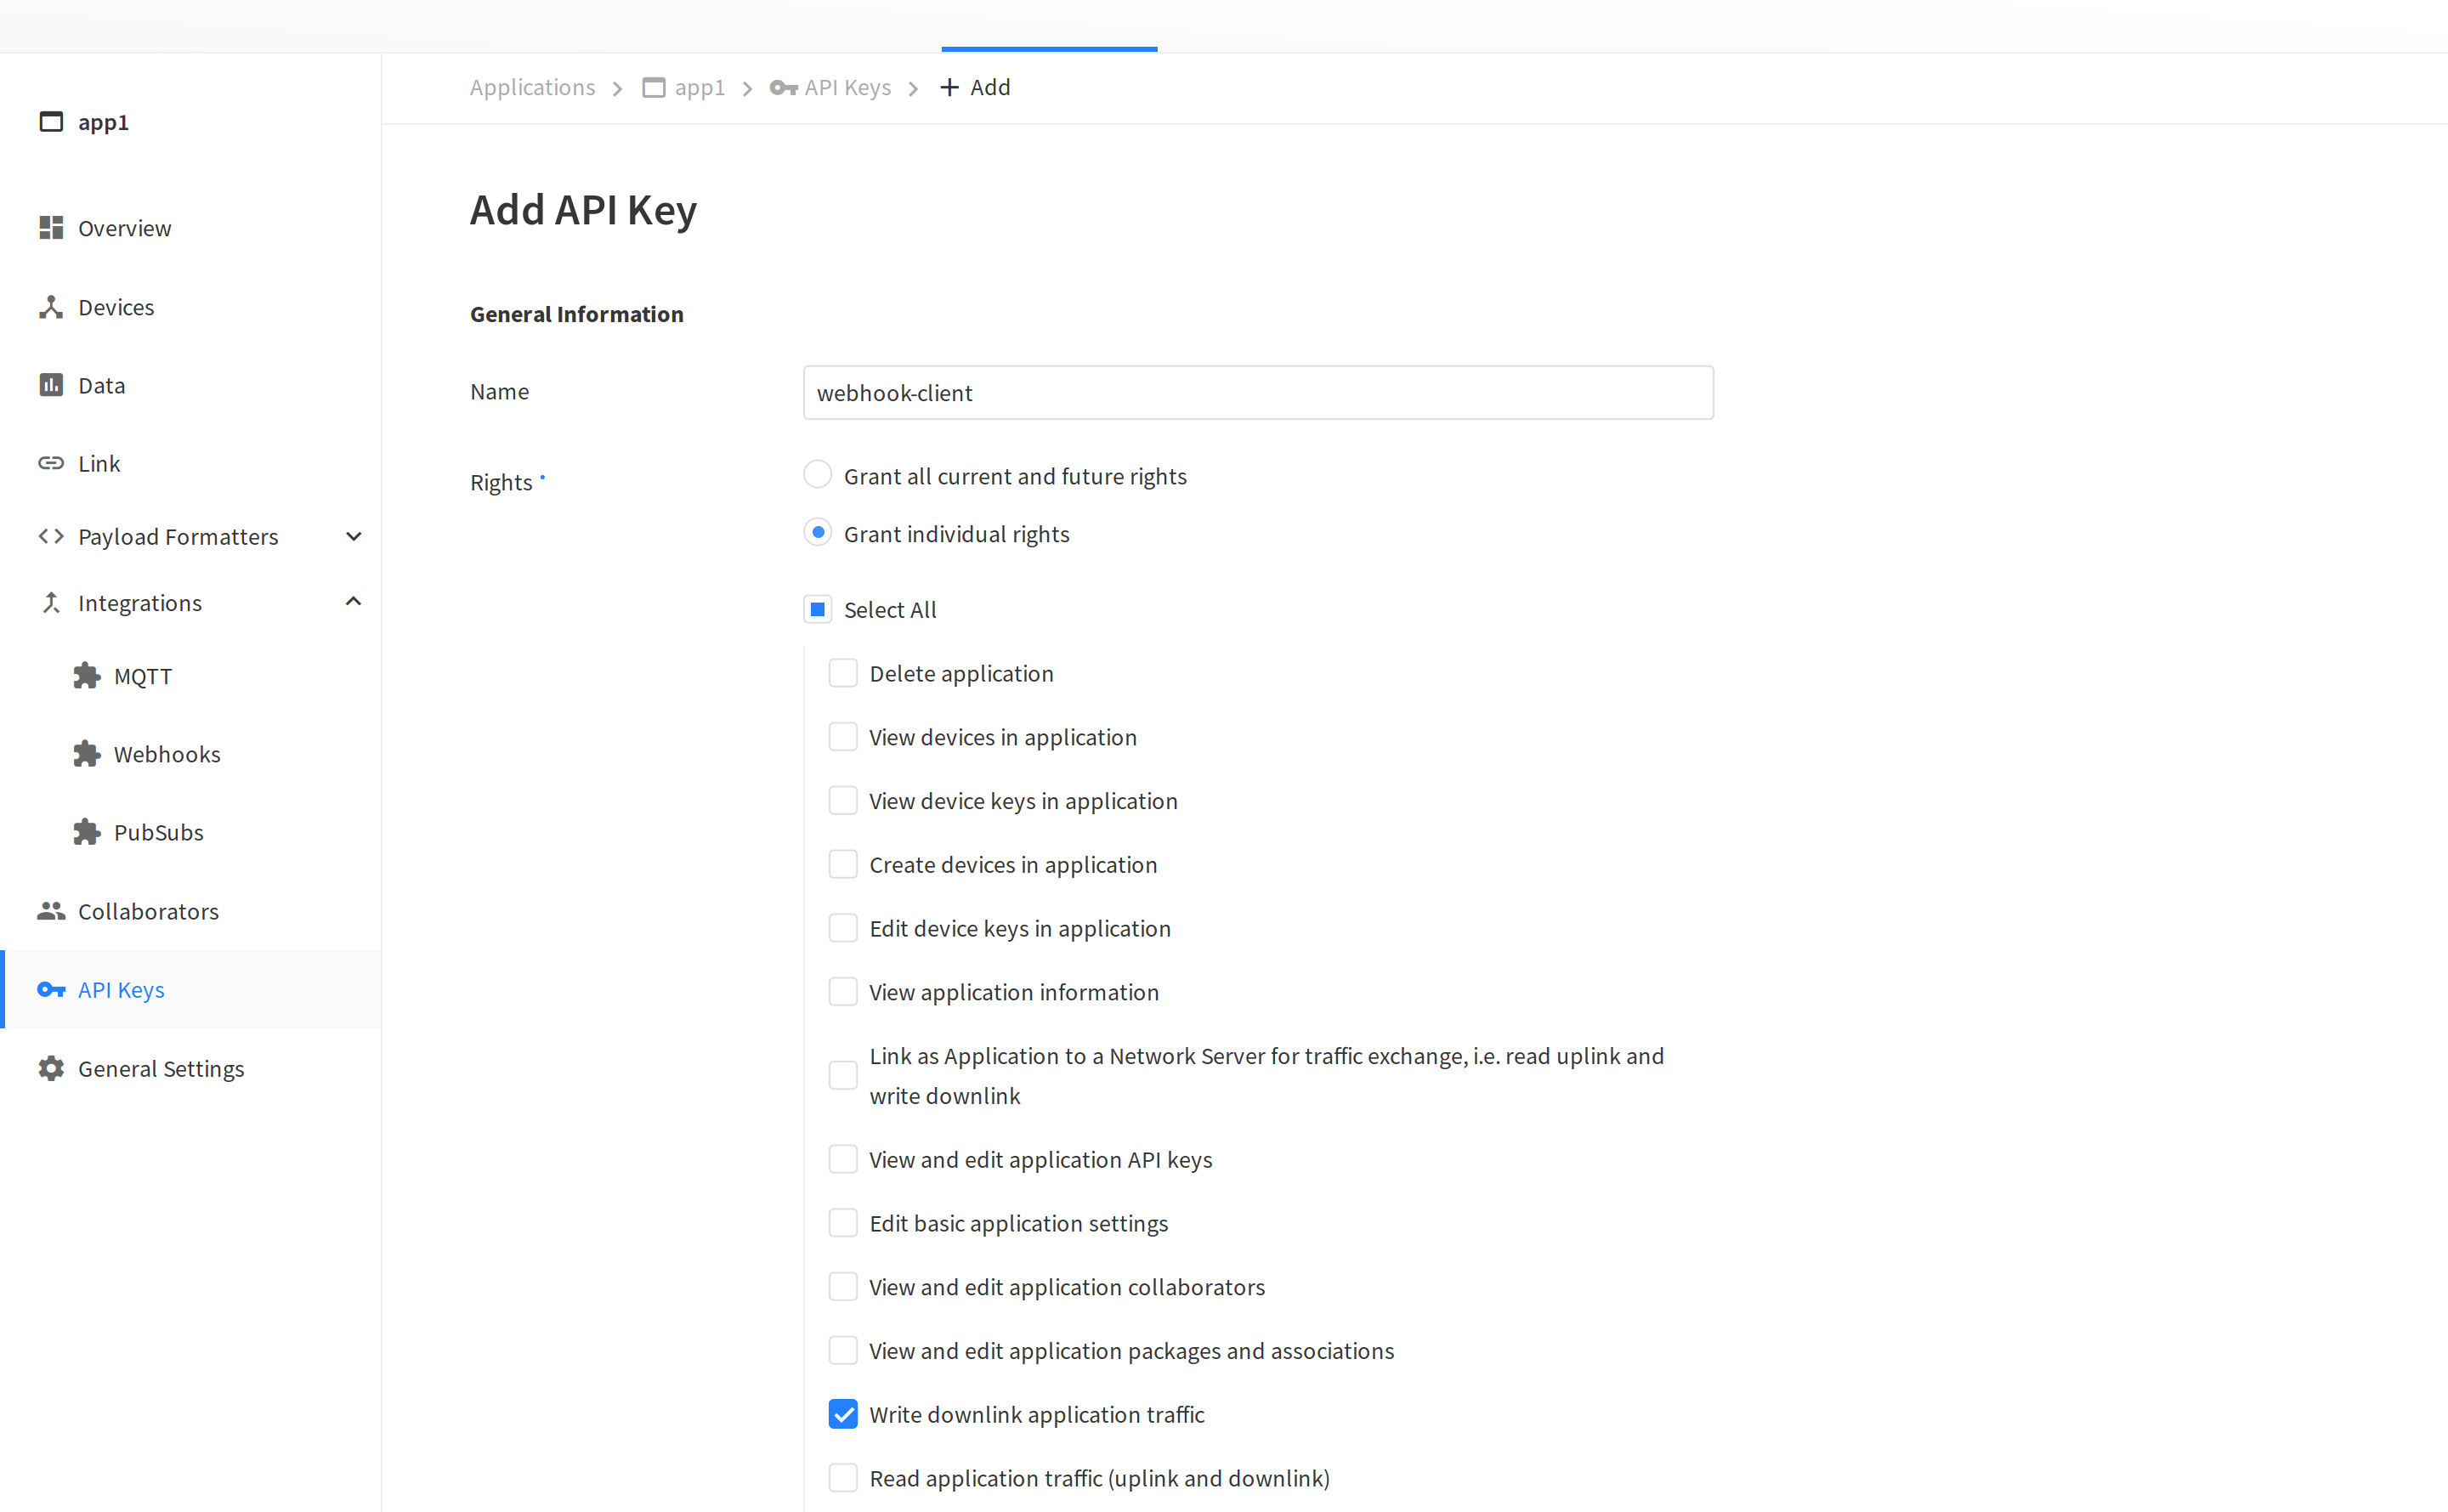
In The Things Stack Console, under your application, select API keys. Select the Add API key button.
On the Add API key page, under Rights, select Grant individual rights and then select Write downlink application traffic.
Select the Create API key button. Then copy the API key.
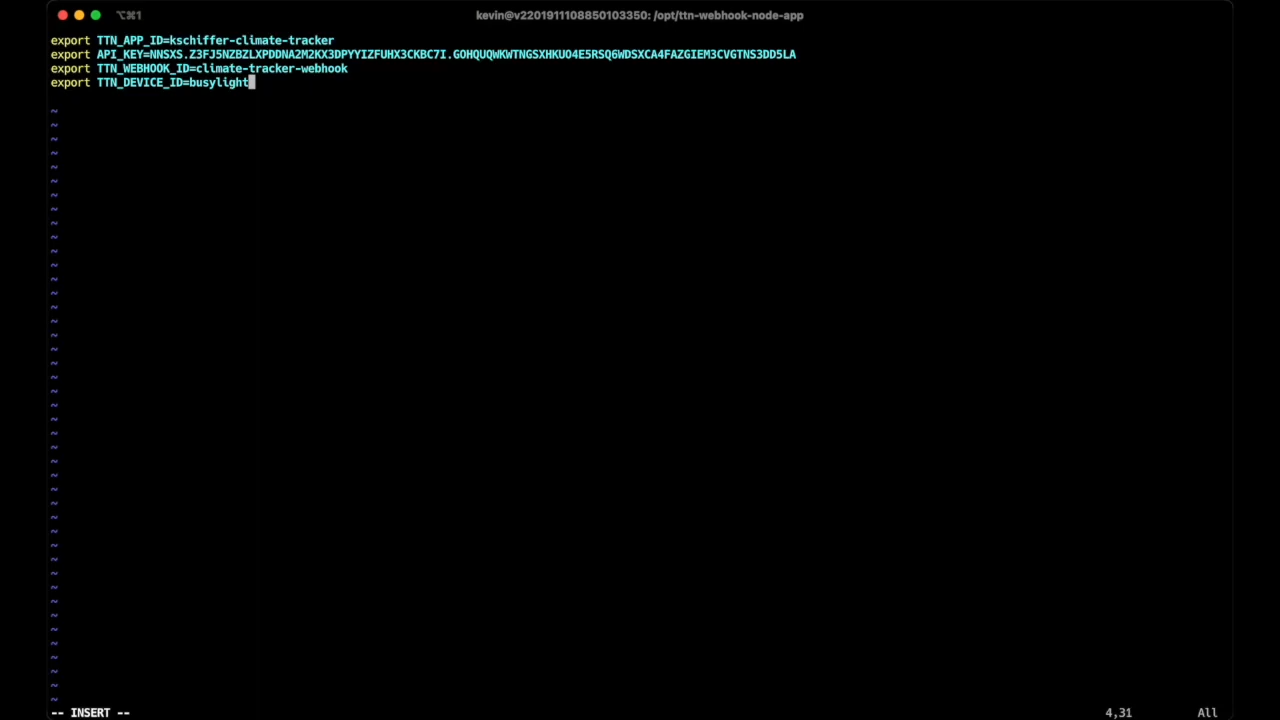
Go back to the configuration file and then paste your API key there (export API_KEY=your API key).
Copy your webhook’s ID and also paste it there (export TTN_WEBHOOK_ID=your webhook id).
Copy the Busylight’s device ID and also paste it there (export TTN_DEVICE_ID=device id).
After editing, your configuration file looks something like this:
Save the configuration file ([esc][:wq][enter]), source it (source config.env) and then start the server (node index.js).
Now press the push button on GNSE. The Busylight will turn ON. Press the push button again. The Busylight will turn OFF.
This solution can be customized to meet your specific needs and ideas, such as changing the Busylight’s color to red when the temperature exceeds a set threshold.