Skip to content
The Things Stack documentation home
Getting Started Concepts Cloud Enterprise Integrations API Hardware
Getting Started Concepts
Cloud Enterprise
Integrations API Hardware
Get The Things Stack

    Recent searches

      Popular pages

      • Getting Started
      • Adding Gateways
      • Adding Devices
      • Payload Formatters
      • Webhooks
      • Authentication

      No results for “”.

      • Check the spelling, or try fewer or more general words.
      • Ask the community on The Things Network Forum
      • Contact support
      ↑↓ to navigate ↵ to open Esc to close

      Integrations

      • Overview
      • Adding Applications
      • Data Formats
      • Payload Formatters
      • Webhooks
      • Storage Integration
      • Integrate with popular IoT platforms
      • Other integrations
        • MQTT Server
        • Pub/Sub
        • Node-RED
        • IFTTT
          • IFTTT Setup
          • Node-RED Setup for Integration with IFTTT
          • Creating Webhook Integration with IFTTT via Node-RED
      • Application Packages
      • Examples

      Node-RED Setup for Integration with IFTTT

      Updated 20 January 2025 Edit on GitHub
      Copy page
      • View as MarkdownThis page as plain text
      • Open in ChatGPTAsk questions about this page
      • Open in ClaudeAsk questions about this page

      This section shows how to create a flow that will act like a mediator between The Things Stack and IFTTT. This flow will receive JSON messages from The Things Stack via the Webhooks integration, extract the decoded payload and send it as a payload of a separate HTTP POST request to IFTTT.

      Run Node-RED and open a new flow by clicking the + button in the upper right.

      Place the http in node on the dashboard and double-click on it to configure it.

      Select POST as a Method.

      In the URL field enter the arbitrary path name, e.g. join if you are enabling the integration for the Join accept messages. Keep in mind that this path name also needs to be used when creating a Webhook on The Things Stack.

      Click Done to finish.
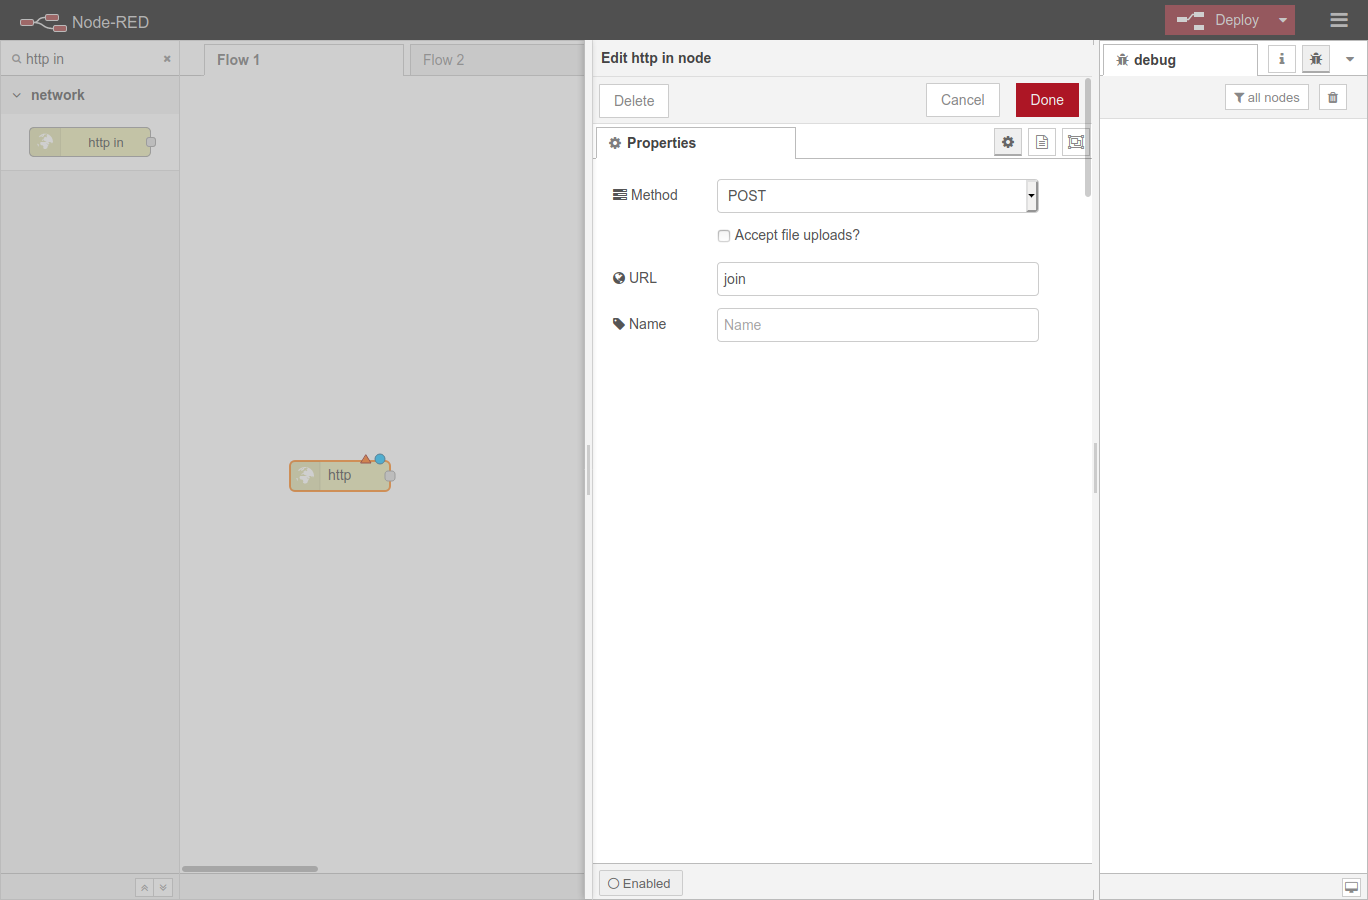
      Configuring HTTP input node

      Next, add a function node to the dashboard. This node is used to define the structure of the HTTP POST request to be sent to IFTTT.

      In the Function field of its configuration, paste the following code, adjust it according to your setup and select Done:

      msg.url = "..." # Paste the URL copied from IFTTT in the previous step
      msg.method = "POST";
      msg.payload = {
          # Adjust according to your payload or leave empty
          'value1' : msg.payload.uplink_message.decoded_payload["temperature"],
          'value2' : msg.payload.uplink_message.decoded_payload["humidity"]
      }
      return msg;
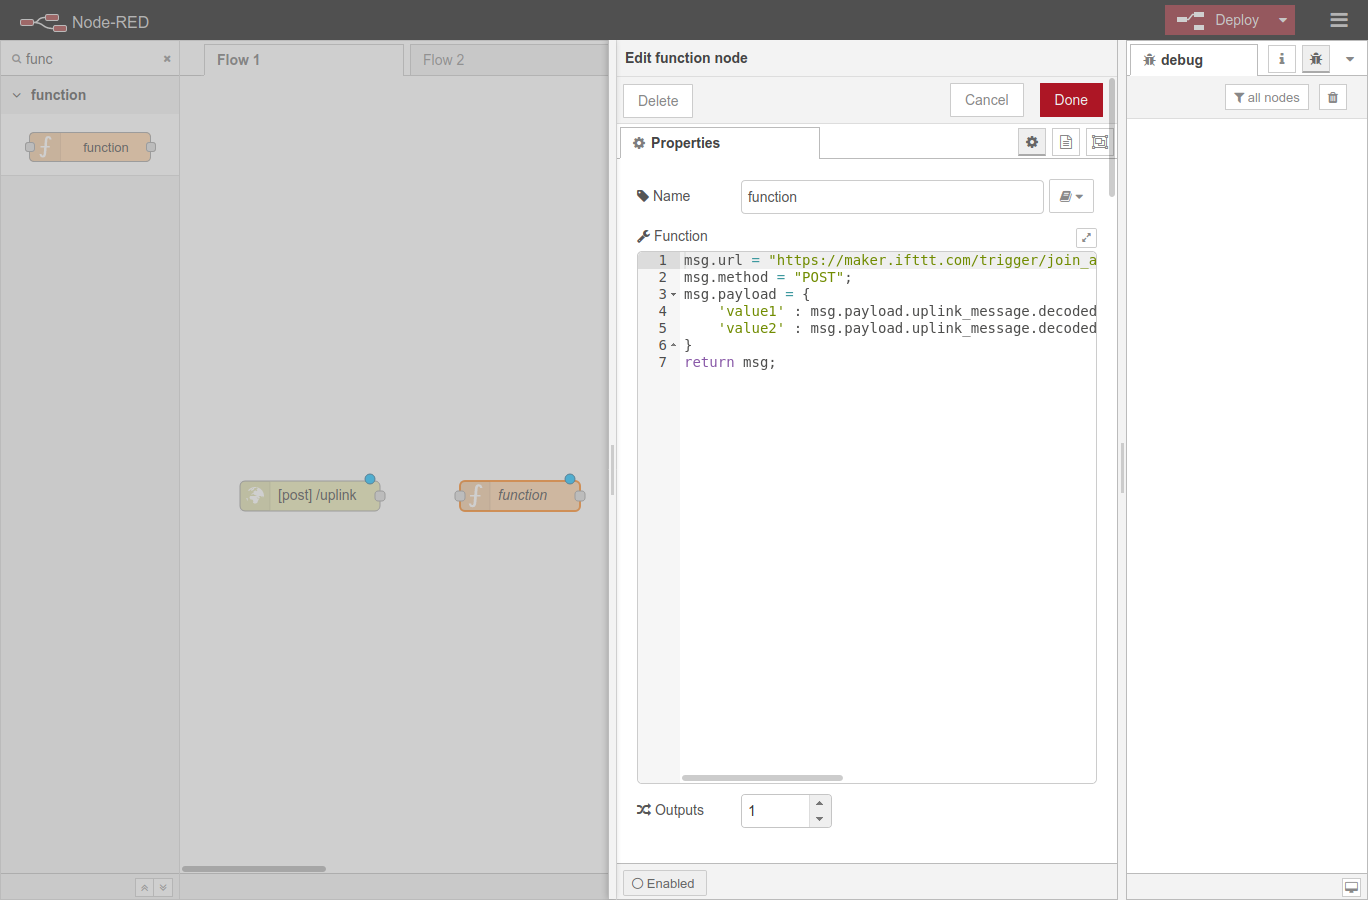
      
      Configuring function node

      Place the http request node on the dashboard.

      In its configuration, choose set by msg.method for a Method and select Done.
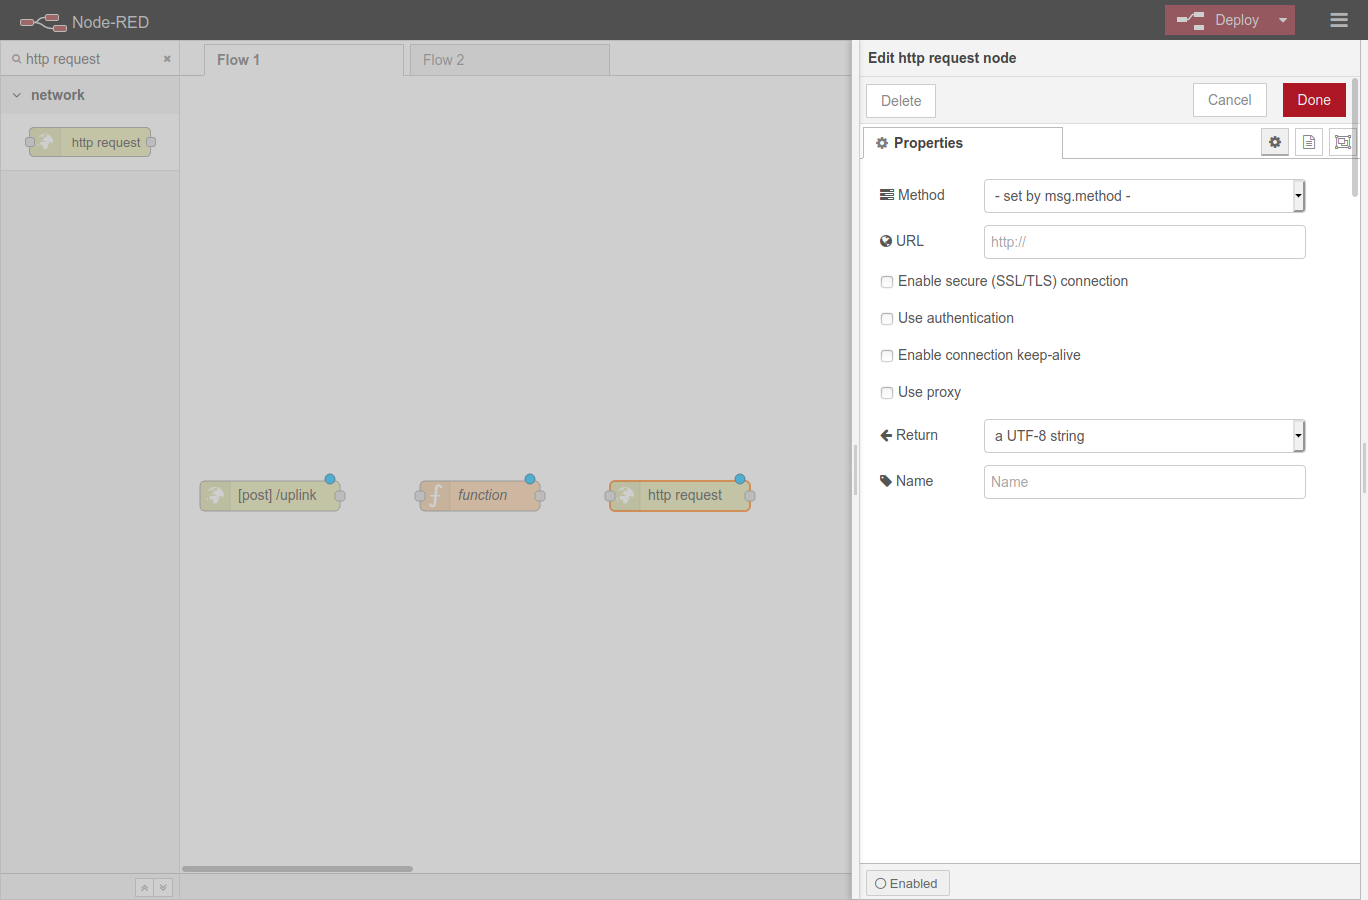
      Configuring HTTP request node

      To avoid timeouts of the HTTP requests originating from The Things Stack, the http in node needs to be connected to an http response node.

      Add the http response node to the dashboard and configure it to reply to these requests with 200 OK.
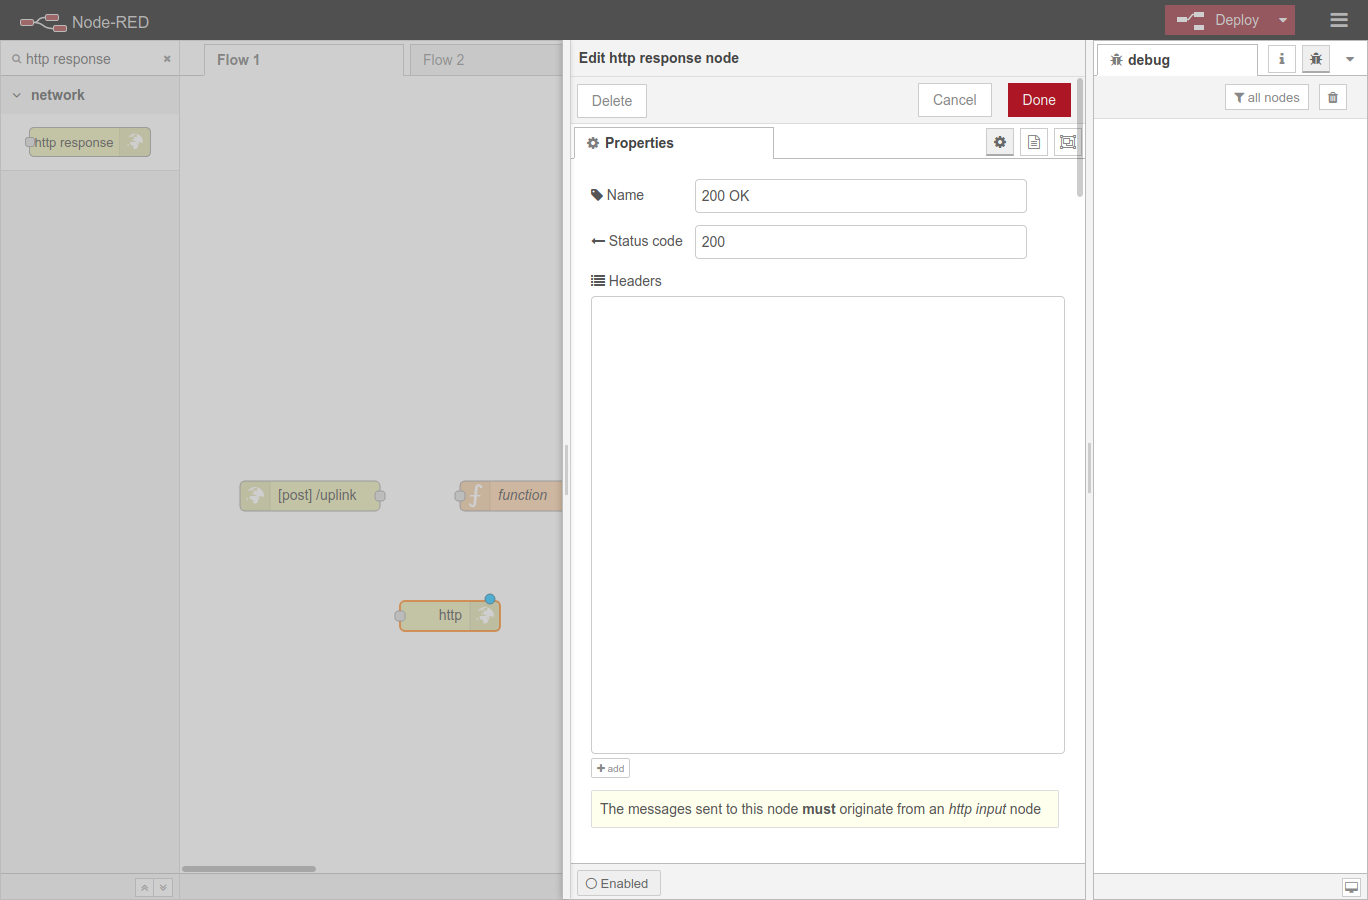
      Configuring HTTP response node

      Finally, add the debug node to the dashboard, configure it to display a complete msg object as an Output and finish by selecting Done.

      Connect these nodes as shown on the picture below and click the Deploy button in the upper right corner. Use the debug window below this button to monitor the results.
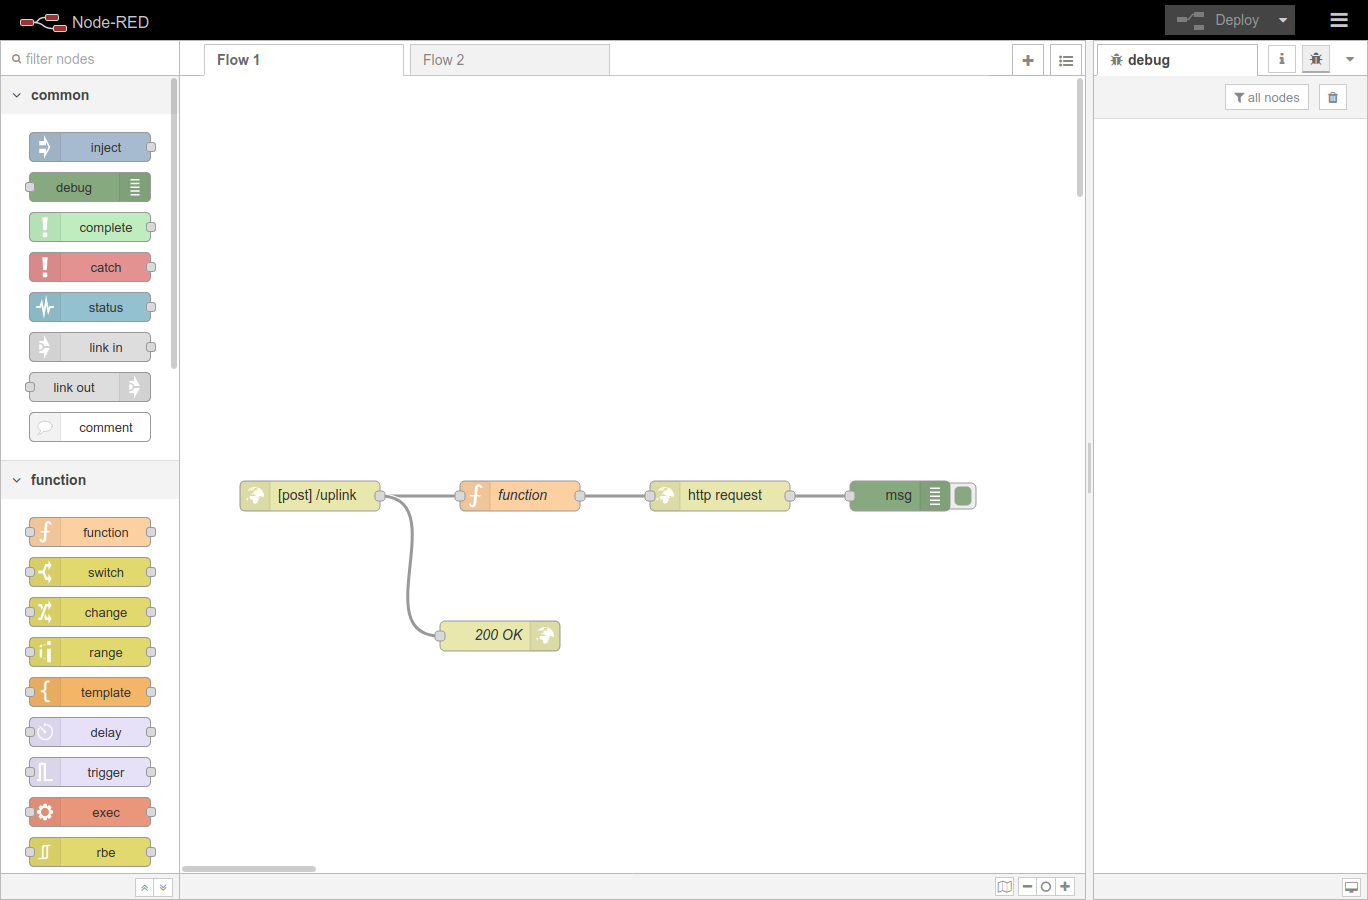
      Node-RED setup
      ← IFTTT Setup Creating Webhook Integration with IFTTT via Node-RED →

      Sections

      Getting Started

      Concepts

      Cloud

      Enterprise

      Integrations

      API

      Hardware

      Sitemap

      View our Sitemap

      Contributing

      GitHub

      About Us

      The Things Industries

      Privacy Policy

      Cookie settings

      Cookie Settings

      We use cookies to enhance your experience, analyze site traffic and deliver personalized content. Read our Privacy Policy.

      Cookie categories