MQTTBox is a cross platform application that makes it simple to create MQTT clients, virtual device networks, and load test MQTT devices and brokers.
In this guide, we show how to create an MQTT client for subscribing or publishing to topics used by The Things Stack MQTT Server.
The examples in this guide are suitable for The Things Stack Open Source deployment. If you are using a different The Things Stack deployment, make sure your read a Note on Using the tenant ID.
Prerequisites
- MQTTBox app installed on your system.
Configuring MQTTBox
This section follows the examples in the MQTT Server guide.
In the MQTTBox application, click the Create MQTT Client button on the left to add a new MQTT client.
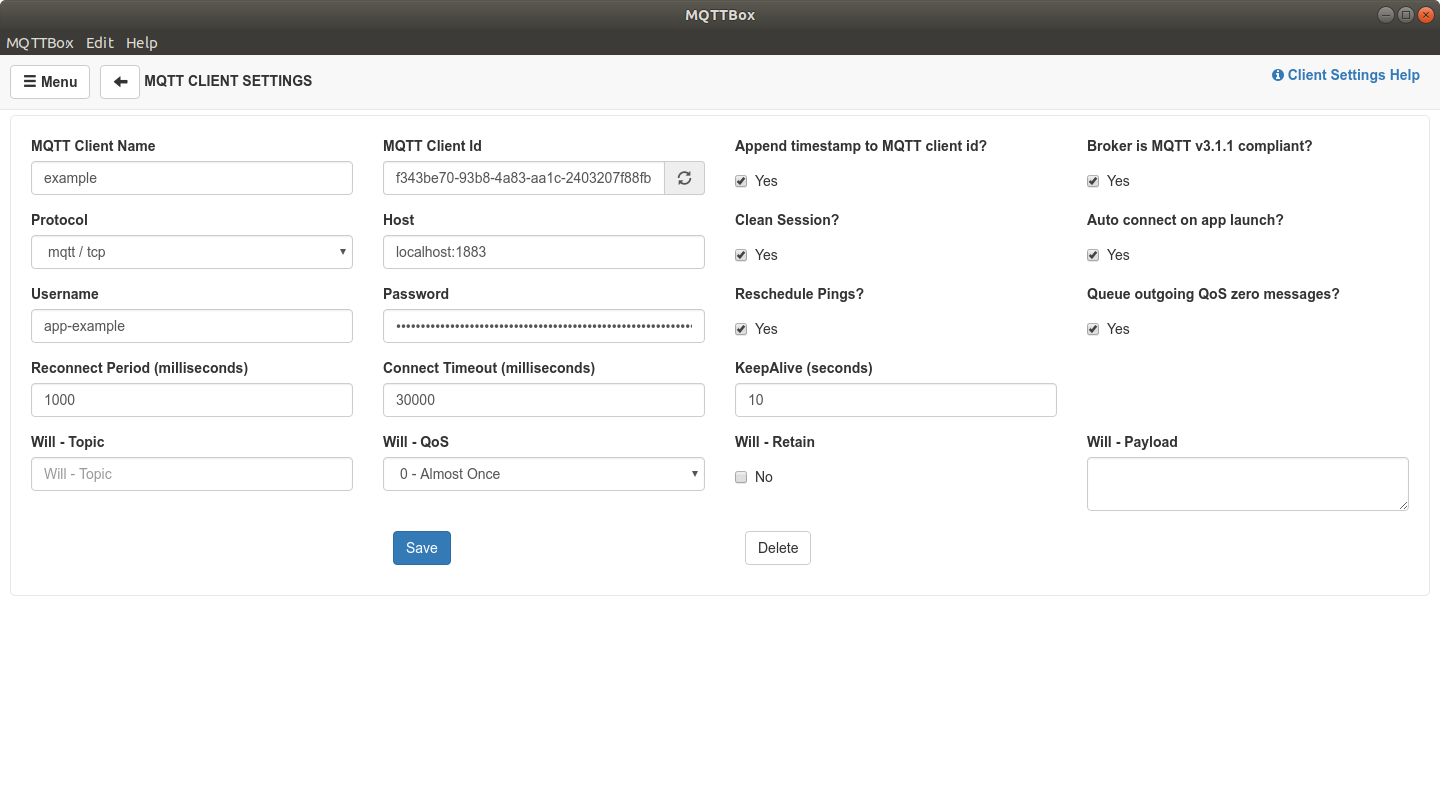
Give a name to your MQTT client by filling in the MQTT Client Name field.
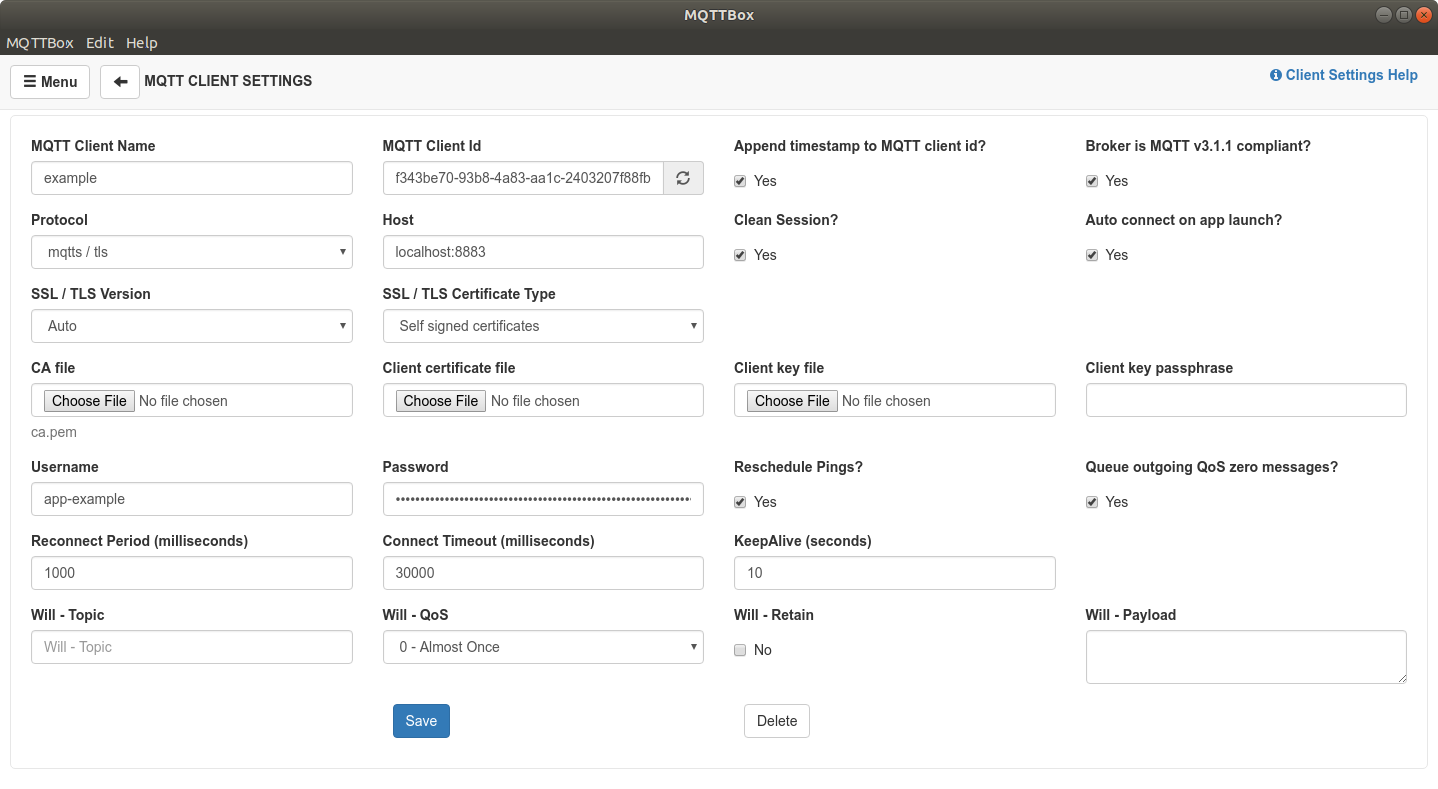
Choose mqtt / tcp from the Protocol drop down list, and enter the Public address of your The Things Stack instance in the Host field.
Fill in the Username and Password fields.
Keep in mind that password represents the value of the authentication API key. For more info, see Creating an API Key.

If you want to enable TLS for security, choose mqtt / tls as Protocol and use the Public TLS address of The Things Stack MQTT Server for Host instead. You will also have to upload at least the CA file associated with your The Things Stack deployment.

You may leave the other fields empty. Click Save to save the configuration.
If the MQTTBox client successfully connects to The Things Stack MQTT Server, the Connected status button will be visible in the upper right. You can also use this button do disconnect.
Once connected, you can proceed with configuring the publishers or subscribers.
You can add multiple MQTT clients, as well as multiple publishers and subscribers within those clients.
Subscribe to Upstream Traffic
To listen to messages being sent by your device and published by the The Things Stack MQTT Server, select Add subscriber and fill in the Topic to subscribe field with the name of topic you wish to subscribe to.
In this section, we use the v3/{application id}/devices/{device id}/up topic structure for listening to uplink messages.
See Subscribing to Upstream Traffic section of the MQTT Server guide for a list of available topics you can subscribe to.
Choose an appropriate QoS value from the list, click the Subscribe button and messages from The Things Stack will begin arriving shortly.

Schedule Downlink Messages
To send messages to your end device, you need to schedule a downlink message as described in the Publishing Downlink Traffic section of the MQTT Server guide. You can achieve this by adding and configuring a publisher in the MQTTBox application.
Fill in the Topic to publish field with v3/{application id}/devices/{device id}/down/push and replace the variables with their values from the The Things Stack Console.
See the Publishing Downlink Traffic section to learn about using /replace instead of /push.
Choose an appropriate QoS value from the drop down menu.
You can define the payload in multiple formats. In this guide, we use the Strings / JSON / XML / Characters for Payload Type.
To send an example downlink, paste the following content in the Payload field:
{
  "downlinks": [
    {
      "f_port": 15,
      "frm_payload": "vu8=",
      "priority": "NORMAL"
    }
  ]
}
Note:
For scheduling downlink messages, thef_port values from 1 to 233 are allowed.
Click the Publish button and a message with the hexadecimal payload BE EF will be scheduled for sending to your end device.
